Things I Am Keeping From Virtual/Hybrid Learning

Oh, 2020-2021 school year. I do not miss you, but I did learn a lot last year and one of my goals for the upcoming school year is to use what I learned going forward. As of this writing, I’m not 100% sure what the 2021-2022 school year will look like (even though school starts is 2 weeks lol), but I’m doubting that virtual and hybrid learning is going to be on the table for us. However, there are still some things I want to pull from last year that I think will make my in-person teaching better.

  1. Daily Slides – I got this idea from Megan at Too Cool for Middle School. She uses this with her middle schoolers, but I think it also worked great for a year when clear communication was so important. Basically, daily slides are just a Google slide you make for each day your class meets that includes what you are doing for that day and what their homework is. That’s it. You just update this every day and put it somewhere your students will see it. If this had been a normal year, you might put this up on the board at the beginning of every class, but for me, I just embedded the slide presentation into our LMS so it was the first thing students saw when they opened up the page for our class. It’s super easy and it’s just another way to communicate with your students about what is upcoming and when due dates are. My students said they appreciated this when I had a student who was struggling to complete homework, I was able to send her parents this slide deck so that they were informed about due dates. Even though virtual/hybrid learning is likely over for my school this year, this is something I’ll probably keep doing on my LMS pages for my classes just so that students feel like they are in the loop about what is going on each day.
Daily slide for Anatomy

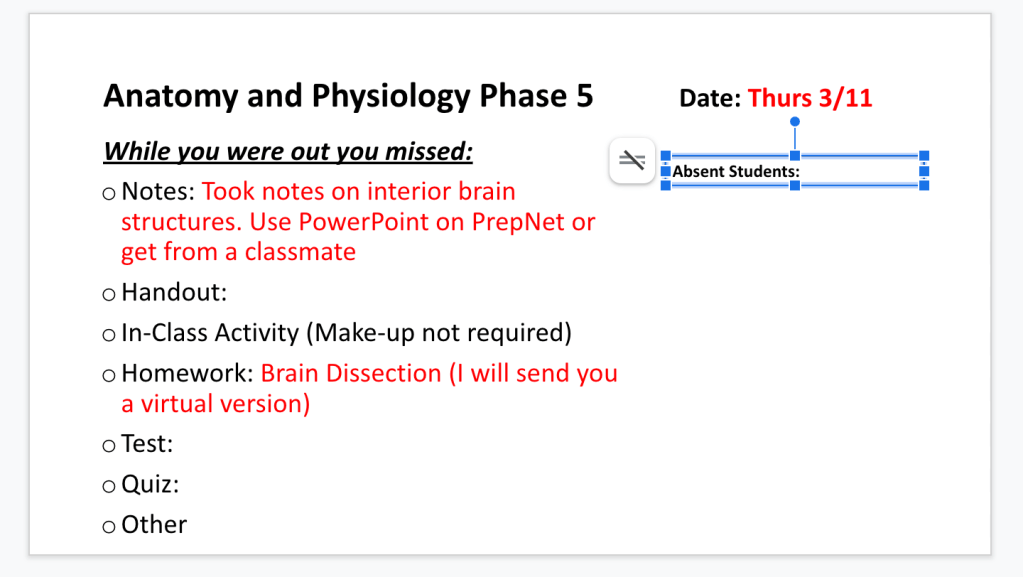
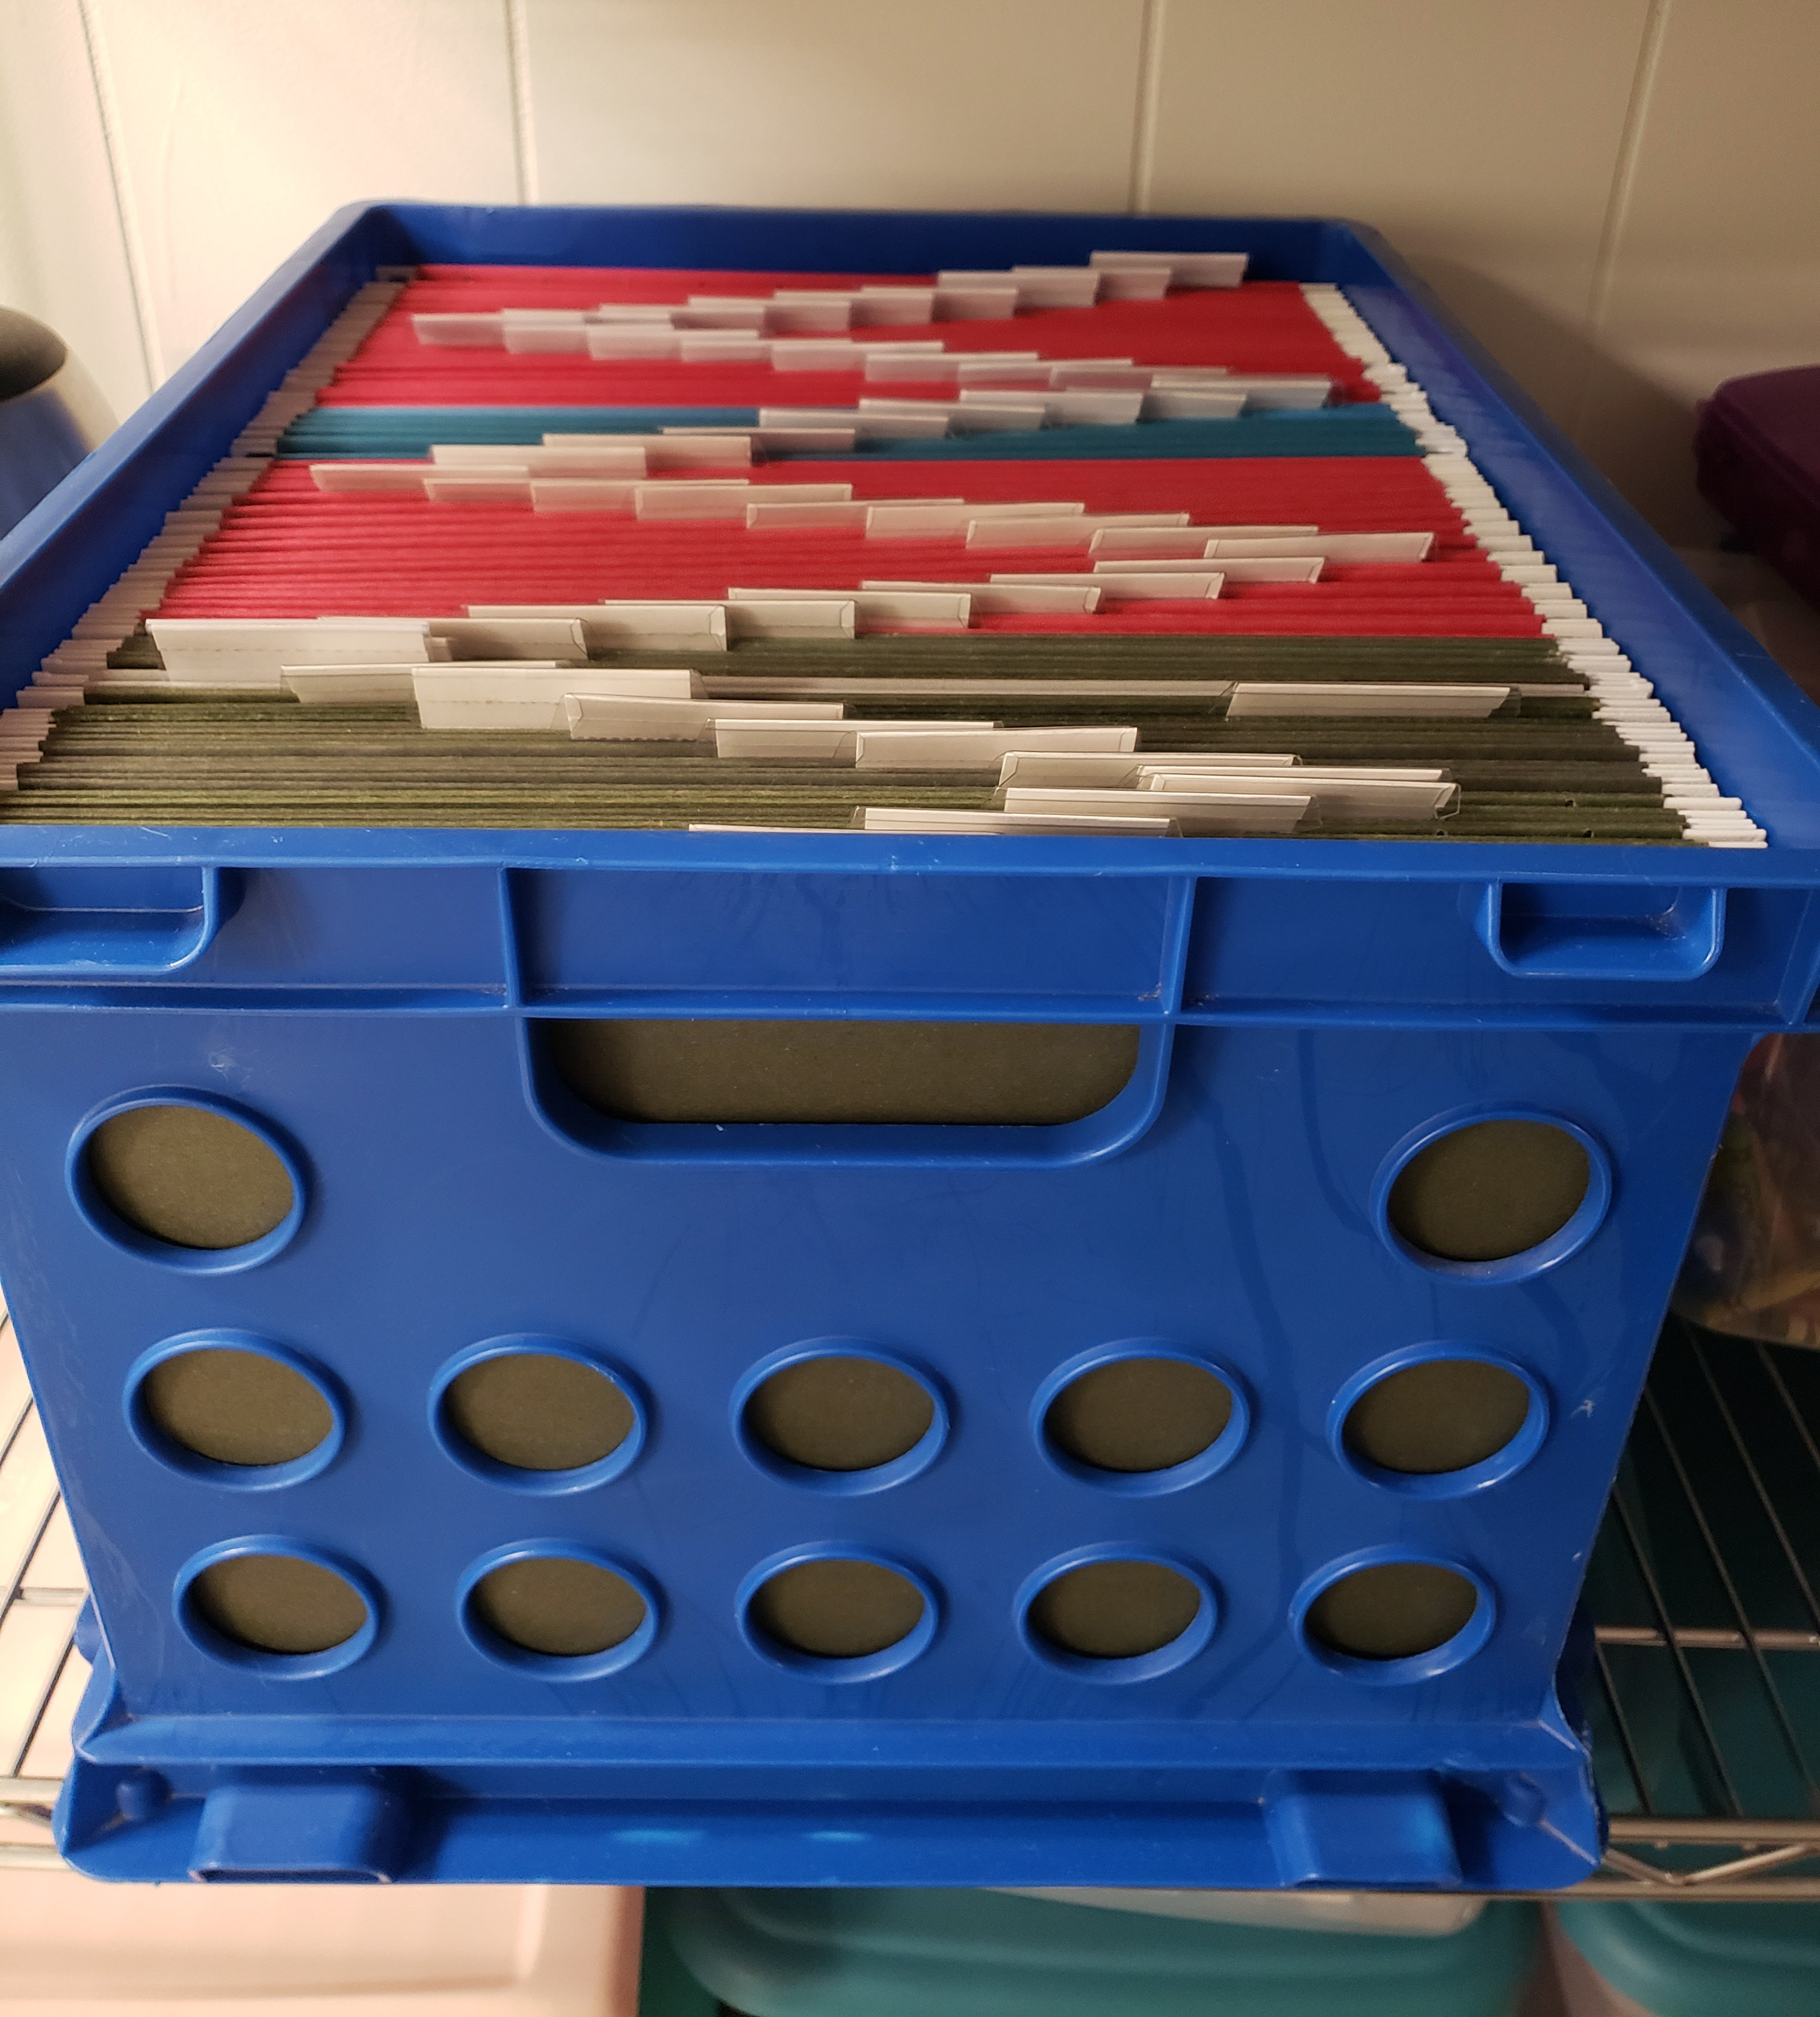
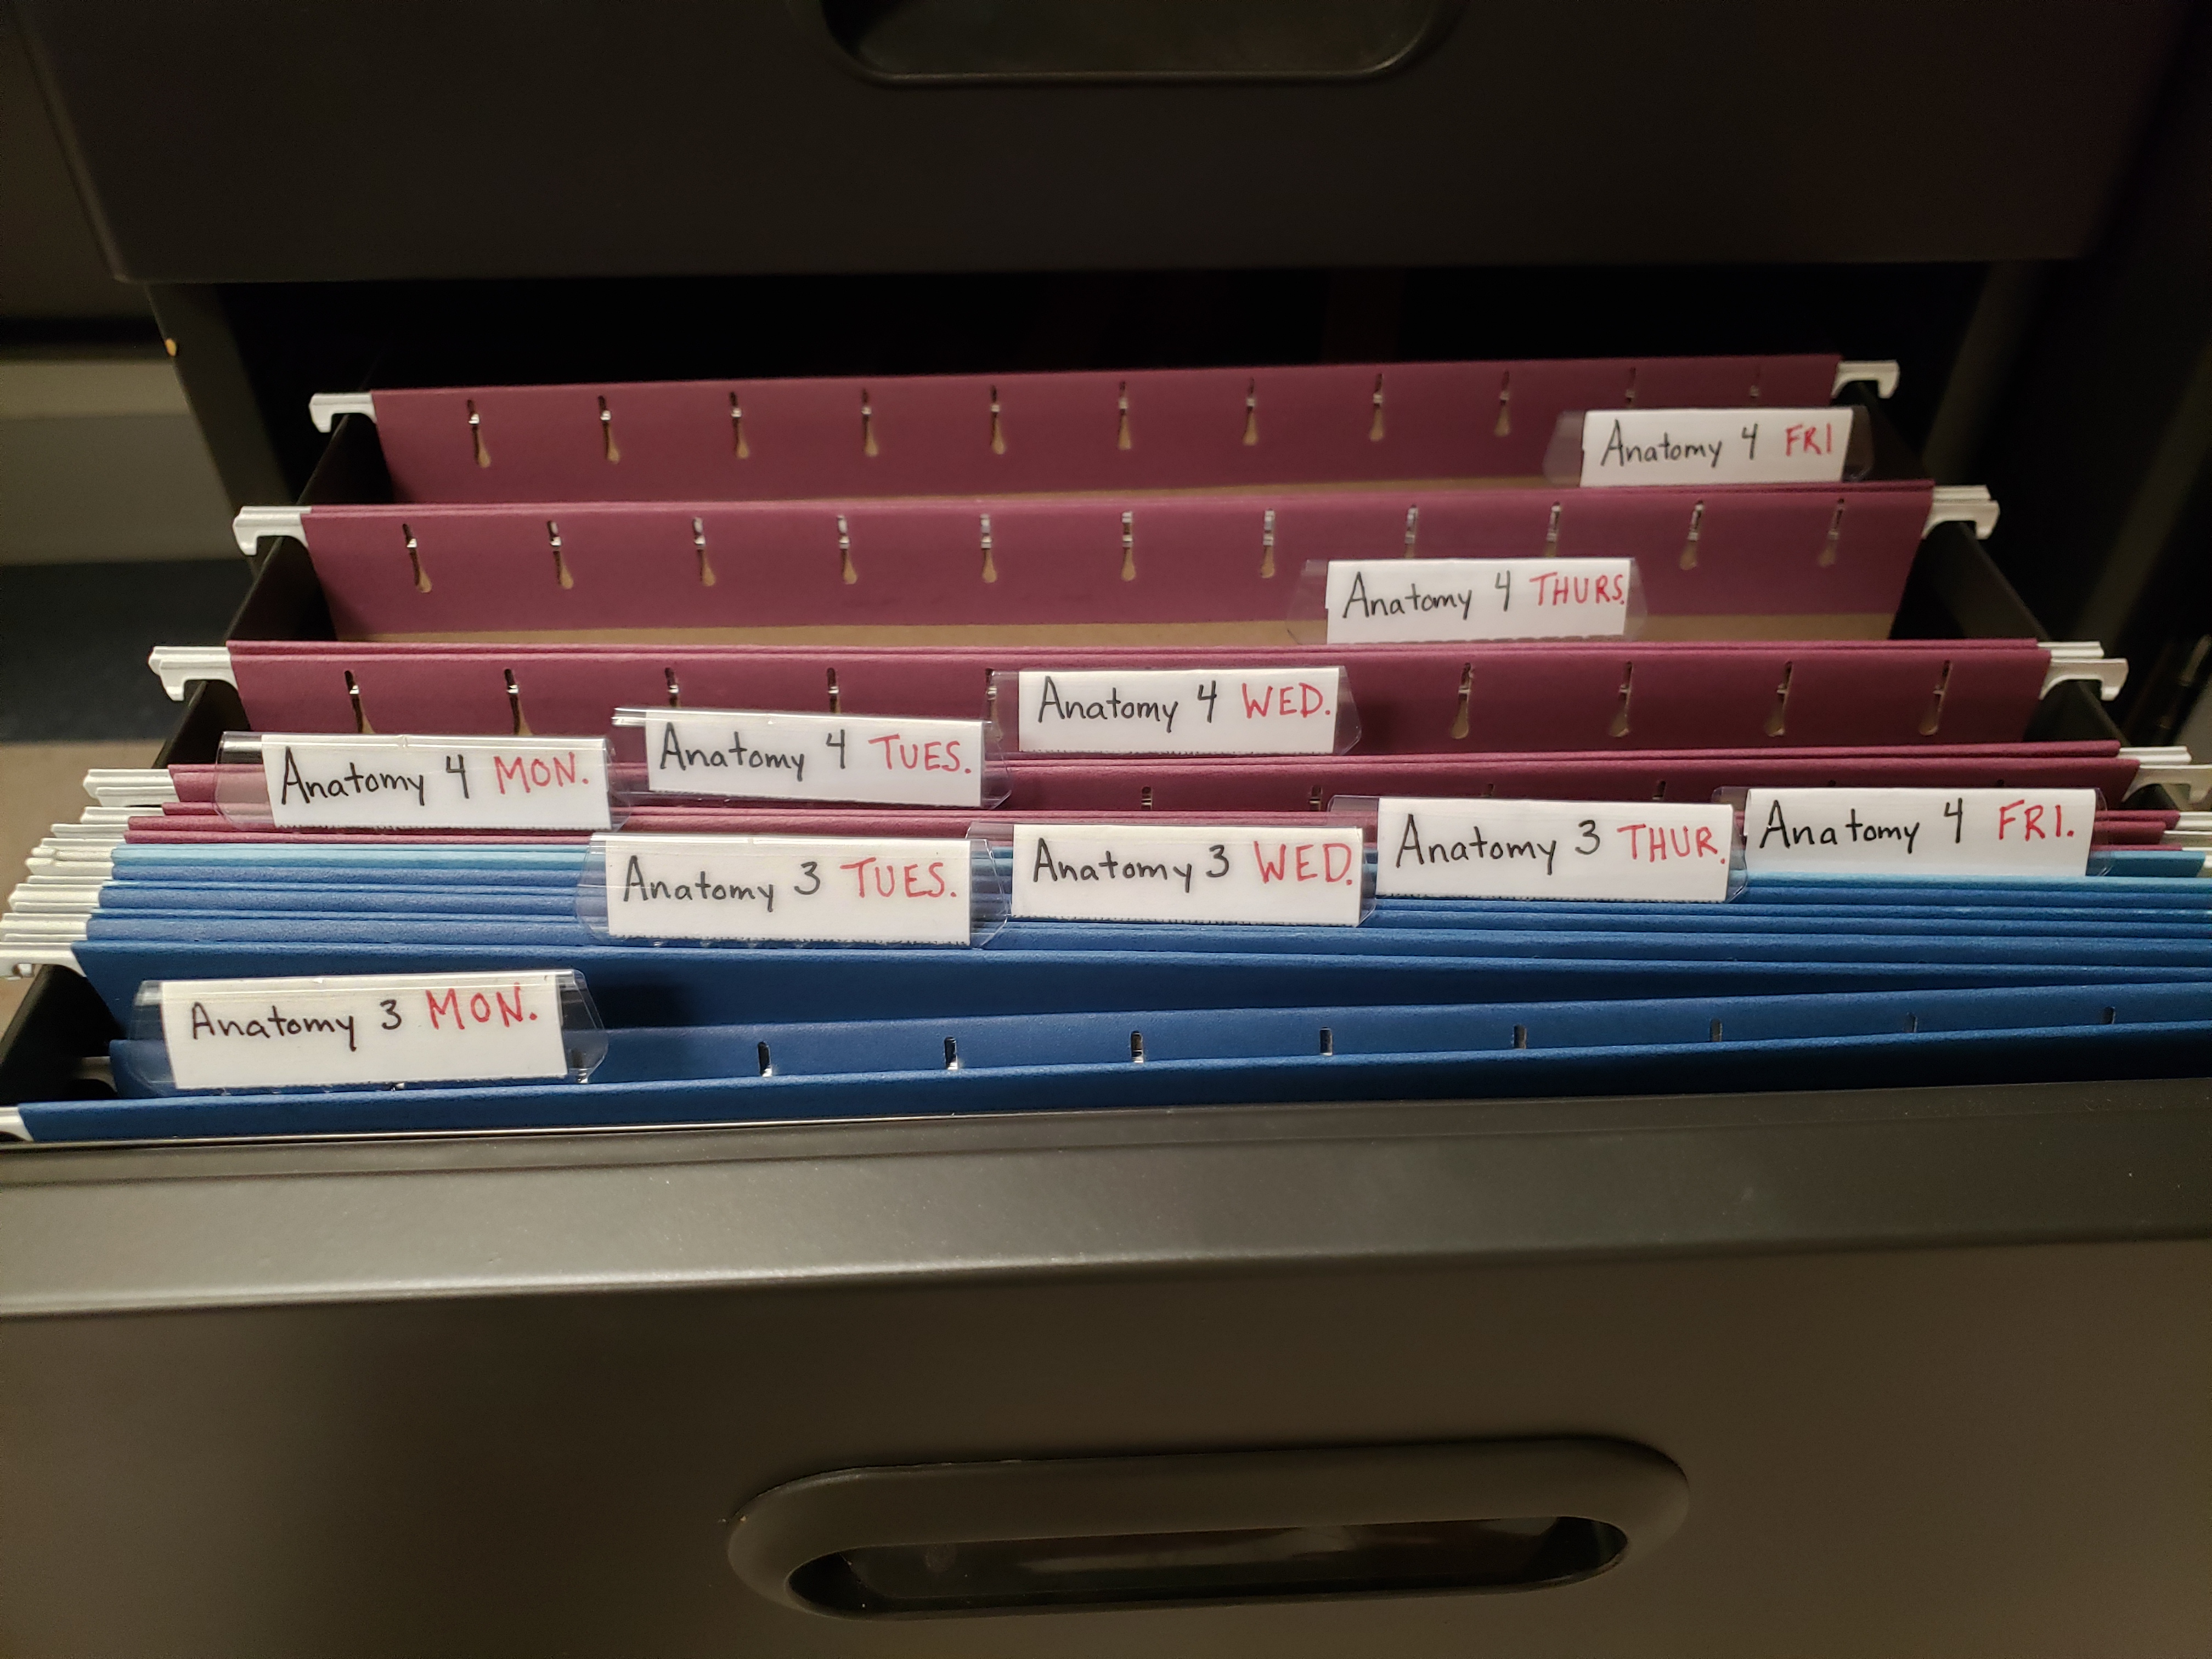
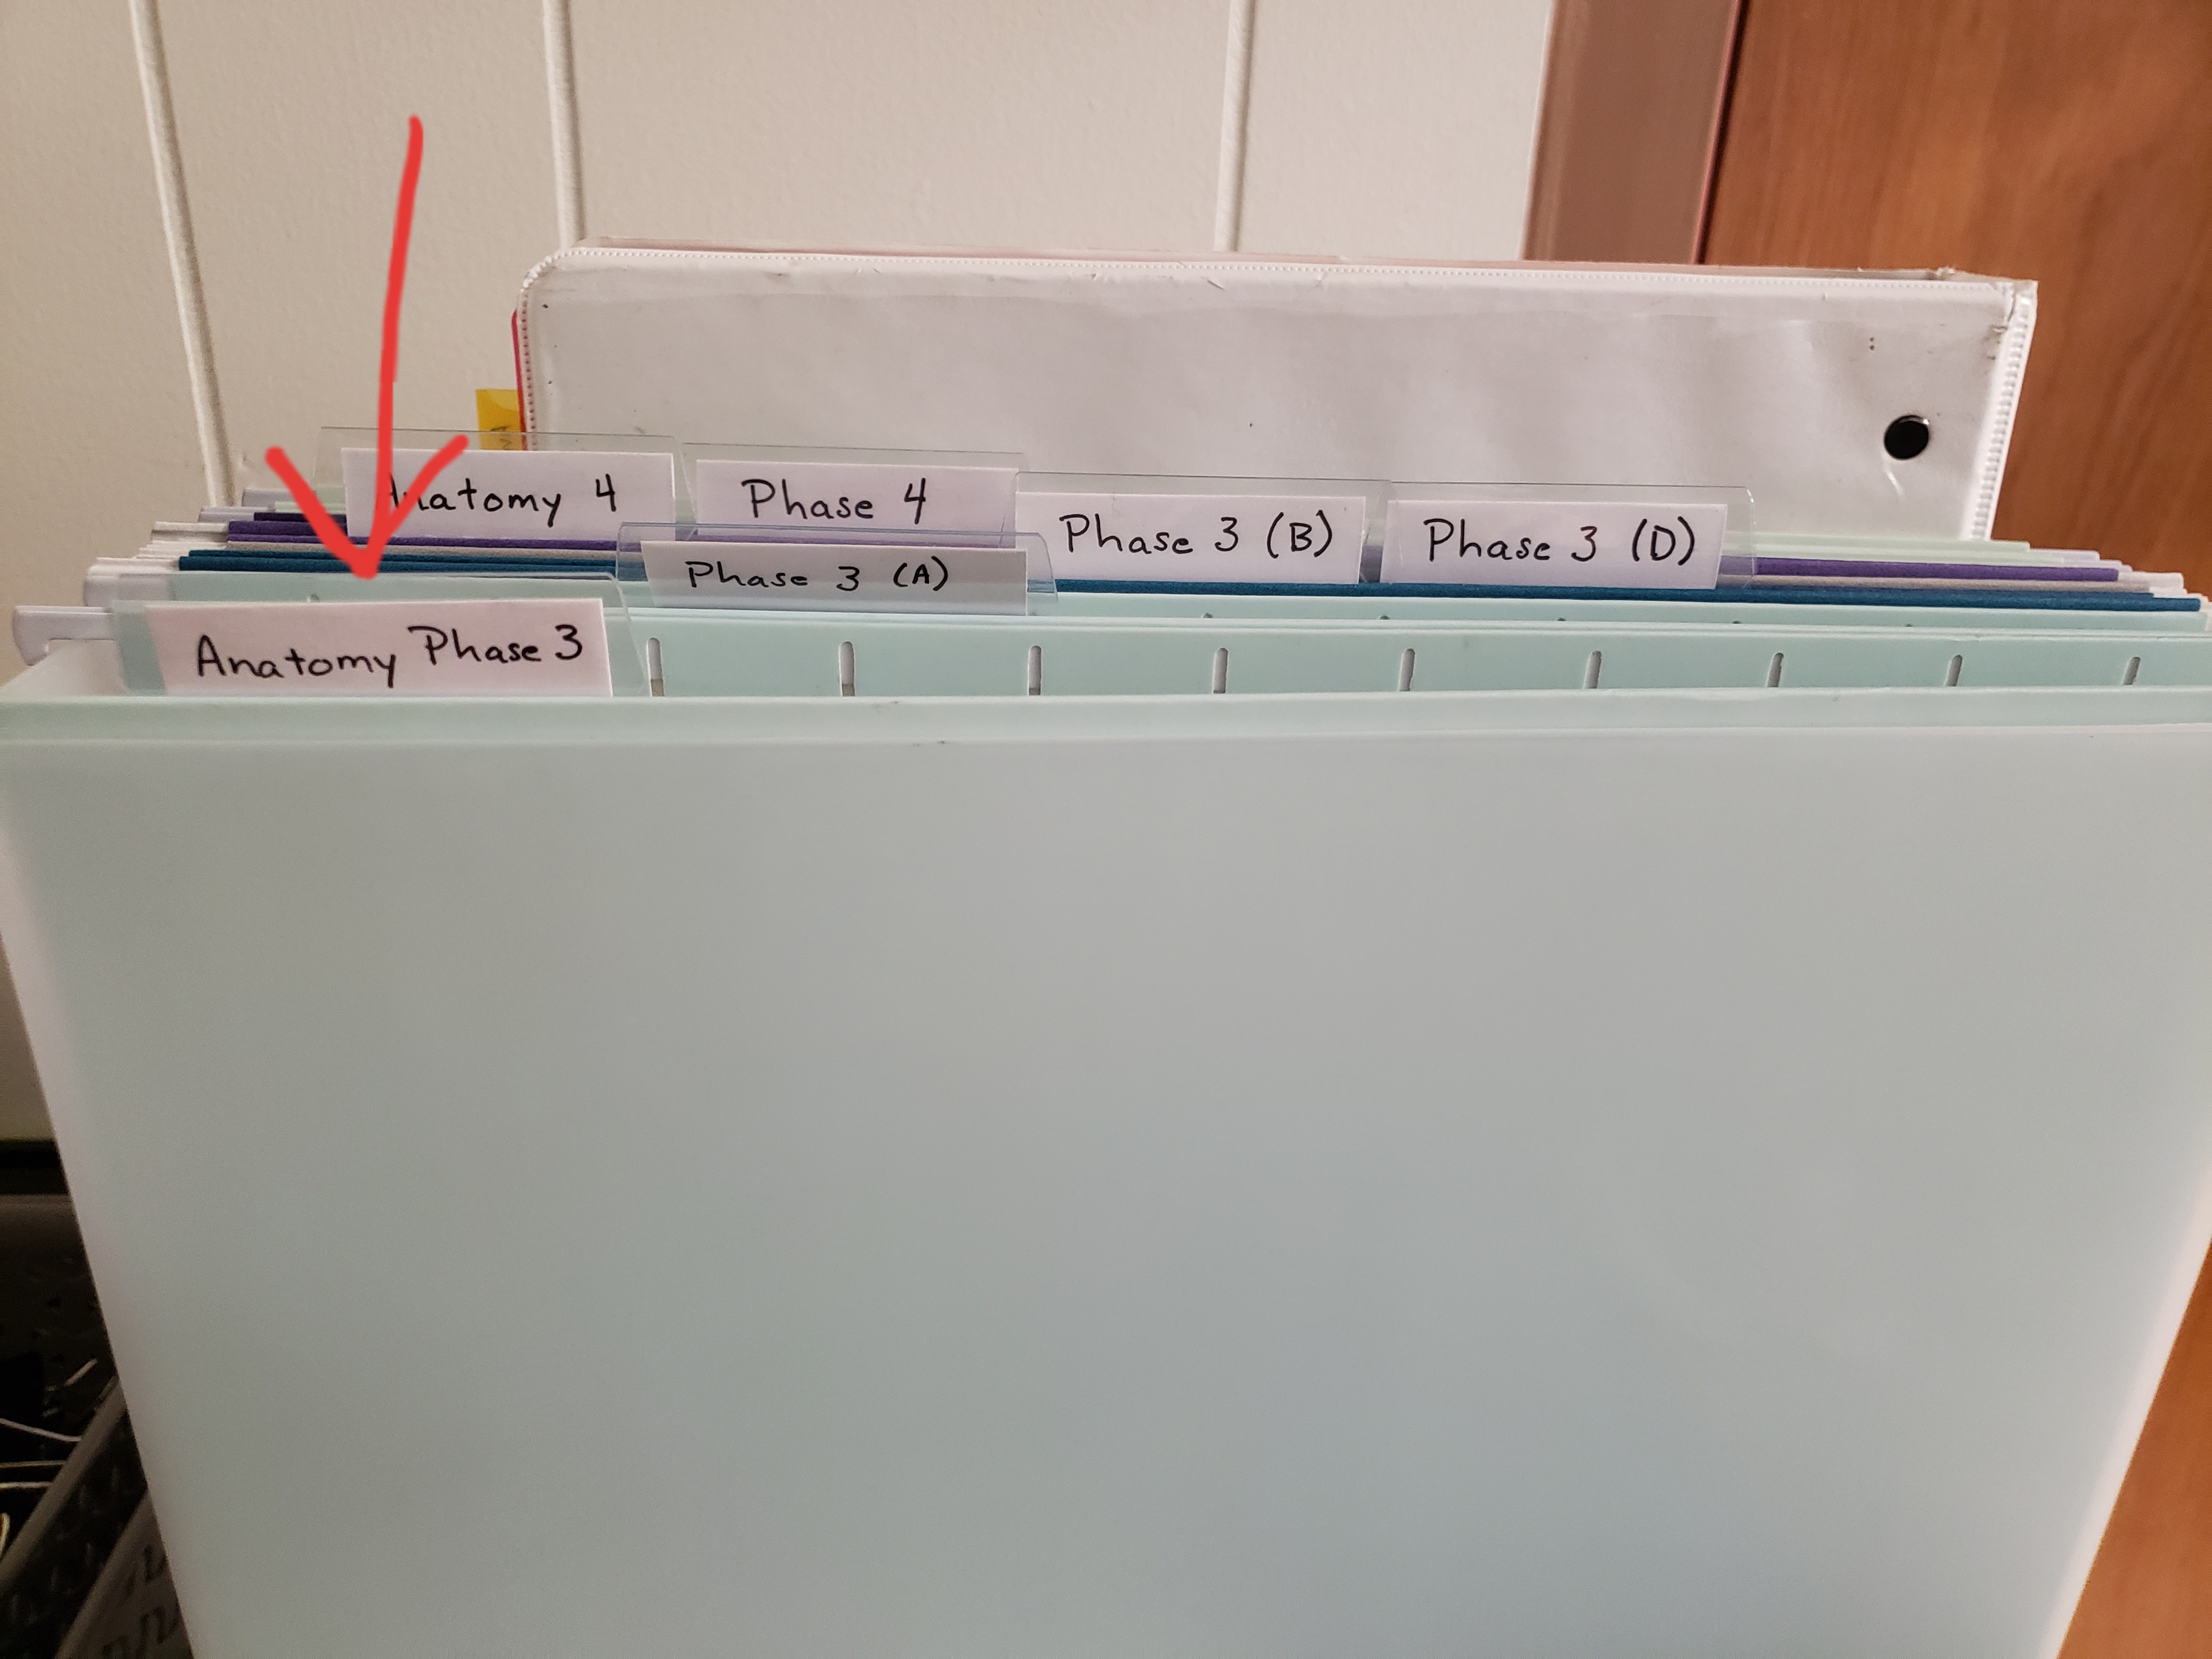
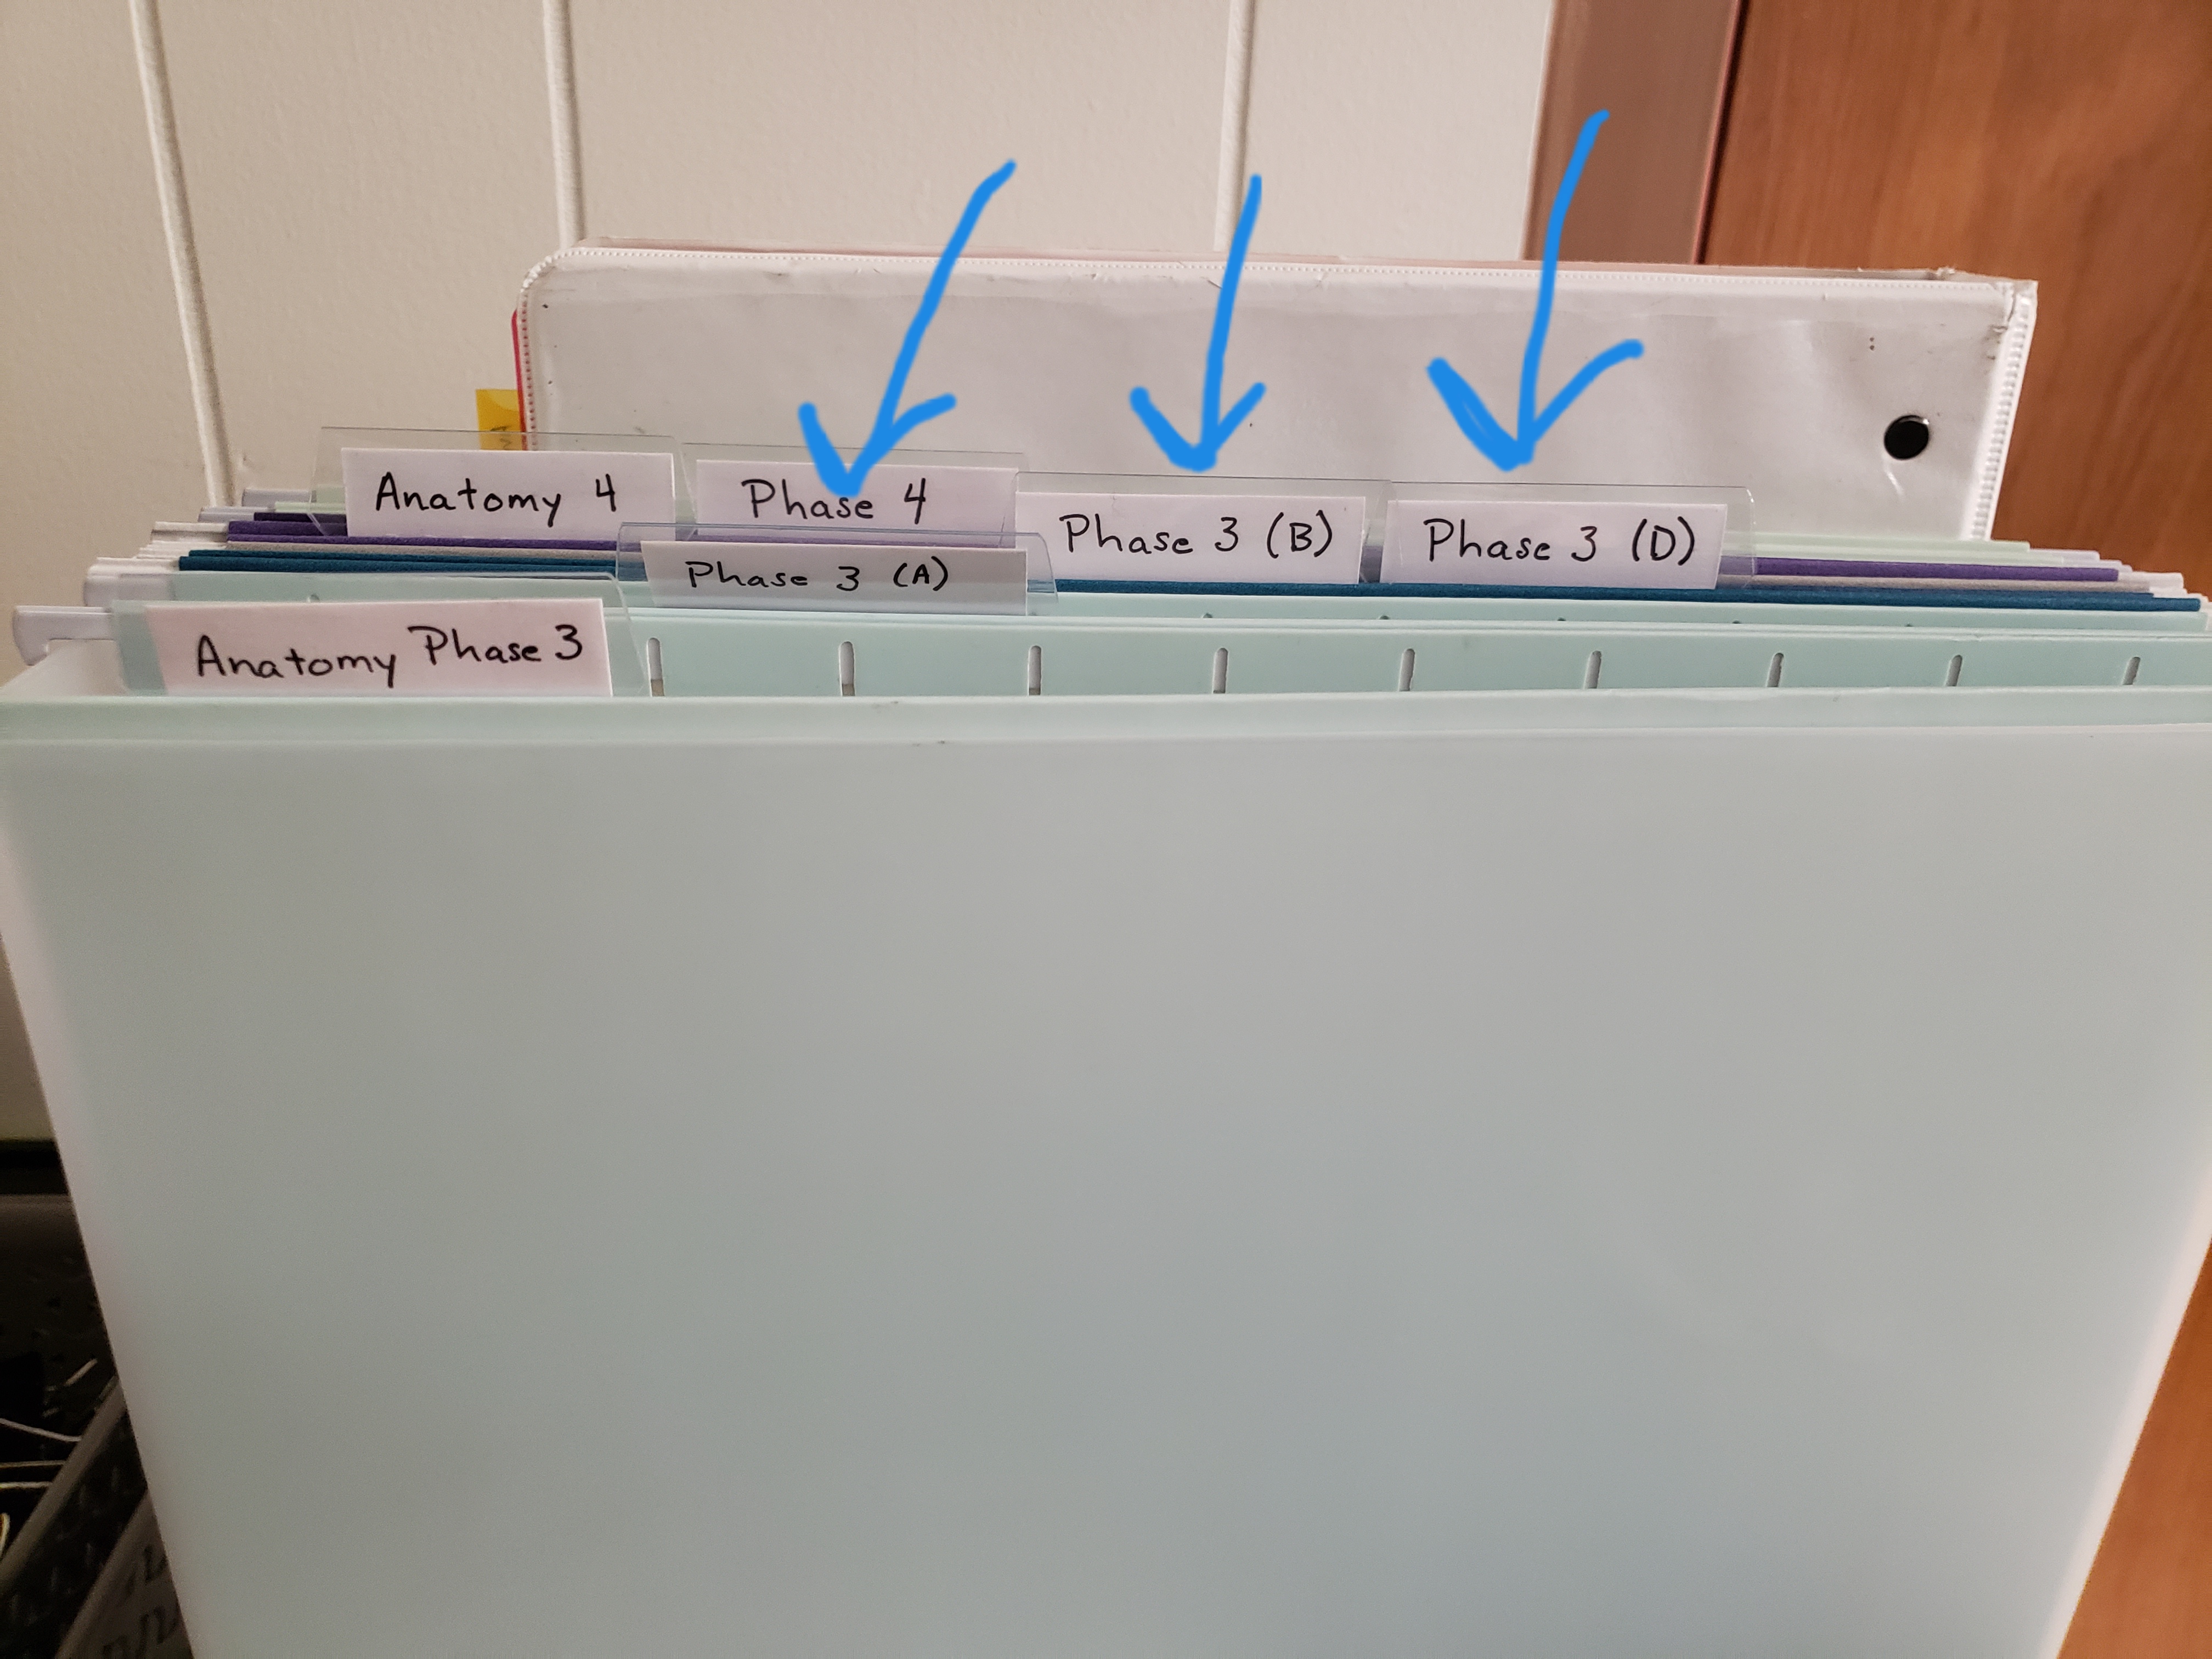
2. Digital Absent Binder – In the ‘before COVID times’ I used to keep a binder in my classroom that had a form I filled out whenever a student was absent and then there were folders that I would place work they needed to make up in. This year I made a digital version and it works SO MUCH BETTER. I just made a Google Slide presentation of the form that was in the binder and linked on our LMS page for our class so students had access to it. Students can get access to the work they missed right away (they don’t have to wait till they come back to school to look in a binder) and it cut down on emails from absent students asking for what they missed. This will definitely be something I continue into the new year. 

Example of a slide from my digital absent binder

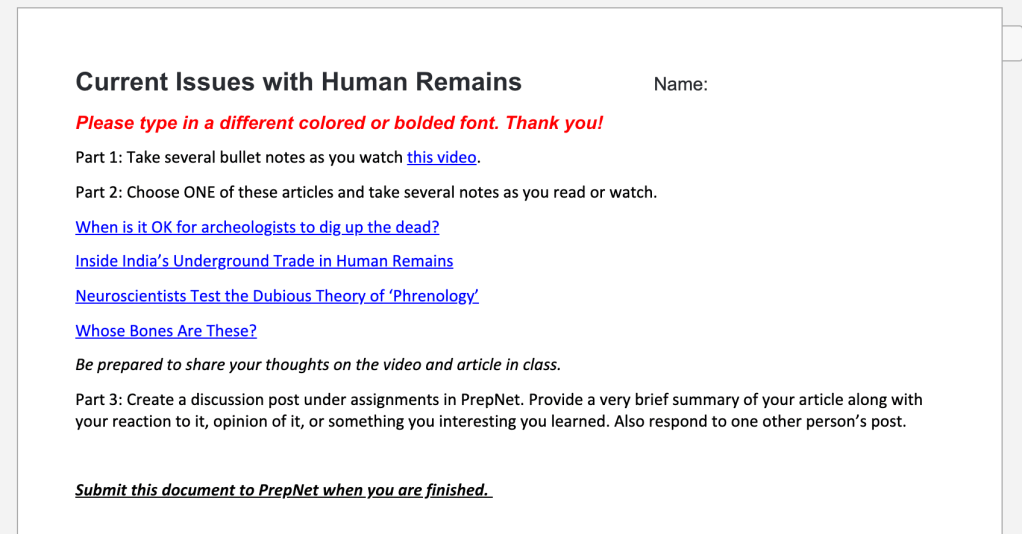
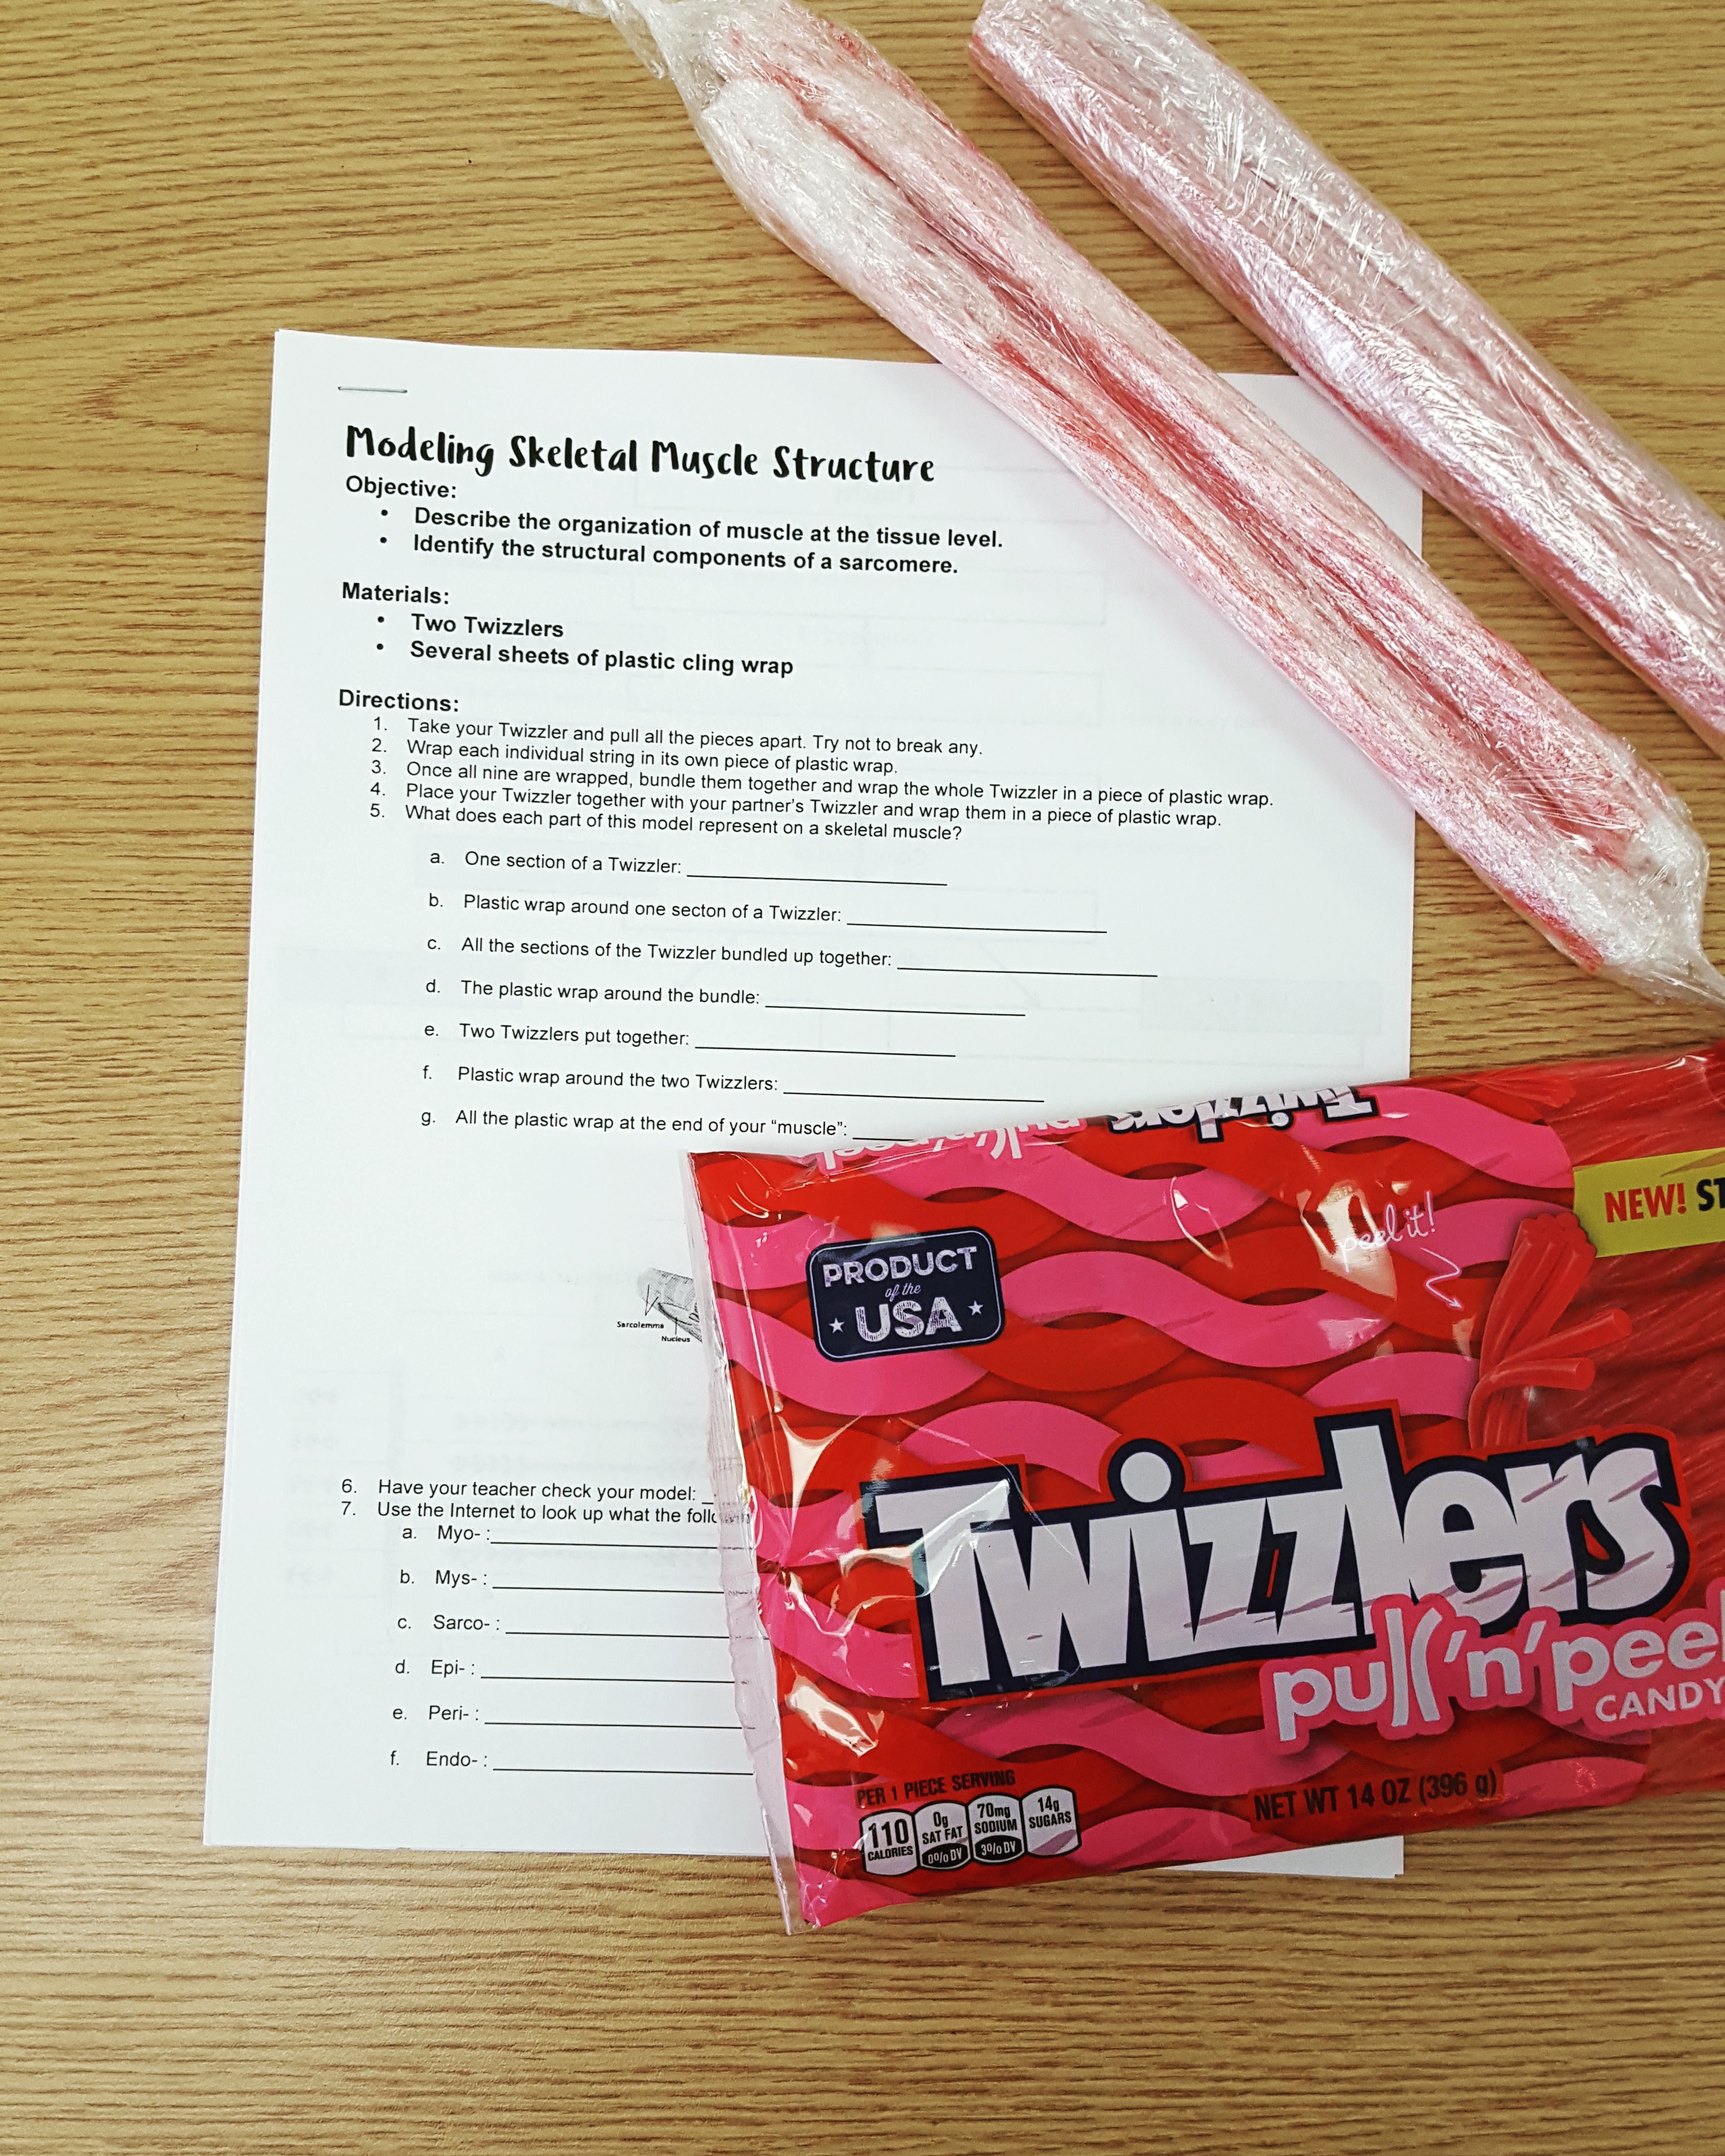
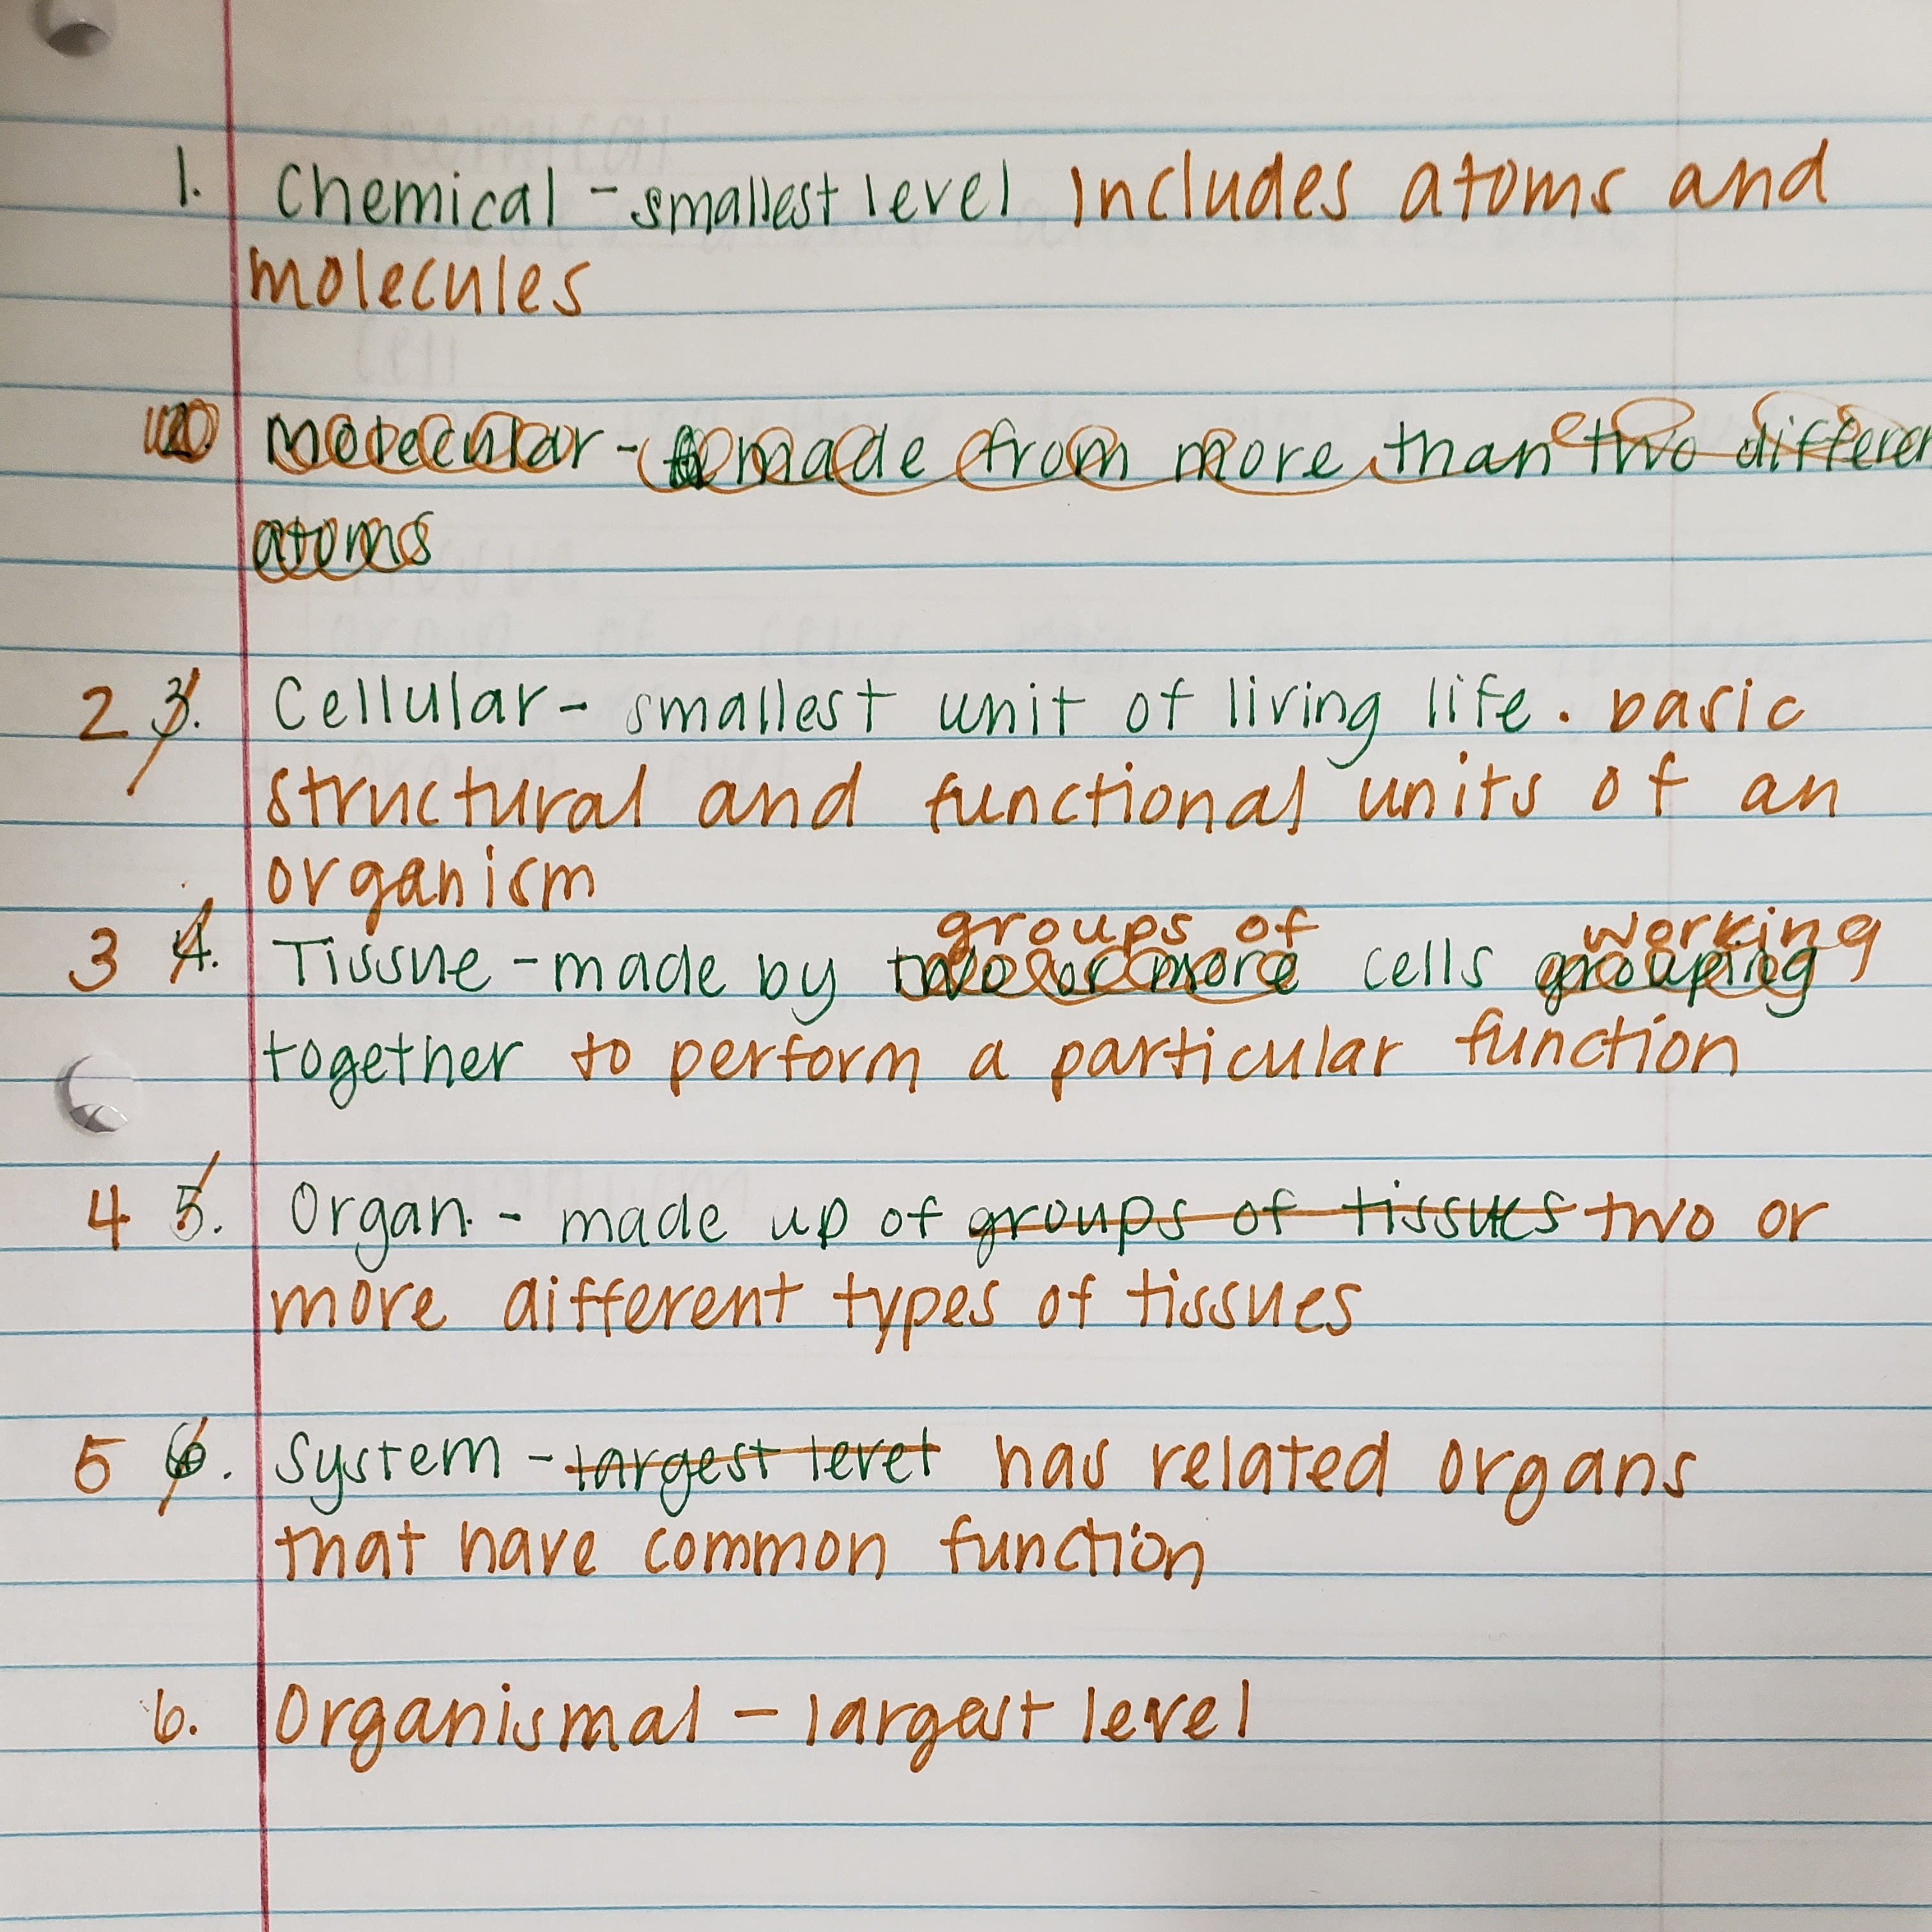
3. Social Issues/Current Event Discussions – This is something new I did in anatomy last year and I really liked how it worked. For certain units I brainstormed some topics that were connected to what we were learning about but weren’t also directly tied to science (if that makes sense). I’ve put an example of the topics I chose for our skeletal system unit below. Each topic linked to an article and students could choose any topic that interested them. After reading the article, students created a discussion post on our LMS that included a short summary of their article and their reaction to what they read. They then responded to another classmate’s post. After creating a discussion post, we would have a short discussion as a class about what they read. This gave students a chance to ask questions of each other about what they read. We had some really good conversations about the topics and I think students appreciated the connection between our topics in anatomy and real-world events/current issues. 

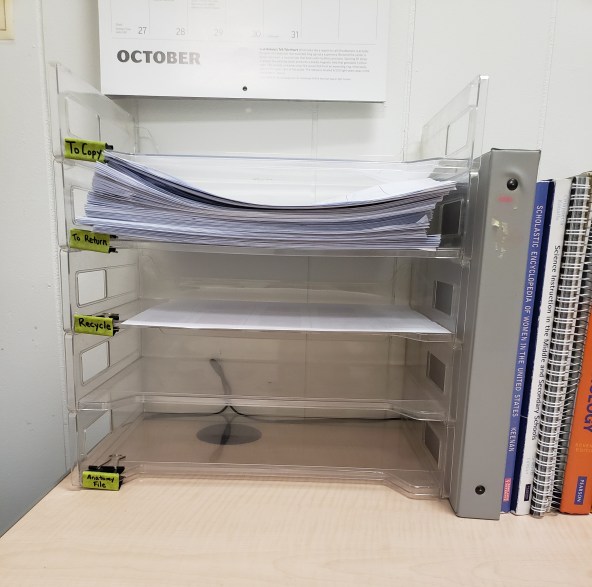
4. Less Paper! – I never realized how much paper I use until last year. With all our learning moving online, I think we were all pretty much forced to stop using paper for everything. As we move back into normal, in-class learning, I want to continue to use less paper when I can. I think it’s less wasteful, make copies of everything is time consuming for me, and I teach in a one-to-one school so using paper isn’t really necessary. However, I will probably go back to using paper for tests and quizzes and some class work. For example, sometimes I think filling out something like a concept map is easier with paper and pencil. But for the most part I want to continue to use less paper from this point forward. 

5. Alternative Assessments – I taught two semester electives this year and for both I used projects to assess student learning instead of tests for the entire semester. I’m really proud of this, because using alternative assessments is something I’ve always wanted to get better at. For assessments we did a variety of projects, presentations, short papers, and small portfolios. Not all of the projects were perfect in my opinion, but I can tweak them in the future and overall I feel like they were authentic assessments of what students learned in each unit. I also felt like most of the projects I assigned weren’t too taxing to grade. (In the past I have dreading grading projects and papers; mostly I think because it feels so much more subjective than grading a test and it takes longer) When I was creating directions for these projects I made sure to ask myself, ‘Is this something that is going to take me forever to read and grade?’. If it seemed like too much, I was tweak it to make it manageable. This is something I want to continue in the future even in my content-heavy classes like anatomy. Even if I mostly give tests as summative assessments, I can assign projects, once a semester for example, to break it up a little bit. 

6. Not coming to school sick! – Can we normalize this forever? I really think that in this pandemic we have learned that it’s kind of rude to be out in public when you are sick and potentially giving that sickness to other people. I think we should stress to students and teachers that it is good to stay home when you are sick so that you don’t infect other people. (Can we get rid of perfect attendance awards please?) So, I encourage you to do the same. STAY HOME IF YOU ARE SICK. (Unless you are like me and have to use your sick days for your maternity leave in which case you want to save them all up. But I digress…)

Last year was one heck of a year, but I think that there were some positives to come out of all of this too. Honestly, I hope schools reflect on this year and try some new and innovative things. This is a great opportunity to kind of ‘blow things up’ and start new with fresh ideas for what schools can do for students. I’m a little disappointed that so many schools are determined to go back to ‘business as usual’ without thinking about how we could fix things that weren’t so good in the ‘before times’. However, as teachers, we do have some control over what we do in our classrooms, and even if we can’t change everything, we can change some things about the way we teach and manage our classrooms. What are your thoughts? I would love to hear about what you want to keep from the craziest year ever! 

Take Care!

8 Demos for Biology

Are you looking for ways to hook your student’s attention in the upcoming year? This might be a challenge if your school is starting the year virtual or hybrid and if you are accustomed to using hands-on and group activities to engage your students. Since we can’t let students work together, I’ve put together a list of biology demonstrations you could do in front of a group of students in a classroom or during a virtual class given over the Internet. It might not be as fun as letting students experience the process themselves, but I think demonstrations give great visuals that hook students into the lessons and help consolidate hard concepts. Here are 8 demos that you can use in a biology or life science class.

  1. Water Demos

There are so many cool demonstrations you can do to show different properties of water! You can use pennies and a water dropper to show surface tension, string and colored water to show adhesion, (see this video), and colored water and paper towel to show capillary action just to name a few. I think all of these would translate well to a virtual class session on Zoom or Google hangouts or you might  even be able to have students do some of these activities in class if you have enough materials for each student. Or better yet, make it a challenge for students to try the adhesion activity with string and colored water at home. Have them document how it went by taking pictures or making a video and explain what is happening. Or challenge students to find examples of cohesion, adhesion, and capillary action around them homes and take pictures of what they find. This is a great way to get them away from the computer for a little while!

20200806_105550
One of my students demonstrates capillary action using paper towel and color water. 

  1. Testing for Macromolecules

Rebecca over at It’s Not Rocket Science has a great lab for testing for macromolecules and when I taught biology I looked forward to doing it every year! Unfortunately, students won’t be able to do this groups like normal, but I still think you could do this as a demo in front of students if you are in the classroom next year. Becca’s lab sets up a scenario in which there is a murder victim and students must investigate the contents of the victims stomach to figure out where they had their last meal and who murdered them. I think if you played this up a lot, the demo could be just as exciting as a lab they do themselves. However, if you are teaching virtually next year, this is trickier. You could easily test for starches and fats using iodine and a brown paper bag, but most of us don’t have Benedict’s or Biuret’s solution at home to test for proteins and simple sugars. My suggestion would be to use a standard lab and start the demonstration with your class during a virtual session and show them how iodine can test complex sugars and a brown paper bag can test for fats. Then students could watch YouTube videos on their own to see how we can test for proteins and simple sugars. (I think this video and this video walk through the steps very nicely) Not quite as fun as doing it class, but students should get the picture or how different foods contain different macromolecules.

  1. Cell Size

Becca, who writes the blog Science Lessons That Rock, has a great lab for demonstrating the importance of cells size that uses beets and bleach. I have not tried this lab with students, but I’ve always wanted to! The set up looks pretty easy and it looks like you could do this in class or virtually. (Becca also has lots of other great resources for teaching cells so check out her blog!)

  1. Osmosis

When I taught biology, students often had difficulty learning about cell transport and I found that visuals and labs really helped. There are many well known labs for teaching osmosis that use eggs, gummy bears, cucumbers, potatoes, or raisins. Personally if I was doing this as a demo for my students in class or online, I would probably do the raisin lab with sugar water (something like this). I’d set it up 24 hrs. in advance and show students the difference between the raisins hypotonic and hypertonic solution. If you don’t have access to a food scale, I think the visual of the swollen raisins vs the wrinkled raisins still works. Make sure to follow up your demonstration with a discussion or visual about WHY the water moves into or out of the raisin depending on the solution they are in.

  1. Fermentation

I always loved doing fermentation labs with my students when I taught biology. I especially loved how my room smelled! A lab like this, could easily be turned into a demonstration. The materials are easy to find around the house (as long as we don’t have another yeast shortage!) and it’s fairly simple to set up. However, I know that some teachers have difficulty getting the yeast to respirate if they don’t have a warm spot to put the bottles. If you are at doing this home for a virtual class, you might be able to preheat your oven and set the bottles on top of your warm stove (just like you are actually making bread) and that should help the yeast do their thing. If you are at school, a warm water bath might work too. I also used to do a project where students had to make something with yeast at home, take pictures of the process, and answer a couple questions. You could have students do this on their own and then have a bread eating party during your next virtual class time.

20200806_105523
An example of how my students tested the affect of yeast on sugar. We were able to place these on a heater in my classroom to get the yeast to respirate.

IMG_20180226_153333_581
Delicious treats made with yeast made by my students!


  1. Respiration

When I taught Biology, I usually did a lab in which students tested the effect of exercise on cell respiration using bromothymol blue. You can find a lot of free labs for this online and I think this could work as a demo or could be done virtually. You can find a demo of this lab here. If I was in front of a group of students I might explain the set up to my students have them do some research about bromothymol blue and have them make a prediction about what would happen when I blew air into the bromothymol solution. If I was doing this virtually, I might even have students time how long it takes for the solution to turn color when I’m resting, then jog in place for a minute (if you feel comfortable and able doing this over a Zoom class), then have them time how long it takes for the solution to turn color after exercise. You might have to buy some bromothymol blue if you are doing this at home, but it isn’t very expensive.

IMG_20180308_164554_583
One of my students turns a bromothymol blue solution green using carbon dioxide from their breath. 

  1. Photosynthesis

Along with cell respiration, photosynthesis can be a really hard concept for students to grasp and labs involving photosynthesis can sometimes be tricky. I’ve done labs with Elodea plants with varying success and I know labs that involve the leaf discs can be frustrating for students when they can’t get them to sink. This lab might work as a demonstration and I’ve greater success with this lab than others. It involves putting Elodea into a carbon dioxide and water solution and watching the bubbles produced when it is placed in a dark place vs. when it is placed in a lighter place. I think you could do this as a demo at school or at home and show students the results over a virtual class session. The materials are things you can easily get at a grocery and pet store. If you don’t have a bright lap to use, you could set up two jars and place one in a sunny window and one in a dark closet. Take the jars out right before class, and your students should be able to see that the plant placed in a sunny place is producing more bubbles thus undergoing photosynthesis at a faster rate.

  1. Strawberry DNA

This classic strawberry DNA lab can easily be set up at home for a virtual or done in front of students. The visual of the DNA is something that always interested my students when I taught biology. This can be used to teach about DNA, but also polarity, cell membranes, and density.

IMG_20180517_165842_010
This lab that extracts the DNA from a strawberry could be used as a demonstration in front of class instead of doing it as a lab. 

This year is going to look so different from every other school year and I know that stress levels are running high as we plan for what is ahead. That being said, you don’t NEED to do labor intensive demonstrations if it seems like it’s going to stress you out. I know that some of these activities require a lot of materials and need to be set up ahead of time and if you don’t have the time or the space, then don’t feel pressure to do demonstrations! Or just pick one or two really simple demos and commit to those. If there was ever a year to focus on making teaching simple, this is the year!

giphy
Source

Anyway, I hope these are helpful and that you find something that will work in your classroom. 🙂

Take Care!

signature

10 Demos for Anatomy

Well, it’s mid-July and we are slowly starting to get a picture of what our schools might look like next year, but there is so much uncertainty around what teaching will actually be like. I think one thing we can plan on for sure is that we won’t be able to lab and group activities the way we normally do. With the threat of Covid still so prevalent, I imagine that we won’t be able to put students into small groups in close proximity to each other to work on a lab. Which is so sad! I always think labs are best parts of science class, but we will have find to some other ways to engage our students in our content. One way I think we can do this is by using demonstrations frequently whether it’s in front of a group of students or whether it is done virtually over a Zoom or Google Hangout session. Demonstrations are done by the teacher while students watch and make observations and can be used to show a process, illustrate a concept, or be an analogy for a difficult concept. Demonstrations done in real time in front of students can help draw their attention and give them greater clarity about difficult topics.

I’ve been brainstorming and made a list some demos I will probably be using in my anatomy classes next year. Some are demos I’ve done before and some are labs that I just won’t be able to have students do. Also, while some are high school specific, others would work just as well in a middle school class learning about body systems.

  1. Rubber Band Chicken Bone

You might be familiar with this experiment where you put a chicken bone (from a rotisserie chicken for example) into a jar of vinegar for 5 days or so and the vinegar reacts with the calcium in the bone dissolving it and leaving behind a bendy bone made of collagen. Instead of doing this as a lab with students in groups, you could easily set this up ahead of time and show it to the whole class as a demo in person or over zoom. You could use this as a simple way to illustrate the importance of calcium in bones but you could also make it more inquiry-based with older students. You could show them the bendy bone and then have students hypothesize about what happened and what is left behind in the bone before they do research to discover what actually happened.

  1. Twizzler Muscle Model

Muscles are pretty complex organs and my students usually have some trouble understanding the structure of muscles and how they work to contract and relax. I think this Twizzler model activity to be a helpful model for how muscles are bundles of bundles of different fibers that work together. I normally have students do this as a group activity with Twizzlers, but I still think this activity would be valuable as a demonstration in-person or virtually followed by a class discussion. I envision doing this in front of my students and having them identify each bundle and the layer of connective tissue around it as I work to put the bundles together to make a completed muscle. The most difficult part of this is that you probably won’t be able to let students eat the extra Twizzlers you have! 😦

IMG_20180122_153450_966

  1. Chicken Wing Dissection

A chicken wing dissection is a versatile lab that you could use in high school or middle school and I think you could still use this as a demo, although I’m not sure if it would translate well virtually (if you or your students don’t have a great Internet connection it could be difficult to see all the structures). I think that dissecting a chicken wing (here is an example of I have my students do) is great for showing the difference between tendons and ligaments and you can pull on the different muscles of the chicken and show students how muscles pull on bones to create movement. I also got comments from students last year saying they never thought about meat as being muscle which is a good lesson too. Again, I’m not sure how well this would translate as a demonstration over the Internet, but chicken wings are pretty easy to get, so maybe you could have students do this on their own at home and document what they learned.

  1. Blood Types

I love this demonstration and its so helpful in showing students which blood types can be donated and excepted by other types! All you need are clear cups, water, and some food coloring. You can read about this demonstration here. You might also want to discuss what ACTUALLY happens when blood types mix (agglutination) so they have an idea of why it’s dangerous to mix blood types.

Screenshot_20200714-112104_Instagram

  1. Reflexes

I normally like to have students test each other’s reflexes but I don’t think that will possible next year. I usually have them test the patellar, bicep, tricep, and the Babinski reflexes. However, I think you might be able to do this as a demo in front of the whole class. If you are in school, you could maybe demonstrate these on a colleague? I’m not sure. You could also demonstrate these virtually to students by testing them on a spouse or roommate. Of course, you can always show YouTube videos of these reflex tests, but it might be more fun for students to see you actually demonstrate on a real person. Also, if you don’t have a reflex hammer laying around, you can make one out of popsicle sticks, rubber bands, and a rubber eraser and it works pretty well.

IMG_20180413_162601_533

  1. Digestive System Model with String

You can find plenty of activities online for modeling the length of the digestive system. You could show the  actual length of the digestive system or one that models it with string to a smaller scale. I had students do this individually last year during online teaching (the did an assignment like this one from Biology Corner), but you could also demonstrate it front of a classroom and maybe also online during a virtual lesson.

20180523_151223

  1. Digestive Enzyme Demo

I wrote about this in a previous blog post, but this a great demo that you can easily do in front of a group of students or virtually. I used gelatin, pineapple, cornstarch, iodine, oil, and soap to demonstrate the digestion of sugars, protein, and fats. It’s a great way to reinforce that there are specific enzymes for specific nutrients and that they get digested in different areas of the digestive system.

  1. Egg in a Jar

This a simple and powerful demonstration of the important of cerebrospinal fluid around the brain and impact of traumatic brain injuries. All you need is an egg in a jar of water and you will find that when you shake the jar, the egg can break when if it hits the side of the jar. It’s a good example of how helmets in sports only go so far in protecting the brain. I also like to show this video of a real brain that shows students how soft and vulnerable the brain is. (Disclaimer: this video is might not be appropriate for all students. I only show it to high schoolers.)

  1. Lung Model

My school has one of these lung models where there are balloons inside a large container and you can pull down on a rubber diaphragm to make the balloons inflate and deflate like the lungs. The way that pressure changes inside the thoracic cavity allowing air to enter and leave the lungs can be really confusing for students so I like to have a good visual, but if I had to teach from home, I wouldn’t have this model so I suppose I could make one out of a plastic bottle and balloons and show students over a Zoom session how inhalation and exhalation work. I also think this model could work too. It uses balloons, straws, and a glass of colored water and is supposed to be a model of how the heart beats. However, because the increased air pressure is pushing the water of the straw, I think it could work to demonstrate exhalation.

  1. Blood Model

I loved doing this model with middle school students, but I think it could work as a demo in a high school class too. I have used cheerios, navy beans, lentils, and water to represent the different parts of blood but there are a variety of things you can use. I would make sure the emphasize the different amounts of each of these components. Make sure students understand that blood is mostly plasma followed by red blood cells, white blood cells, and platelets.

If you are a science teacher, I hope you find this helpful and that some of these will work for your classroom. I would love to hear if you have any other demonstrations you plan on doing in an anatomy or human body systems class or any other ways you plan on adapting your class for the upcoming year!

Take Care!

signature

Seven New Things I Did In The 2019-2020 School Year!

Oh, 2019-2020. This school year has been a year full a changes for me, as I’m sure it has been for you as well. As of this writing, we have finished up a school year that concluded with pretty much every school in America trying to do online or at-home learning due to the coronavirus pandemic and we are currently staring down an upcoming school year full of uncertainty.

3ubddj
Source: imgflip

For me, I also started teaching at a new school in August 2019 after teaching at my previous school for 5 years so the whole year kind of felt like a giant upheaval. With so much change, I got the opportunity to try some things in the classroom and was forced to do new things with online teaching in the spring as I’m sure you did too! So after some reflection, I want to focus on some of the successful and fun new things I did with students this year. So I give you my top 7 new things I did this year with success. (For reference I mostly taught high school anatomy this year so some of these activities are specific to an anatomy class, but some of these ideas can work in a middle school science classroom or in a classroom of any subject area.)

Also, some of things mentioned below might not be applicable to the classroom next year if we are teaching online or if we are not allowed to do labs in groups, but some are things that can work online or in a socially distanced classroom. I hope you find something here you can use in your classroom!


  1. Rat Dissection

For the first time this year I taught anatomy with another teacher and got to see some different ways to do things in the anatomy classroom. One of things I was most taken aback by was that my new co-teacher typically does a rat dissection in the beginning of the year in addition to a pig dissection in the spring at the end of the year. At first I found this very interesting, but after I completed it with my class I realized that it was genius! A full dissection right at the beginning of the year is a great was to introduce all the body systems all at once, it forces students to use the anatomical terms and directions they have been learning from the get go, and it gets students EXCITED. The first unit of anatomy can be intimidating to students (it’s full of terms they have never heard of) but I think the dissection helped hook them in even though the first impressions of the class can be overwhelming. It was also nice to be to refer back to the dissection throughout the year. (“Do you remember the spleen during the rat dissection? It was that really dark red organ on the right side toward the back of the rat?”) I realize that two full dissections can be costly, but if your school can afford it or if you have a small anatomy class, a big dissection at the beginning of the year can be really helpful and meaningful for students. I have been buying dissection specimens from a company called Biology Products for a couple years and I like their specimens. They do use formalin in their preservation fluid, if that bothers you, but I find it worth it for the price.

  1. Chicken Wing Dissection

Another new dissection I did this year was the chicken wing dissection during our muscle unit and this is so simple and straight forward, I don’t know why I haven’t done it sooner. Chicken wings can be purchased pretty cheap and it’s a nice way to help students tie together the skeletal and muscular systems. Something I want to work going forward with anatomy is better showing how body systems work together and that they don’t just work in silos sperate from each other. Also this lab can be simplified for middle school or made more complex for high school. So versatile! You can find lots of different versions of this lab by just Googling “chicken wing dissection lab”.

  1. Spirometer Lab

Testing for lung volume was a new lab I did during our respiratory unit and I tried it two different ways with different classes. With my lower level students I used this lab from Biology Corner using a balloon to get a rough estimate of lung capacity. With my upper level students I use a lab from my co-teacher (similar to this one) that used lung volume bags. Of the two labs, I think the lung volume bags worked a lot better and students got a kick out of seeing their estimated lung volumes. Obviously, I don’t know if we will be able to do this lab next year with the threat of the corona virus still eminent, but this lab was fun for students and I will do it again when it is safe to do so. The lung volume bags and parts are pretty simple and not too expensive. Also I think the lung volume lab from Biology Corner could work in a math class learning to calculate the volume of a sphere.

  1. Digital Escape Room

I have done one escape room that I made myself a couple years ago with some success but this May, as my students losing interest in online learning, I purchased this premade digital escape room for my students to change things up a little. It was a slightly different way for students to review what they had learned and they seemed to enjoy it. It worked well over Zoom (I put students into breakout rooms and emailed them the different levels as they worked through each one) and it I think it was a nice way for students to not only to see what they knew and didn’t but it gave them a little time to interact with each other in small groups as well. Over the summer I plan on trying to make my own digital escape rooms for a couple units. I much prefer doing escape rooms manually with locks or puzzles they do together in person, but I think the digital escape rooms with be great with the adjustments we will have to make next year with COVID-19.

  1. Digestion Demo

Since we couldn’t do a lab during our digestion unit this year, I did a demonstration over zoom that showed the digestion of carbohydrates, proteins, and lipids. I had students fill out a handout during the Zoom where they simply listed what they observed and what they thought was happening. After the demonstrations we discussed how each molecule was digested and how it connected to what happens in the digestive system. This seems to work really well as it gave students a visually of digestion even if it was over Zoom and not in-person. I plan on making a list of other demos that will fit in and help students understand concepts in anatomy for next year since I’m not sure if we’ll be in the classroom again or if we will be able to labs in groups like we usually do.

IMG_20200514_164206_552
You can use pineapple (which contains an enzyme called bromelain) to show how enzymes digest protein, like the collagen in gelatin.

  1. Podcasts

During online learning in the spring I was looking for ways to keep things fresh and interesting as I felt like students were losing motivation and interest in school as it became more clear that we would probably not be returning to in person classes at all in 2020. Giving students a podcast to listen to and some simple questions to answer seemed to interest my students and I think it is a great way to help students learn new material and practice listening skills. It’s also a way for students to hear from experts in the field and they hear stories that might new otherwise get from reading an article or textbook on the subject. It’s also just a nice way to change things up a bit if students have been doing a lot of reading or watching videos for your class. This year I had students listen to podcasts about the Tuskegee Syphilis study, the coronavirus, and (my personal favorite) a short one about giardia. There are loads of good podcasts you could use in literally any class!

  1. Retrieval Practice

Last summer I read two books: Small Teaching by James Lang and Understanding How We Learn: A Visual Guide by Weinstein, Sumeracki, and Caviglioli and both books emphasized the evidence (such as this) that supports the use of retrieval practice in the classroom. Retrieval practice is simply having students try to pull information they have learned from their memory to help solidify new information. This strategy is backed up by multiple studies so I made a point to use it more in my classroom and I think it made a HUGE difference in student learning. Anatomy has a reputation for being all about memorization and memorizing is a big part of the class. Memorizing the meaning of so many new words is the first step for students who are interested in the medical field or just learning more about their bodies and it sets them up for being about to think critically about problems that can occur in body systems. I think the various activities I did using retrieval practice helped students retain all the new information they were learning, helped them do better on their assessments, and help them gain confidence in the class. You can read more about retrieval practice here and this blog has some great and simple ways to implement this in your classes if you are interested.

IMG_20190909_180623_304
For this exercise in retrieval practice, I had students list the levels of organization in the human body from memory (they did this in green pen). Then they looked at their textbook and consulted with each other and fixed any mistakes they made (they made corrections in the brown pen). Afterwards we reviewed this together as a class. This is a great way for students to practice pulling information from their memories and for them to assess what they do and do not know.

I also want to mention that there is a list in my head of 10-20 new things I tried this year that were not successful or did not work well enough to mention in this list. There is also a list of old things I have done in years past that did work at all at my new school or with my new group of students or that didn’t translate well to online learning. Trying something new and having that lessons fail in front of students is always uncomfortable but I always feel like it’s better to try new things and fail than to not try at all. The global pandemic has made teaching less than optimal right now, but it’s also an opportunity to try and fail and succeed with new lessons, activities, and approaches.

What new things have you been trying out or hope to try out next year??? I would love hear about it in the comments!

signature

Dealing with Teacher Comparison and My Teaching Gut

This year I have started my 6thyear as a teacher in a brand-new school. As it is now November, we are almost half way through the 2ndquarter and I finally feel like I am getting the hang of a new system, new students, and new culture. This school is much bigger than the last school I taught at, and I have many other teachers to collaborate with and learn from. At my last school I was only biology, earth science, and anatomy teacher, but now I am working with several other teachers that teach the same class that I do. This has been wonderful experience for me as I am learning to grow in my teaching pedagogy and adapt to a new way of doing things. Many of the science teachers in my department worked as biochemists, physical therapists, and environmental engineers before becoming teachers and I am so blessed to work with people with so much expertise in what they teach.

This has led my think a lot about who I am as a teacher. You see, the last couple of months have led me to compare myself with my new coworkers. Sometimes I feel so inadequate as a teacher. I never wanted to be anything but a teacher and I got my teaching license right out of college and started teaching at 23. I do not have my master’s degree yet and I have never worked in a science field. I feel like I don’t have the wealth of knowledge that my fellow teachers do and I have often worried about looking like I don’t know what I’m doing. I fear that I will mess up, that my students won’t learn what they are supposed to, and I doubt that I am a good enough teacher. I’ve tried to abandon certain lessons and ways I teach and tried to adopt what other teachers do.

At the same time, I sometimes find myself pushing back at certain lessons and content covered by my fellow teachers. I may not have experience working in the science field, but I have 5 years of teaching experience and I feel like I have learned a lot about how to structure clear and engaging lessons that students both enjoy and learn from. Sometimes I don’t want to adapt to what my new coworkers do and I want to teach like I always have.

However, I don’t think either of these attitudes is helpful. Neither doubting myself as a teacher nor being prideful in my teaching and resistant to change is going to make me a better a teacher and help my students. Lately I’ve been trying to do two things:


  • Be humble and learn
  • Stick to my teaching gut


I think there needs to be a measure of both humility and confidence in teaching.  I don’t know everything and there are many areas where I can grow as a teacher, but I do have lots of teaching experience and what works for one teacher may not work for me. It is ok to stick to my own teaching gut and say no to doing things that don’t work for the way I teach. Last month I tried a new way of teaching the structure of muscles in the way that my co-teacher did that just did not work for me or my students. They got very confused and I had to go back and reteach. However, I really like the format of lab reports other teachers in my department use and I’m using them every unit. There can be balance between learning new ways of teaching and sticking with what will work for you.

tumblr_962ea500cceda67ebc68fa6fb48b1c65_0ee79256_400
Source: Tumblr

All-in-all I’m very thankful for my new school, my new students, my new co-workers, an opportunity to stretch and grow, and an opportunity learn more about myself as a teacher. As the year continues, I hope to continue to remind myself to stay humble and to stick to my gut. How about you? Have you had experience with this? How do you keep yourself both grounded and confident in your teaching when you doubt and compare yourself to others?

signature

How I Organize Paperwork

Do you struggle with the organization of paper work in your classroom? Does your desk have multiple stacks of student work, late work, absent work, evaluations, advisory activities, permission slips, budget requests, receipts, etc all over it at the end of the day? Even as an organized person, I have struggled with both keeping track of paper work. The first few years of teaching were the worst. In my first year, I just didn’t know what to expect and wasn’t prepared to have to keep track of so many physical papers, and then as the years continued and I more classes were added to my teaching load, the problem just got worse. I now teach in a school that is 1:1 with laptops and I have fewer classes to teach so the paper work is much less, but I still find that I have many papers to keep track of. Additionally, I do not have my own classroom and I move from room to room with a cart and the chance of losing and misplacing papers is huge! That being said, I’ve tried to come up with a system that gives all paperwork its own place to reduce clutter and keep my life organized.

paperwork
Source: giphy

The organization of paperwork many seem like an insignificant thing to some, but I think that it is an extremely important part of my classroom procedures. When I am the throws of a busy day, having all my papers organized in the proper places takes some of the mental work out of finding what I need for the day. Personally, I also find that a clean and organized desk takes some of the mentally clutter and stress away during a hard teaching day.

20191026_073625.jpg

First, I keep this black paper holder/drawer on my desk. This is where Iput papers that need to be dealt with today. If I need to grade or organize something that day or first thing the next morning, it goes there. When I had my own classroom, this is where I put all my papers. Anything I collected from students or was given to me by another teacher or when students needed to turn something in while I was busy doing something
else, it went there. Then at the end of the day, I would go through and organize papers into the places they needed to go.

20191028_073103

From the black paper holder, papers can go in a number of places. If the papers are homework, quizzes, or something else I collected form the whole class I need to grade, I put them in this expanding file folder that I can easily take home if I need to.

20191027_143258

If the paper is late or absent work from a student, I put in a separate folder for late and absent work. I also keep all the hard copy keys and my paper grade book here.


If the papers are something I need to take home, I put them in the front pocket my teaching binder which is basically my plan book. If the papers are other things like advisory activities or permission slips, I keep those in separate folders that I keep on or in my desk.

20191009_090710.jpg

I also keep another set of paper holders on my desk. On the top file I will put any hard copies of papers I need to copy for class later. On the second file, I put work that is already graded and needs to be handed back to students. (As you can see, I did a lot of graded on this day!) On the third, I put any papers I need to recycle. (I don’t have a recycling bin in my office and need to take recyclables to the classroom across the hallway) The fourth file is empty right now. And the 5thI use to put any hard copies of things I want to file into binders.

20191028_073040

To return work to students using hanging files in a milk crate. Each student has their own file and they are organized alphabetically by last name. However, I now teach semester classes and I will gain and lose many different students when the first semester ends, so I may go to a number system instead of using last names. I like this system for graded work, because I can just take this crate out and students can get their graded work while I do something else like take attendance or set up a lab or help another student.

20191009_090729

Next, I keep hanging files in my desk to store copies of things I will use in my class later in the week. For example, I give my students a short quiz every Friday, so if I’m planning ahead and make copies of the quiz on Wednesday, I put those copies in the hanging file for Friday so they are out of the way and not just sitting in a pile on my desk. When I had my own classroom, I kept files in an upright file holders like the one pictured on the right. I had one file holder for each day of the week and each class had a file in each holder. I would keep my copies for the week there and then I could just pull out the files in the morning and I had all my copies for my classes organized in a place where I could easily grab them.

20191026_073526

20191026_073551

As I said before, I travel from classroom to classroom with a cart this year so I use this fold holder on my chart to keep papers organized. The front file is where I put copies of papers to give to students and then the files behind are for each section of that class. So on Fridays I will take quizzes out of the first file and then when I collect them for my period A class, they will go in the A file to be taken back to my office for grading.


As teachers, we make so many little decision during the day that when combined can become exhausting. Don’t let finding and keeping track of paper work take up any more mental space in your busy teacher brain! This is how I combat mental and paper clutter, but you can come up with a system that works for you that gives every paper it’s proper place.

signature


5 of My Favorite Blogs for Teachers

Happy October everyone! I hope your school is off to a great start! I don’t know about you, but it feels like September has just flown by! I’ve been so busy adjusting to a new school and getting to know my new students that I feel like I’ve barely had time to catch my breath!

For this blog post, I wanted to compile a very short list of blogs for teachers that I have repeatedly gone back to over the years for ideas, resources, or encouragement. My first year of teaching I did not really have a mentor that I felt like I could bounce ideas off of and I felt a little isolated as I tried to keep my head above the water of first-year-teaching. I went to the Internet for a lot of advice and ideas for things like classroom management and organization and I found some very helpful blogs that I still visit on a semi-regular basis.

I am a high school science teacher, but these blogs are good for any teacher of any age or subject. Here are some of my favs:

  1. Teaching Sam and Scout: Elizabeth is a high school English teacher and blogs about her life as a mom in addition to her life as a teacher. She has great ideas for English lessons, but she also has great advice for classroom set up and organization. I went to her blog a lot as a new teacher for ideas when I got my first classroom and for setting up my first syllabus. She has great stuff for new teachers and great blog posts about teacher life in general for veteran teachers too!


  1. The Effortful Educator: Blake Harvard teaches AP Psychology and his blog focuses on applying scientific research in memory and cognition in the classroom. Once of my goals for this school year is to incorporate more teaching techniques that are backed by research into my units, so I’ve been going to Blake’s blog a lot over the last couple of months. I follow a lot of teachers on Instagram where I feel that sometimes the focus can seem to be more on educational trends/buzzwords and lessons that look good on social media and classroom decorations than on actual teaching techniques and this blog has been a good balance to all of that. Don’t get me wrong, I love teachergram and I’ve gotten so many good ideas from it, but Blake’s blog reminds me to keep my focus on how can help my students actually LEARN and REMEMBER content rather than on finding lessons that will look good on Instagram.


  1. The Learning Scientists: This a website and blog that is similar to the Effortful Educator in that it focusing on applying cognitive strategies backed by science in the classroom. There are so many great blog posts and resources for teachers about the science of learning, what we have learned about learning from research, and how to improve instruction. There are also great resources for students on how to make the most out of studying!


  1. Leading, Learning, Questioning: Aaron Hogan is a principal and has written a book called Shattering the Perfect Teacher Myth which I have read and recommend if you are feeling burnt out in your teaching. His blog is also great for reading when you are feel disillusioned and need some inspiration. I also think his blog is especially great for ideas on getting to know students and build rapport with them from the first day of school to the last. Sometimes I like to read his blogs just to remind myself that building relationships with my students if one of the most important things I can do as a teacher.


  1. Eat, Write, Teach: I love this blog so, so, so much and it’s probably the one I’ve read the most over the last 5 years. Stephanie is an English teacher, so she has great ideas in her content area, but she also has amazing ideas for classroom management and organization. She writes about technology, her classroom set up, and all sorts of new things that she tries out in her classroom each year. If you are a so-to-be teacher and want to know what teaching is really like, you need to read this blog. I appreciate how honest and authentic Stephanie is and I’ve gotten so much inspiration from what she does in her classroom. I can’t recommend this blog enough! Check her out!!

That’s it! I hope through these blogs you might be able to find some inspiration for your own classroom! Comment below if you following any of these blogs or have other recommendations!

signature

Six New Things I Tried Last Year

Last month I shared some of the best new labs I did last year, and this month I wanted to share a couple more new things I tried in my classroom last school year. These are non-lab activities or organizational things and most are non-grade specific and could be used in any classroom!


  1. Investigate the Teacher: This is an activity that I did with a few of my classes on the first day of school and I got this idea from the wonderful Abby Gross on Instagram. You can find here account here. At my school, our classes are slightly shorter than normal on the first day and there isn’t enough time to go over the syllabus or do a long activity. For this activity you give your students a form and they walk around your classroom, look for “evidence” that says something about you, and they try to draw conclusions about who you are. This activity is easy, gets kids out of their chairs on the first day, and gives me a chance to observe them and get to know them a little. They also get to know me as a teacher and a person. I really loved this and I think it helps set the tone of what my classroom is like and starts the process of relationship building. Abby (who created this resource) is an English teacher but the concept of collecting evidence and drawing conclusions works so well for a science classroom too! You can find this activity on TPT here.


  1. Get to Know Students RIGHT AWAY: I read two great books last summer:
    Shattering the Perfect Teacher Myth 
    by Aaron Horgan and Better Than Sticks and Carrots by Dominique Smith, Douglas Fisher, and Nancy Frey. Both books really emphasized the importance of building relationships with students as the foundation of classroom management and in order to building a caring and safe classroom environment. However the books both went further in suggesting that teachers need to intentionally build those relationships right at the beginning of the year and gave some practical solutions for how to do this. I took a student survey out of Sticks and Carrots, adapted it slightly, and then gave it to all my freshmen at the beginning of they year. Then I read every single one and I do think this helped me learn who my 20190715_102722
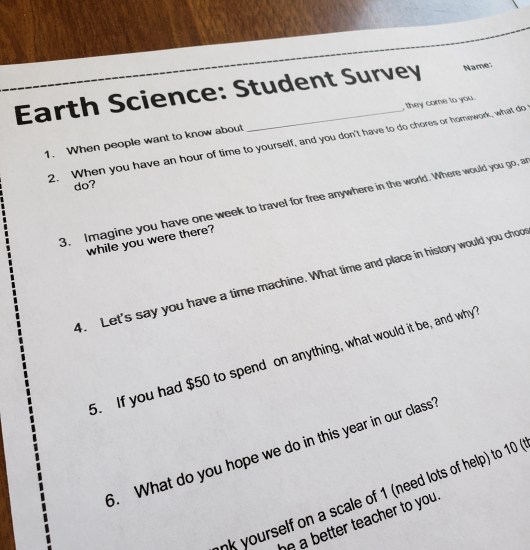
students were quickly. I liked this survey better than most that I have used in the past because I thought the questions were somewhat different from the typical get-to-know-you questions. Additionally, I took some ideas out of Aaron Horgan’s book about having positive, everyday interactions with students to build relationships. You can read more about this on his blog post here. I have always tried to get to know my students at the beginning of the year, but I truly think that putting positive relationships at the forefront of my mind this school year really made a difference.
  1. Quizizz: If you are not using Quizizz in your classroom, you need to! This website was a game changer and saved me a lot of time this last year. Quizizz is an educational game website similar to Kahoot, but I think it is much easier to use and has more useful features. You can create multiple choice question quizzes for students that they can take individually at their own pace or the whole class can complete together similar to what you do with Kahoot. Here is why Quizizz is better though: the quizzes are much easier to make than on Kahoot, you can also assign these quizzes as homework where students can take the quiz as many times as they want until they get the grade they want, Quizizz generates a report for each student20190715_111353 
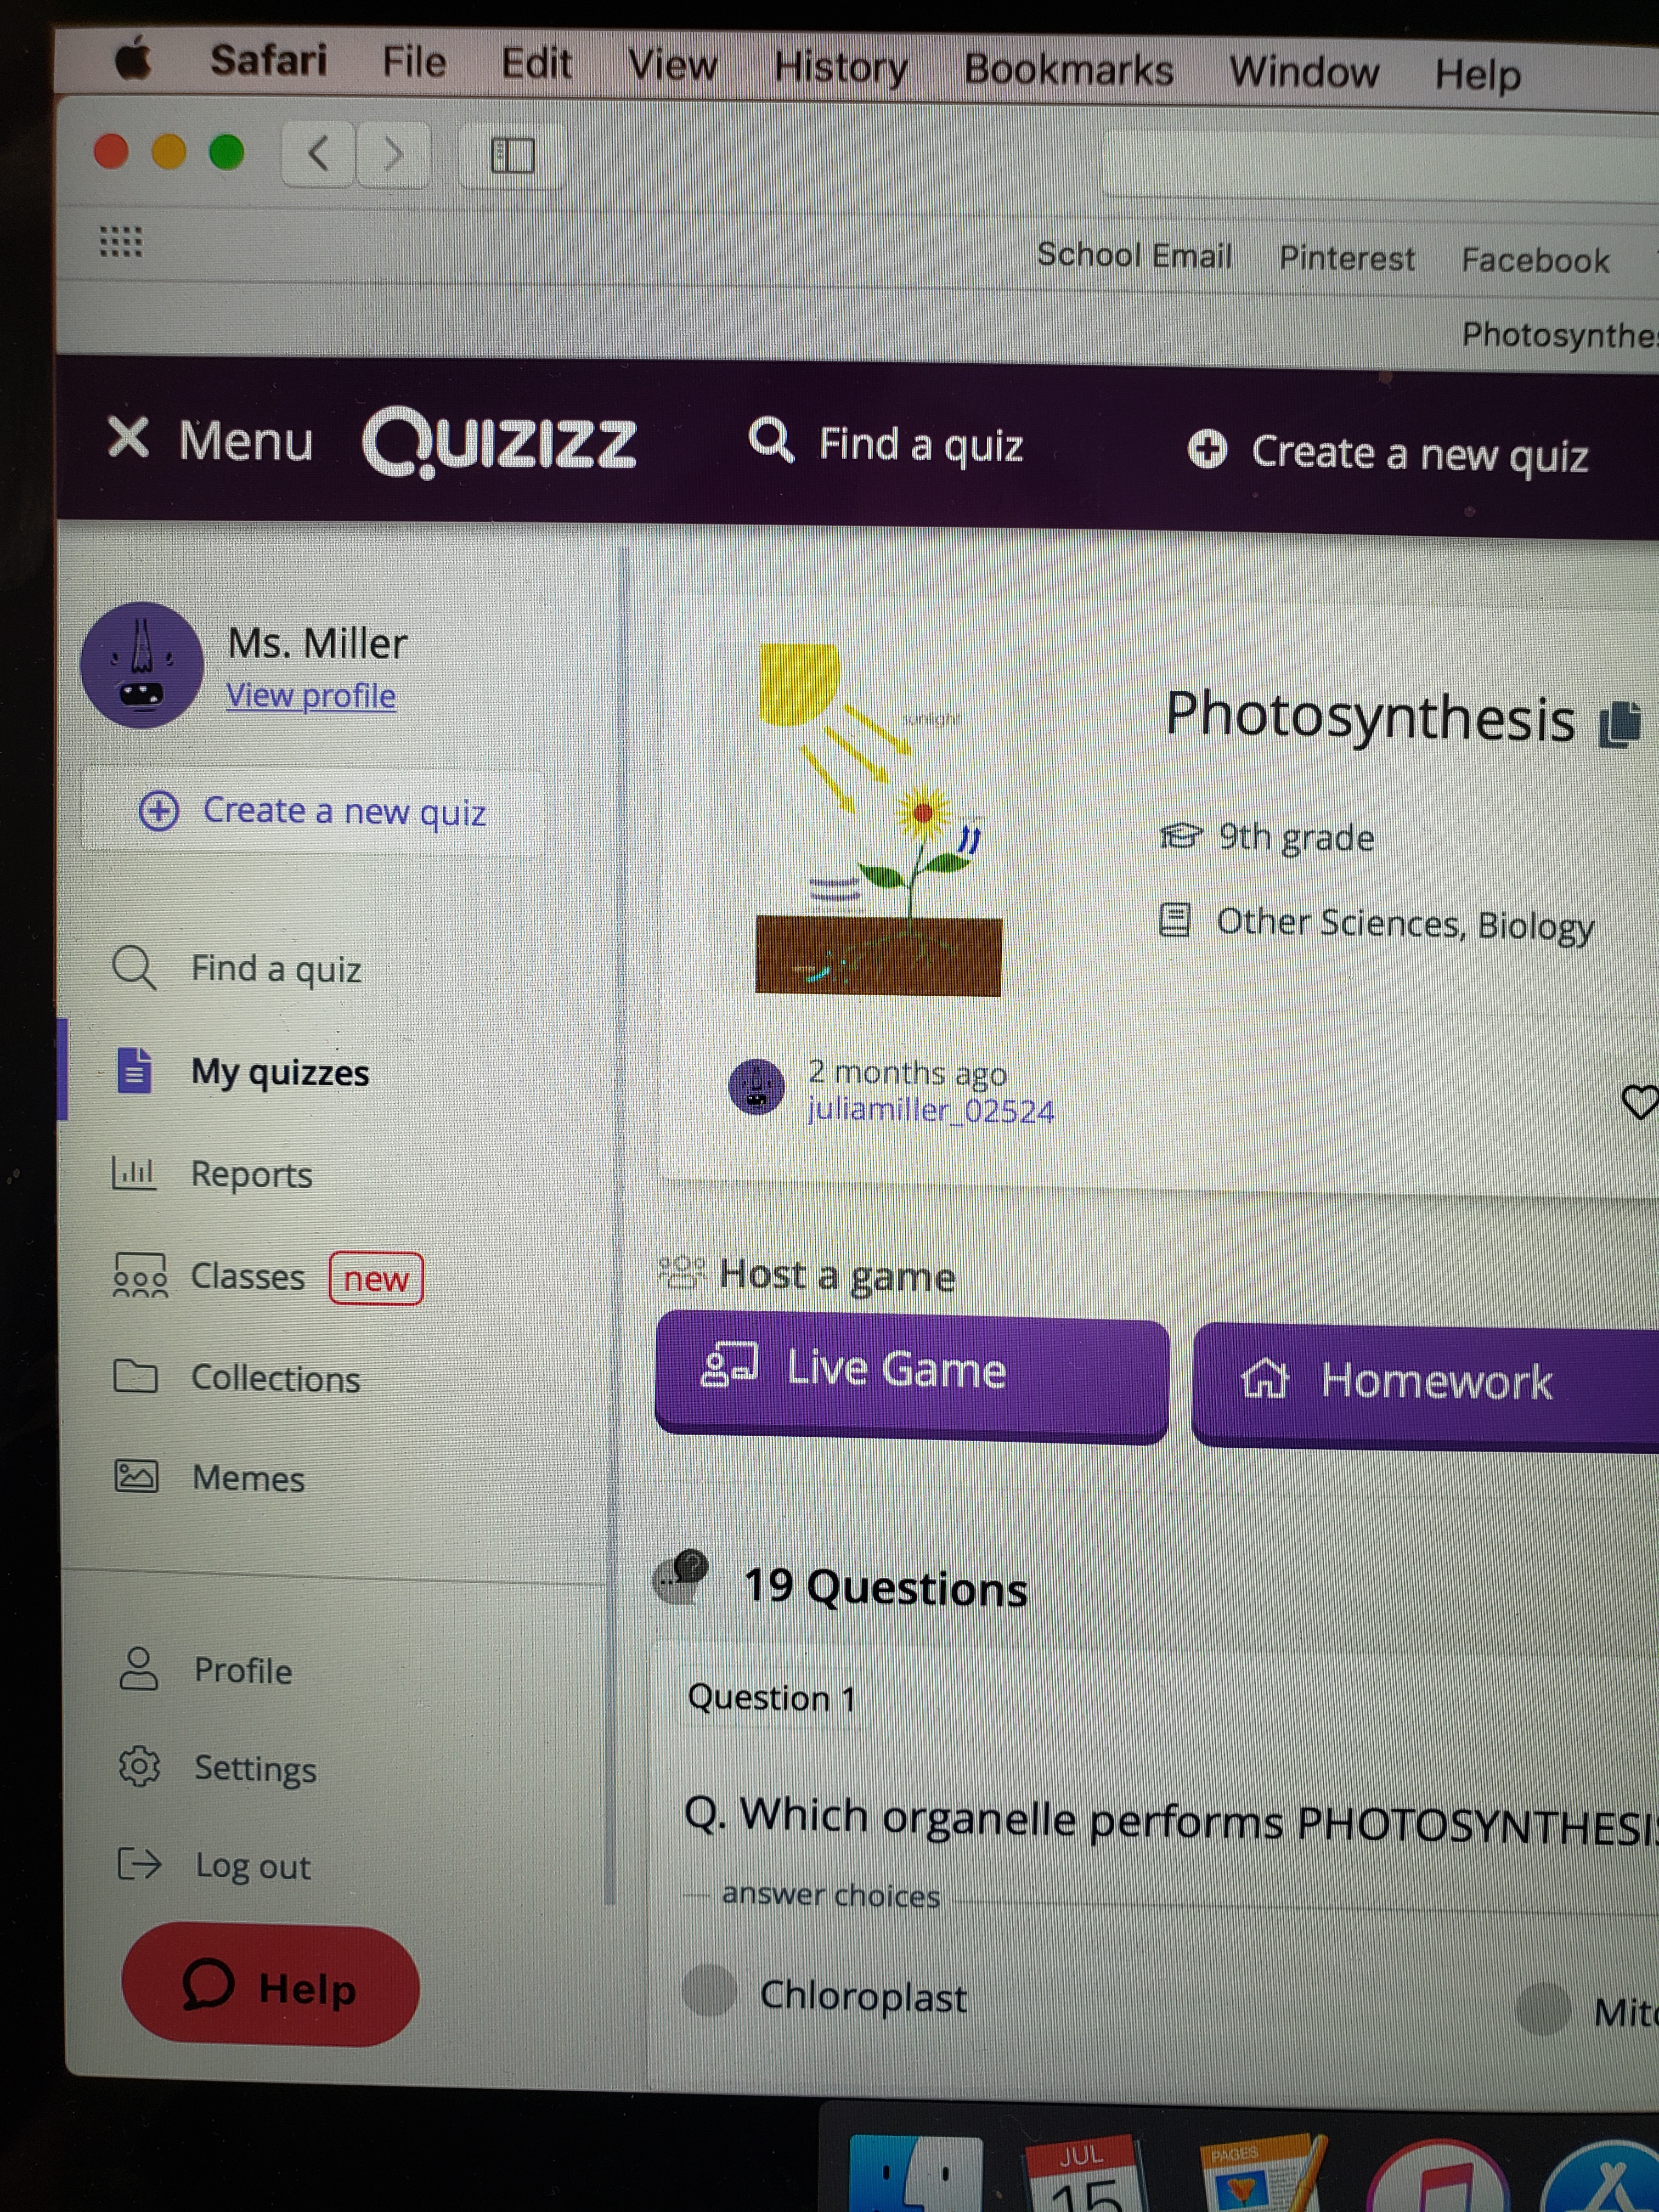
that you could import into your gradebook AND you can email this report to parents (I love this feature!), and it’s FREE! I used this in all my classes this year from freshmen Biology to Anatomy which was composed of all juniors and seniors and it was successful with all of them. You can also use this in a middle school classroom. (Sidenote: I have also Gimkit in my classroom and my students love it, however I find that the free version is harder to use and I didn’t really want to pay for the upgraded version) If you are curious about this tool, check out this YouTube video that I watched before I started using Quizizz.


  1. Starbucks Study Time: This is an idea I got from Megan Forbes’s Instagram page @toocoolformiddleschool but I know a lot of other teachers do this too. Student are allowed to study or work on something independently and quietly while listening to their own music and eating snacks (if they are allowed to) just like they are at Starbucks. It’s a way to hopefully teach students how to work on their own just like they would if they were in college. I did not do this with my freshmen or sophomore students as most of my classes this year had a hard time holding themselves accountable with independent work, but I know a lot of middle school teachers who do this for short, 15 minute segments with success. I mostly used this with my Anatomy class of juniors and seniors and it worked great. Anatomy is so content heavy, that a day of independent study is great for them and many of them will be in college next year doing something like this everyday on their own. Additionally I have all my students fill out a form (pictured below) that explains how they used this time to study, what topics they feel confident about, and which topics they need to study more and I have them turn this into me at the end of class. I love using this time not just for students to work and study, but also for them to reflect on what they know. You can find Megan’s instructions for “Starbucks Time” here.

20190715_102754

  1. Switching Up My Biology Units: This year I took a page out of Rebecca’s wonderful blog https://itsnotrocketscienceclassroom.com and switched up the order of some my biology units. I used to teach ecology during the first semester right before Christmas, but this year I taught it at the end of the year right before genetics and heredity. My students typically always like the ecology and genetics units more than others and in her blog Rebecca argues that putting “fun” and activity-heavy units toward the end of year helps keep your students engaged during those last weeks of school and I have to say I agree. I think teaching these units in April and May kept everyone engaged and interested during the time of year when everyone is usually jumping off the walls. You can read more about this from Rebecca’s blog post here. I know this is biology specific, but even if you don’t teach biology and find that the end of the year is a struggle in your classes, is there a unit or activity you could save for the end of the year that would keep your students engaged? It might be worth switching things around!

And finally:

  1. I Gave Less Homework: Let me begin by saying that I am not a no-homework type of teacher. I do give my students assignments and projects that we start in class and they are expected to finish on their own, but this year I gave fewer assignments than I have in previous years. This last year was my fifth year of teaching, and honestly, I was just tired and hitting the point of burn out. Additionally, I had four different classes to prep for and all that planning and grading really builds up. And I mean really, really builds up. I was tired of grading for hours on Sundays so I dropped a couple of the assignments I normally give and I do not regret it. A couple of years ago I NEVER WOULD HAVE DONE THIS. But as I get older I think it’s important to remember that as teachers we need to keep our teaching MANAGEABLE with the rest of our lives and what I was doing in previous years was not manageable. NEWSFLASH: it’s ok to give ourselves a break.


If you getting ready to go back to school or simply looking for new ideas for you classroom, I hope that you have found something here you can use and implement.

Have you recently tried a new activity in your classroom with success or have you tried one of things I listed above?  I would love to hear about it in the comments below!

signature

Best New Labs I Tried This Year!

With the 2018-2019 school year in the rearview mirror, I spent a little time last week reflecting on the year that was. In doing so, I realized that I am very proud of the effort I put into trying new activities in my classroom. However, this is also one of my greatest weakness as it also makes my life harder with extra planning and, with 4 different preps last year, it can drove me a little crazy too!!! After I reflected on all the new things I did this year, I wanted to bring to you some of the BEST new labs/activities I tried in my classroom in case you looking for new ideas for your classroom. (I know it’s only June, but I know someone out there is already thinking about next year!) Now,  not every new idea I tried this year worked out well, but the labs I’ve listed below are definitely keepers that I will be using in the years to come. Last year I taught Biology (regular level and an honors level, Earth Science, and Anatomy and I’ve included activities for each of these classes.

  1. Bio: Bubble Gum Lab– I did this as my first lab in my Biology class this year, to introduce lab expectations and lab report requirements. In my regulaIMG_20180905_171125_151
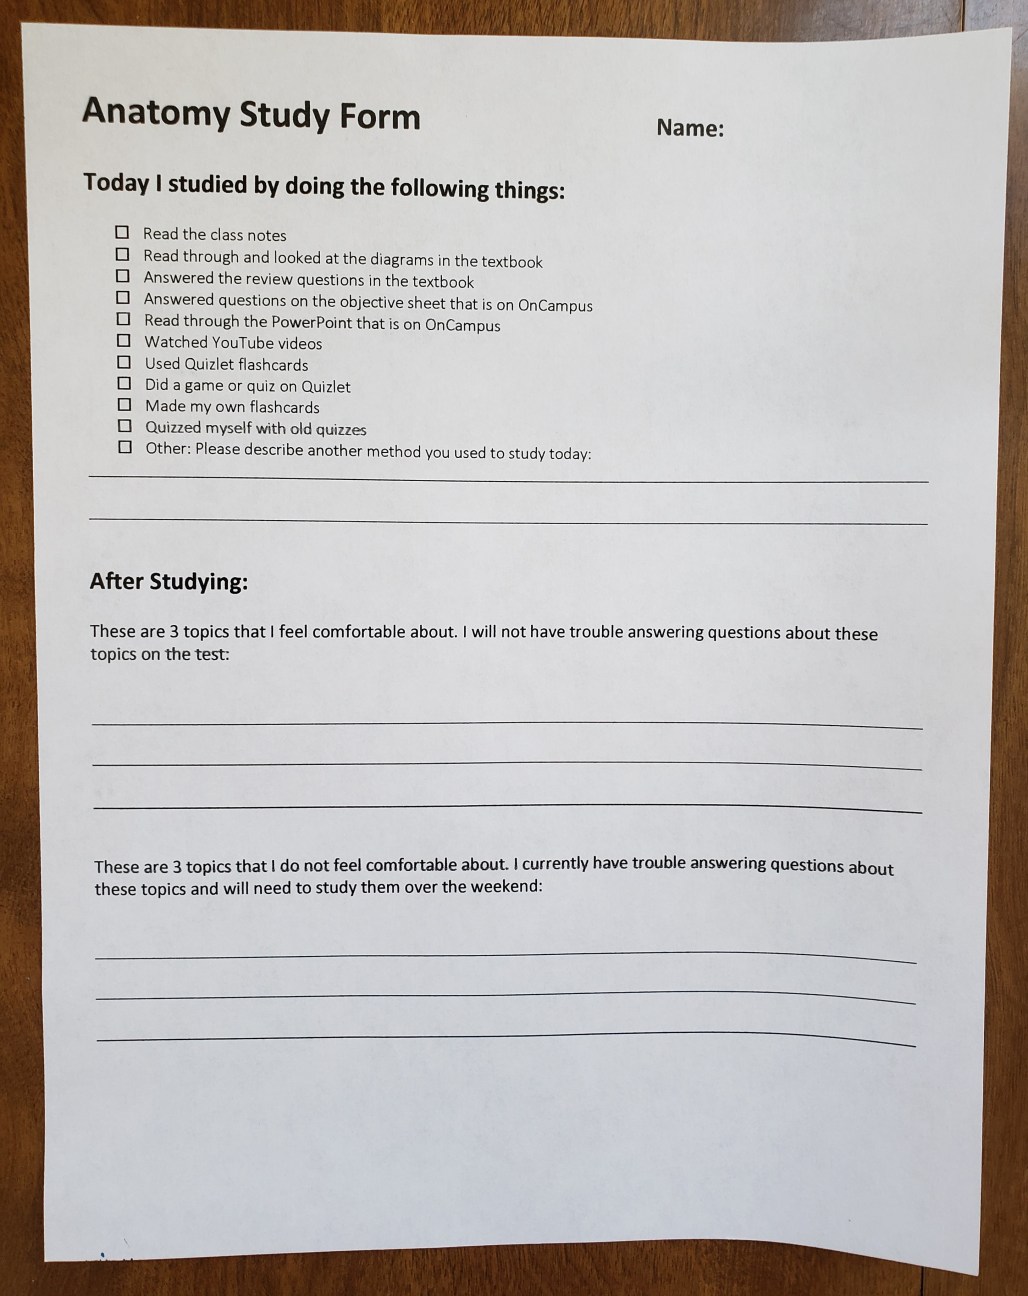
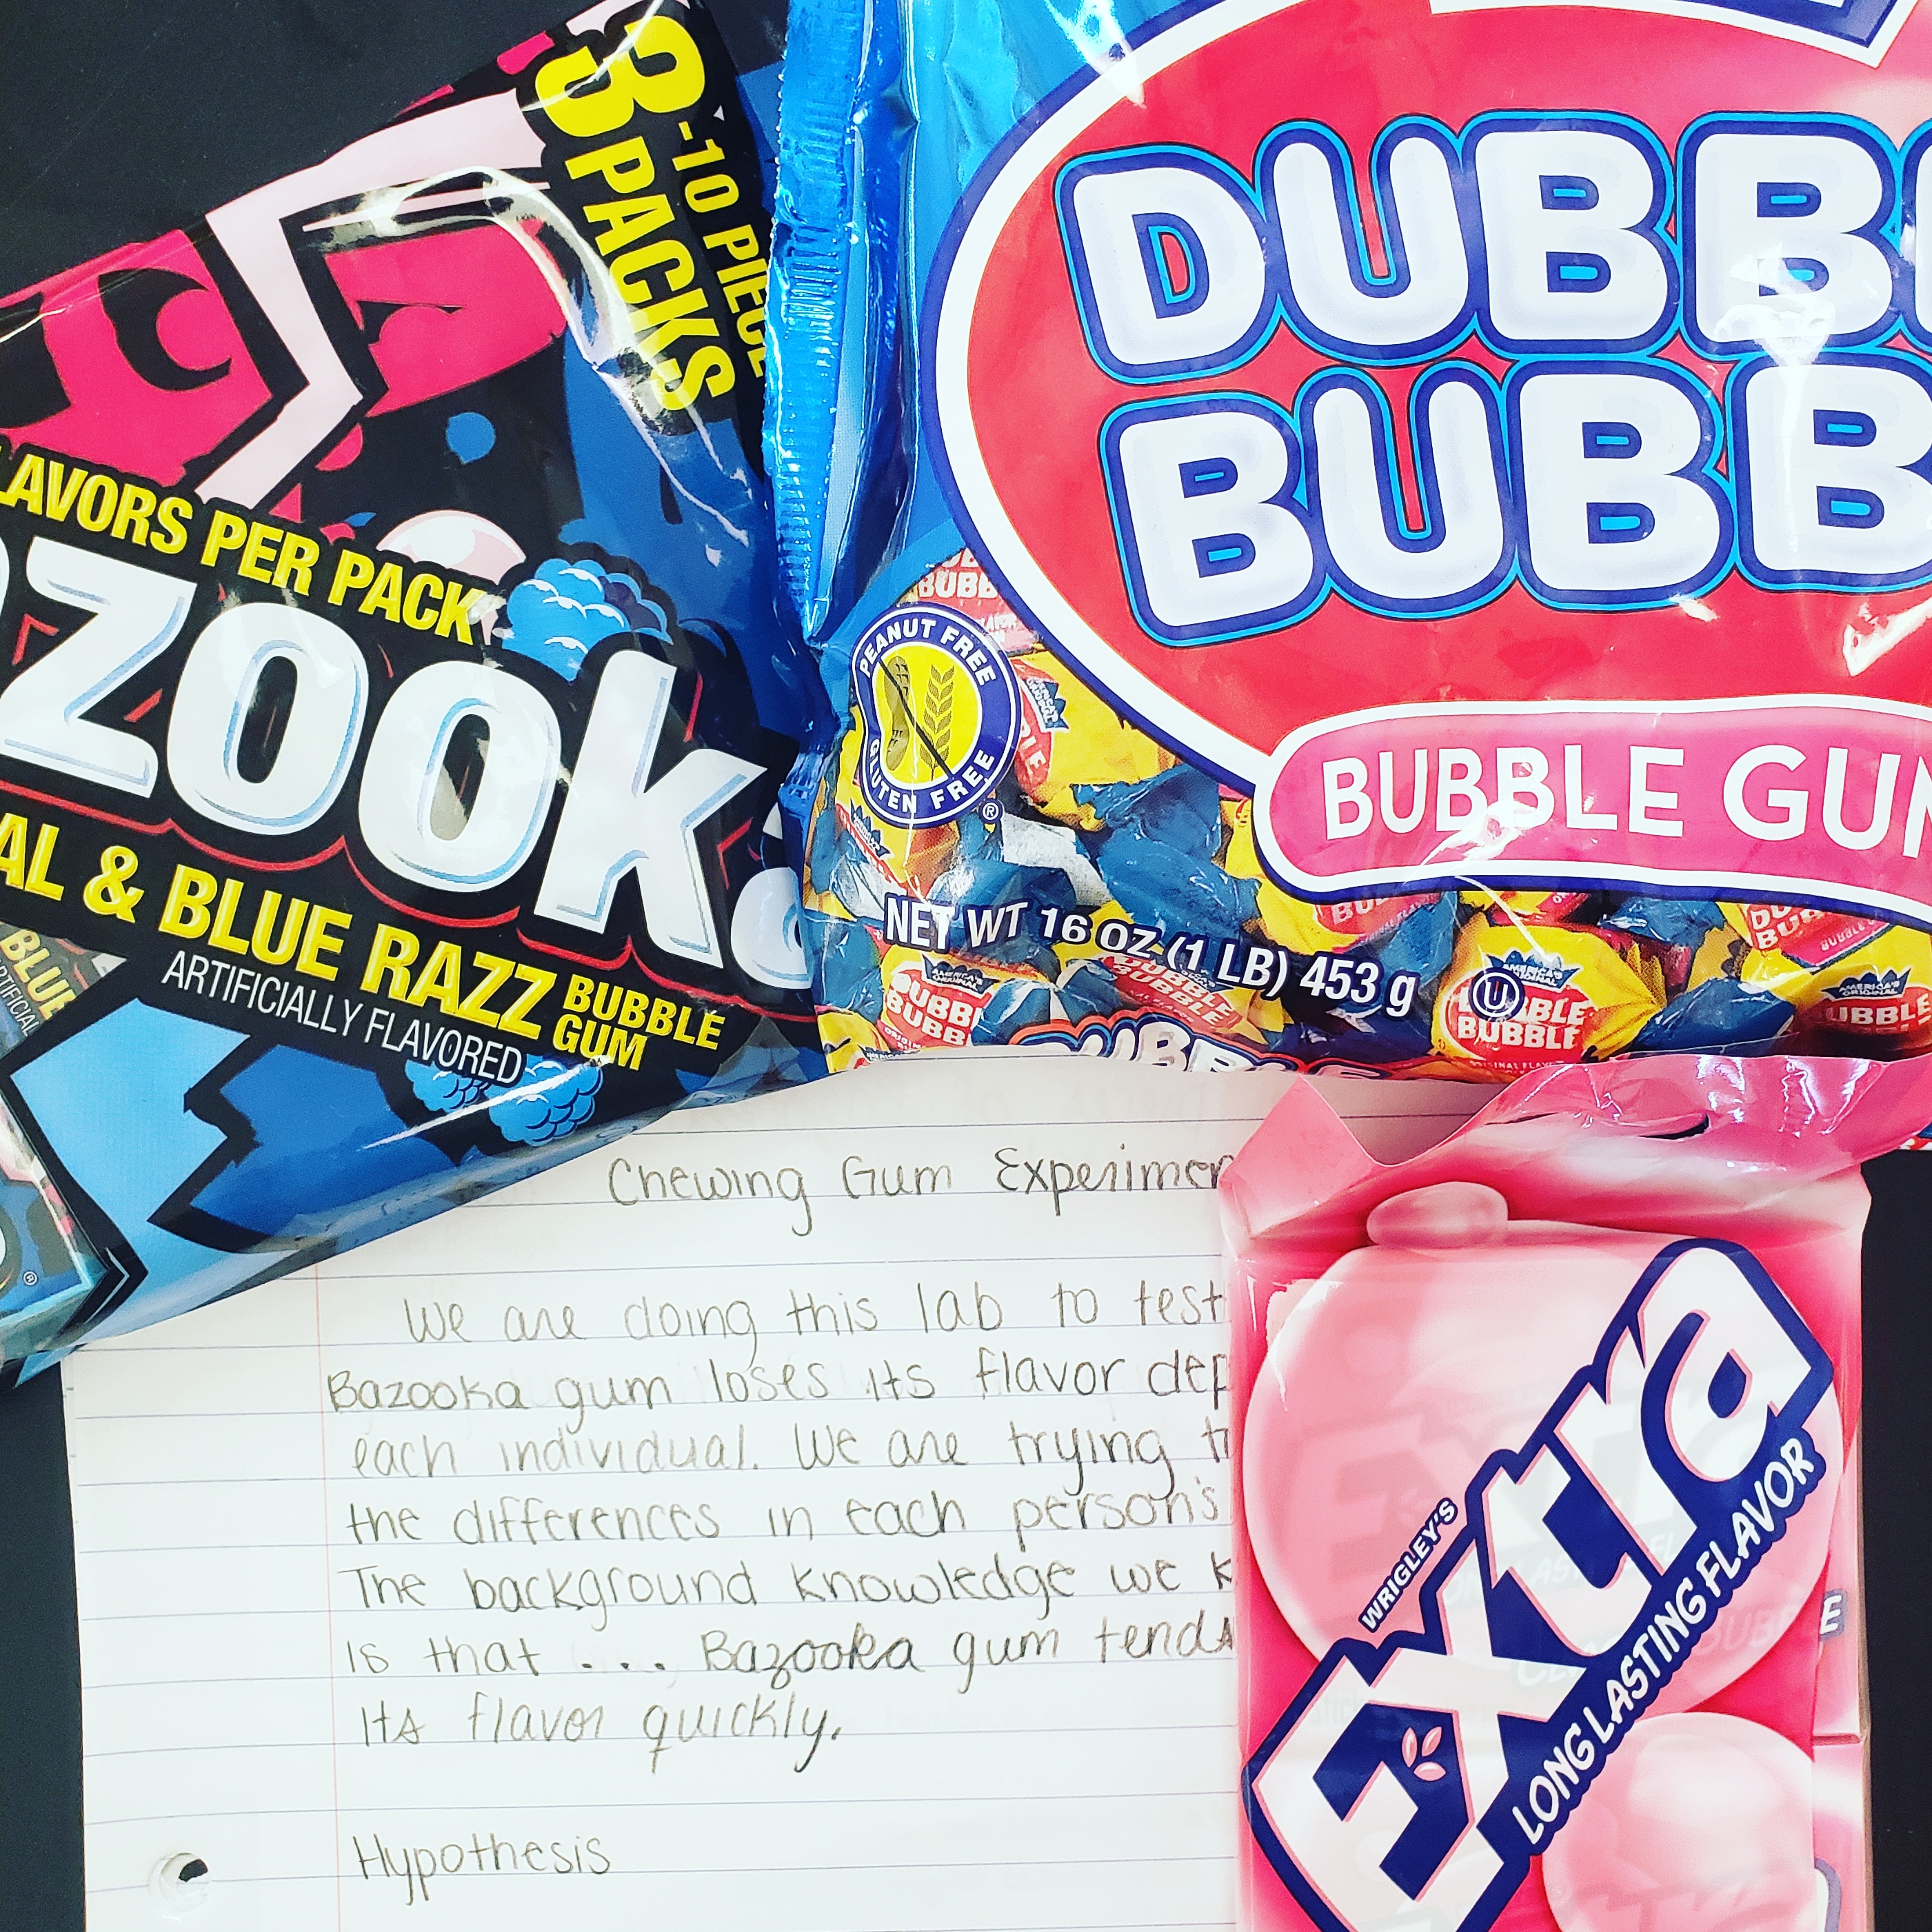
r Bio class, I gave my students several brands of chewing gum and told them to design an experiment that would find which brand blew the biggest bubble. In my Honors Bio class, I gave my students the different brands of gum, but they designed an experiment that tested anything they wanted. Some tests bubble size and some tested which brand held its flavor the longest. I’m so glad I did this lab because it’s inquiry-based, students learn and practice experimental design, it has easy set up, and it’s FUN! You can find more descriptions abouIMG_20180906_155113_092
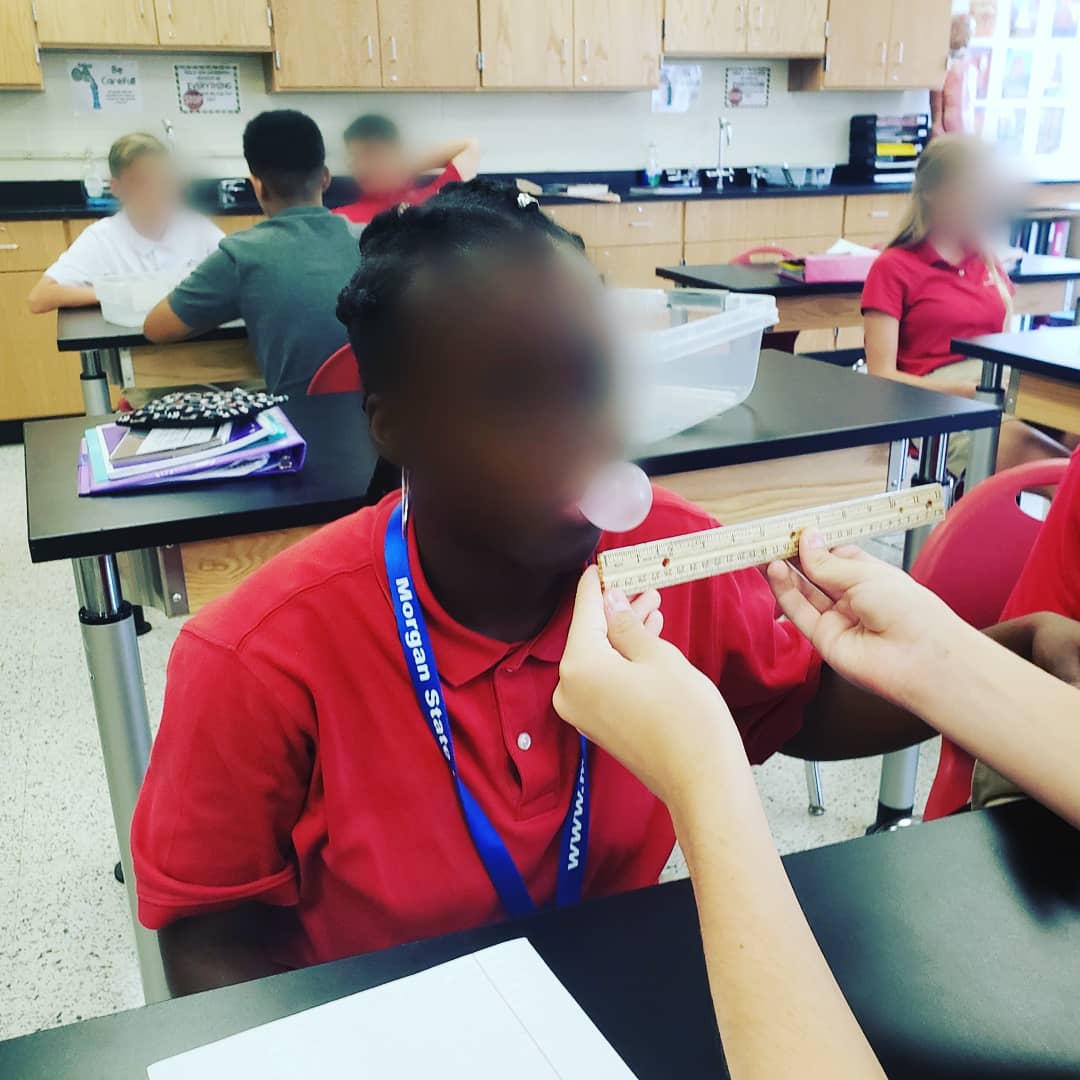
t this lab on Mrs. Miko’s wonderful blog: Refuse to Reinvent the Wheel (https://refusetoreinventthewheel.wordpress.com/2015/01/04/the-ultimate-bubble-blowing-champion/)
  2. Bio: Balloon Diffusion Lab– Most years when I teach cell transport through the cell membrane (diffusion, osmosis, active transpoIMG_20181129_171704_794
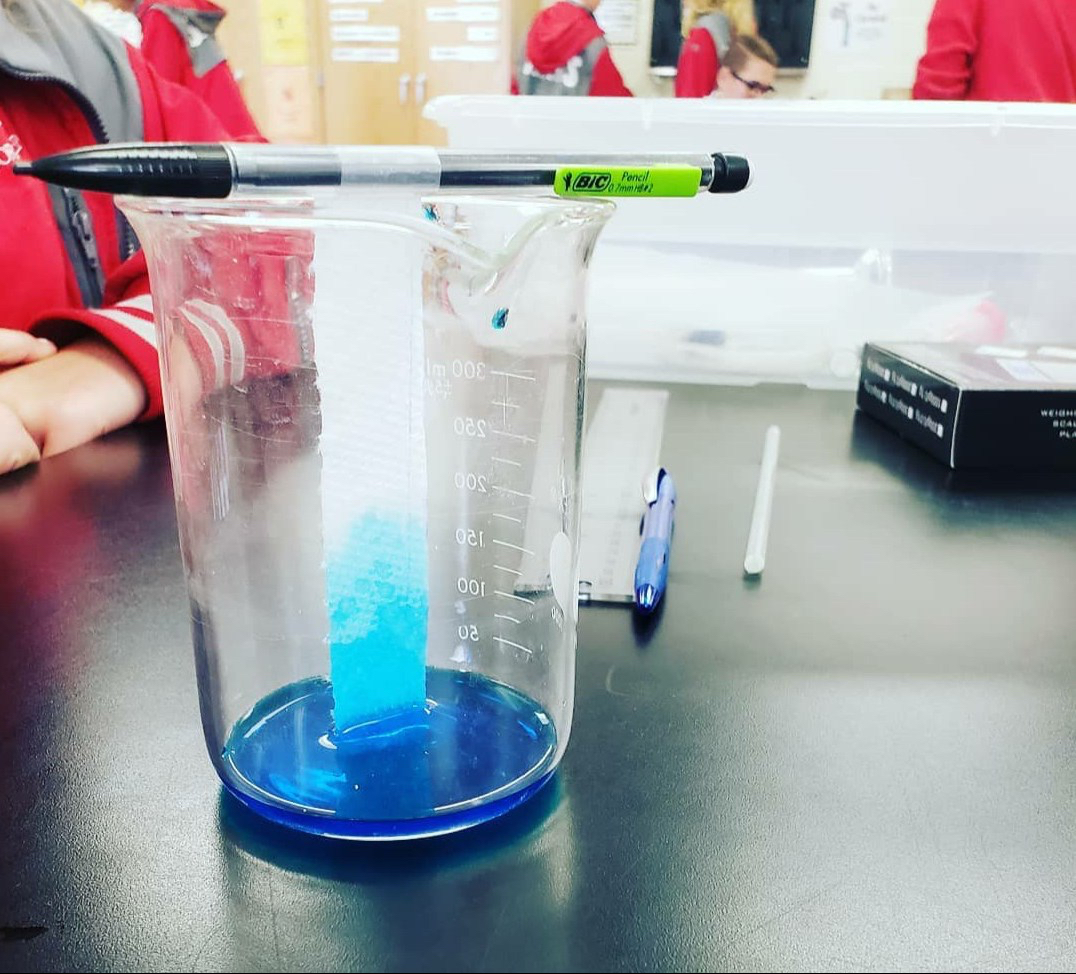
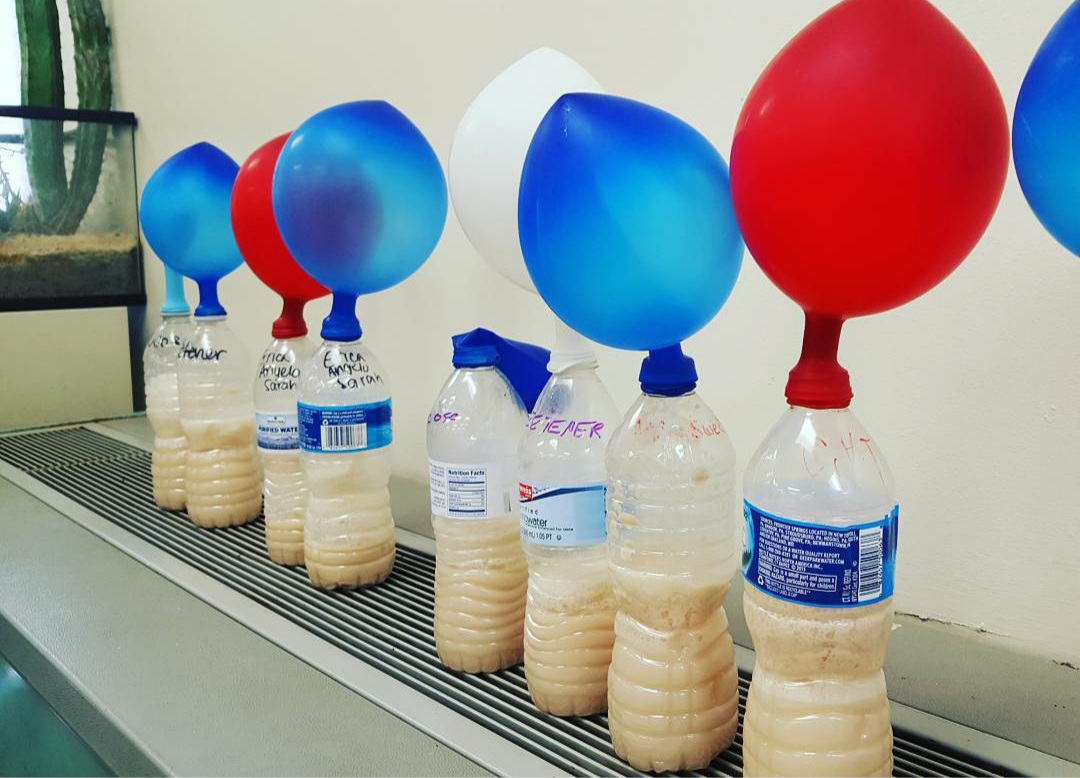
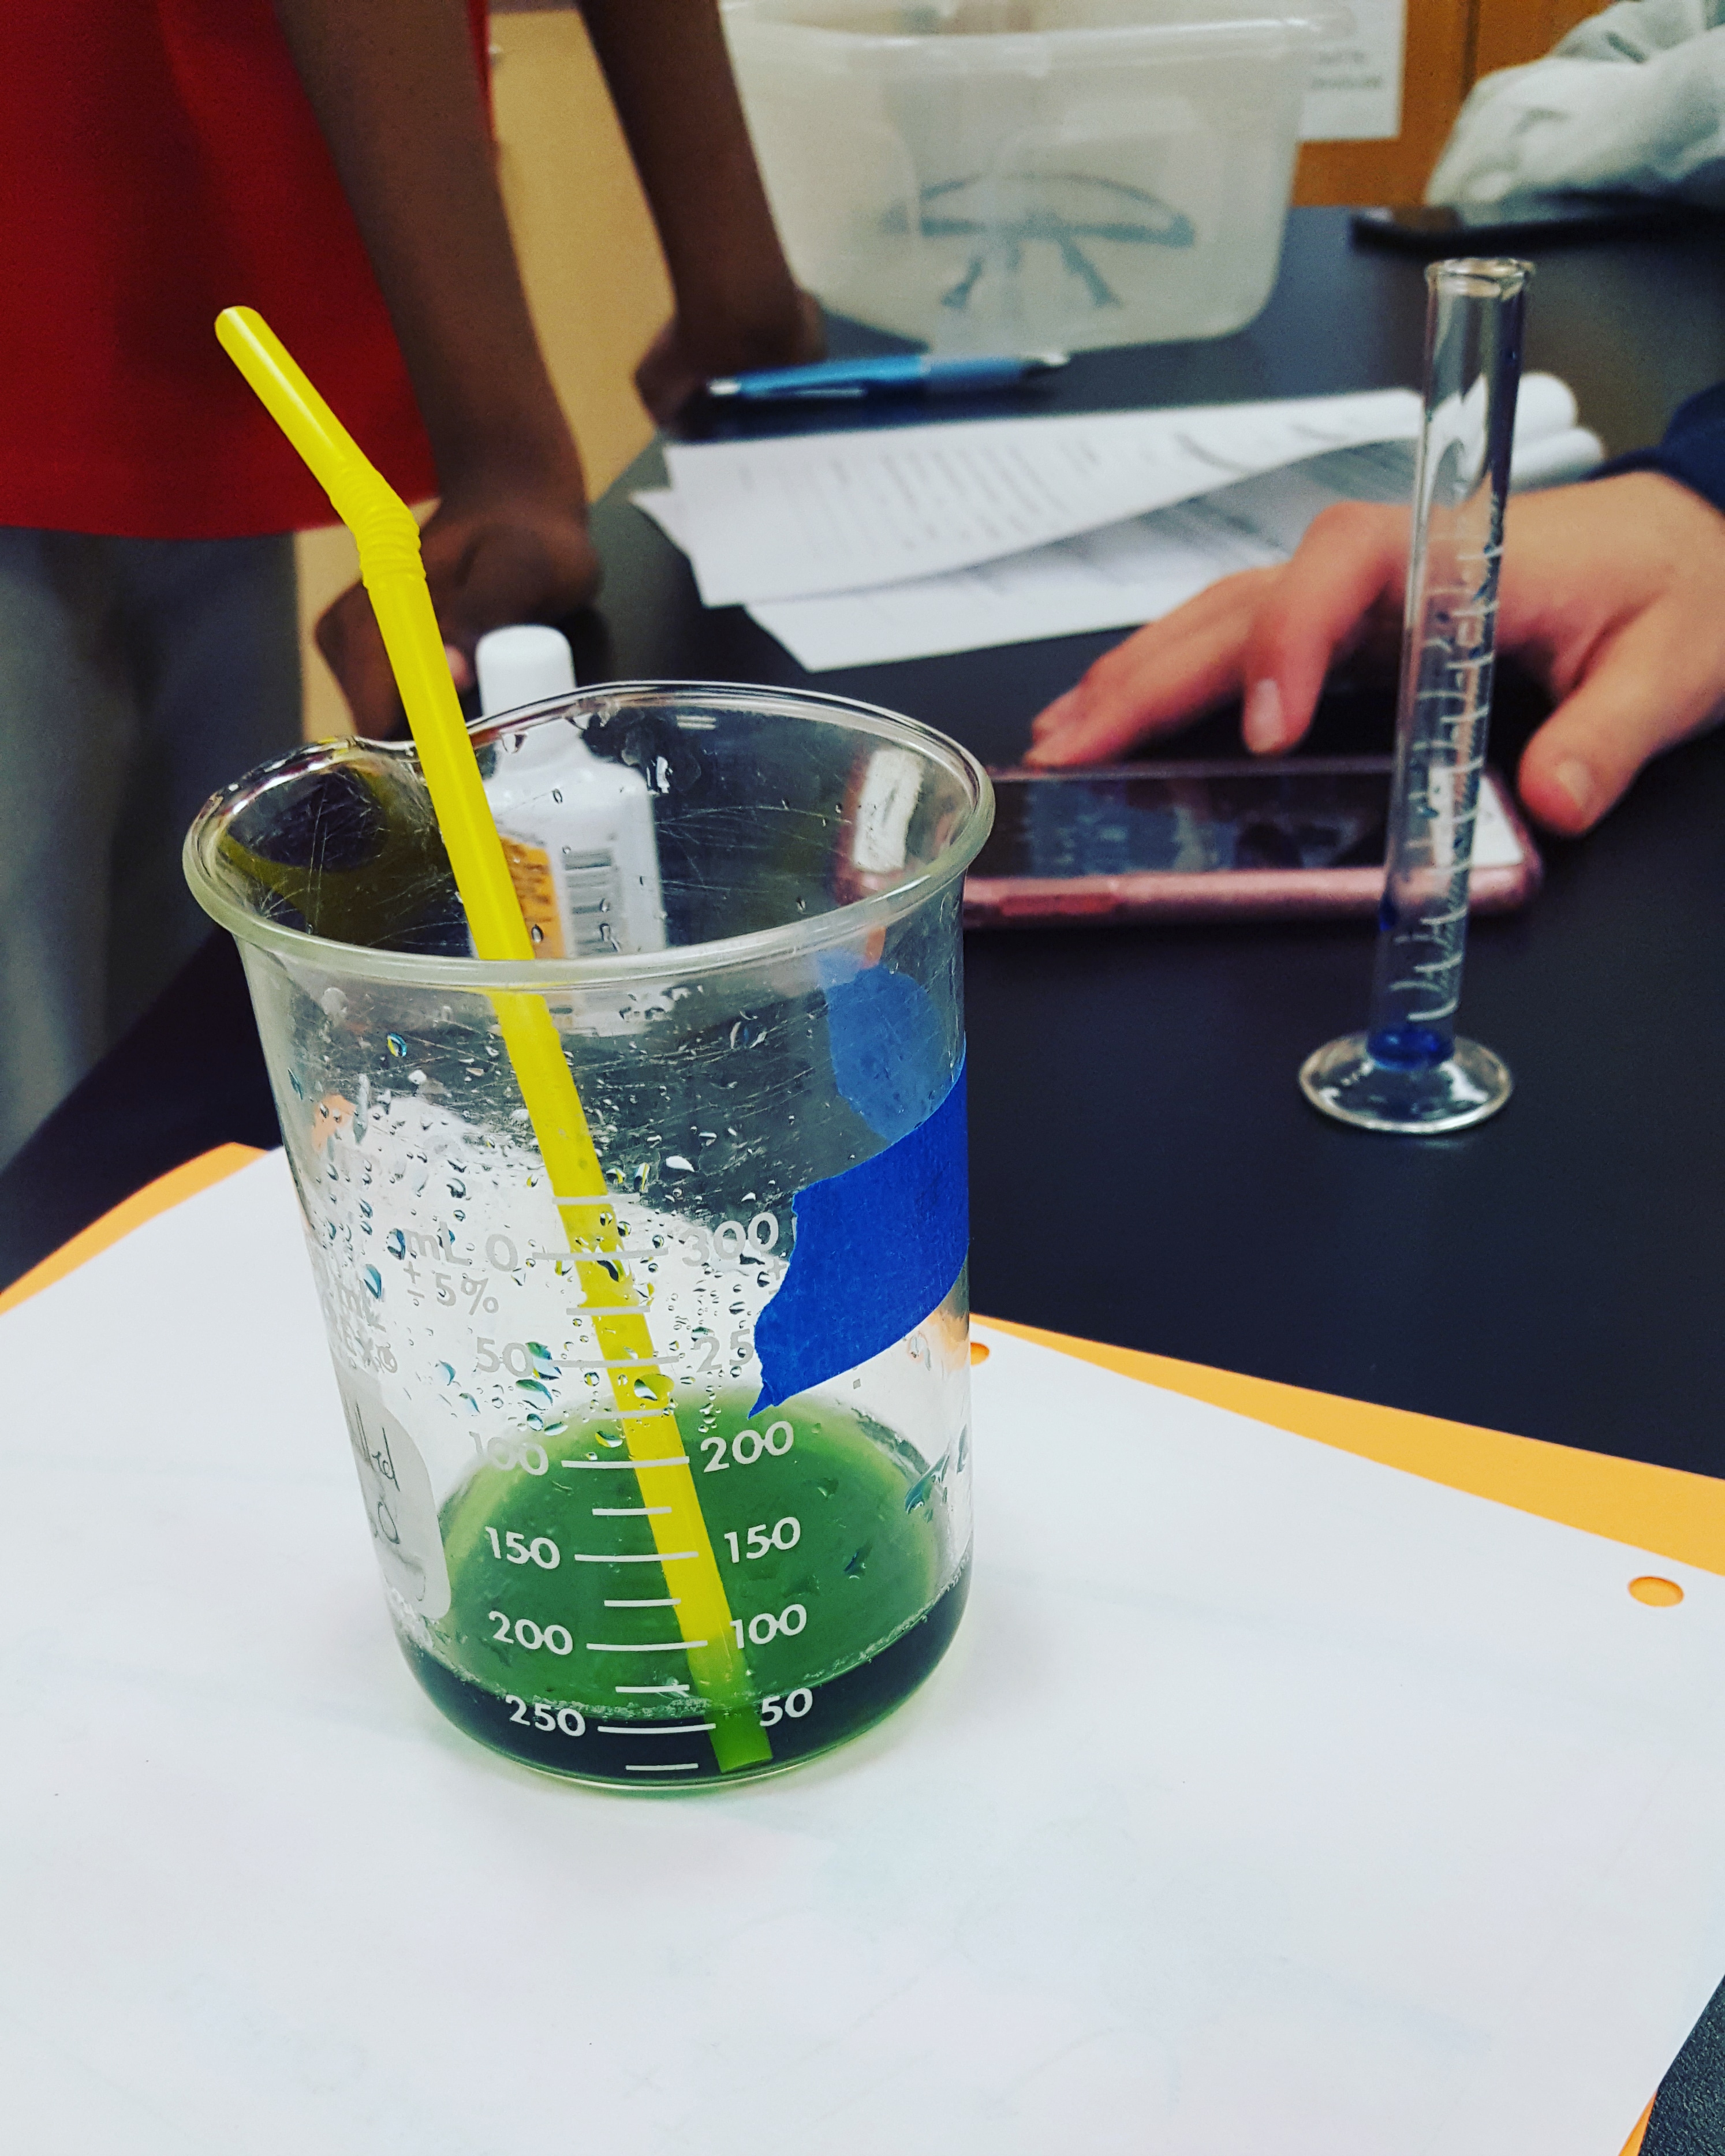
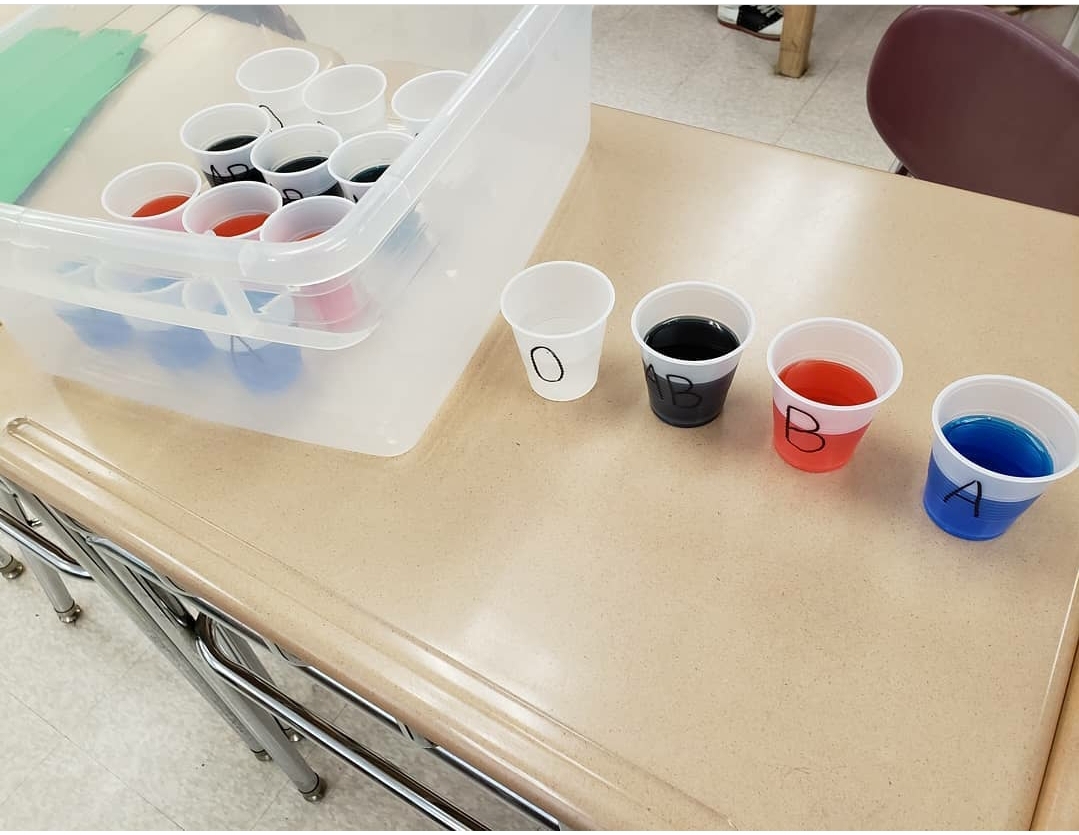
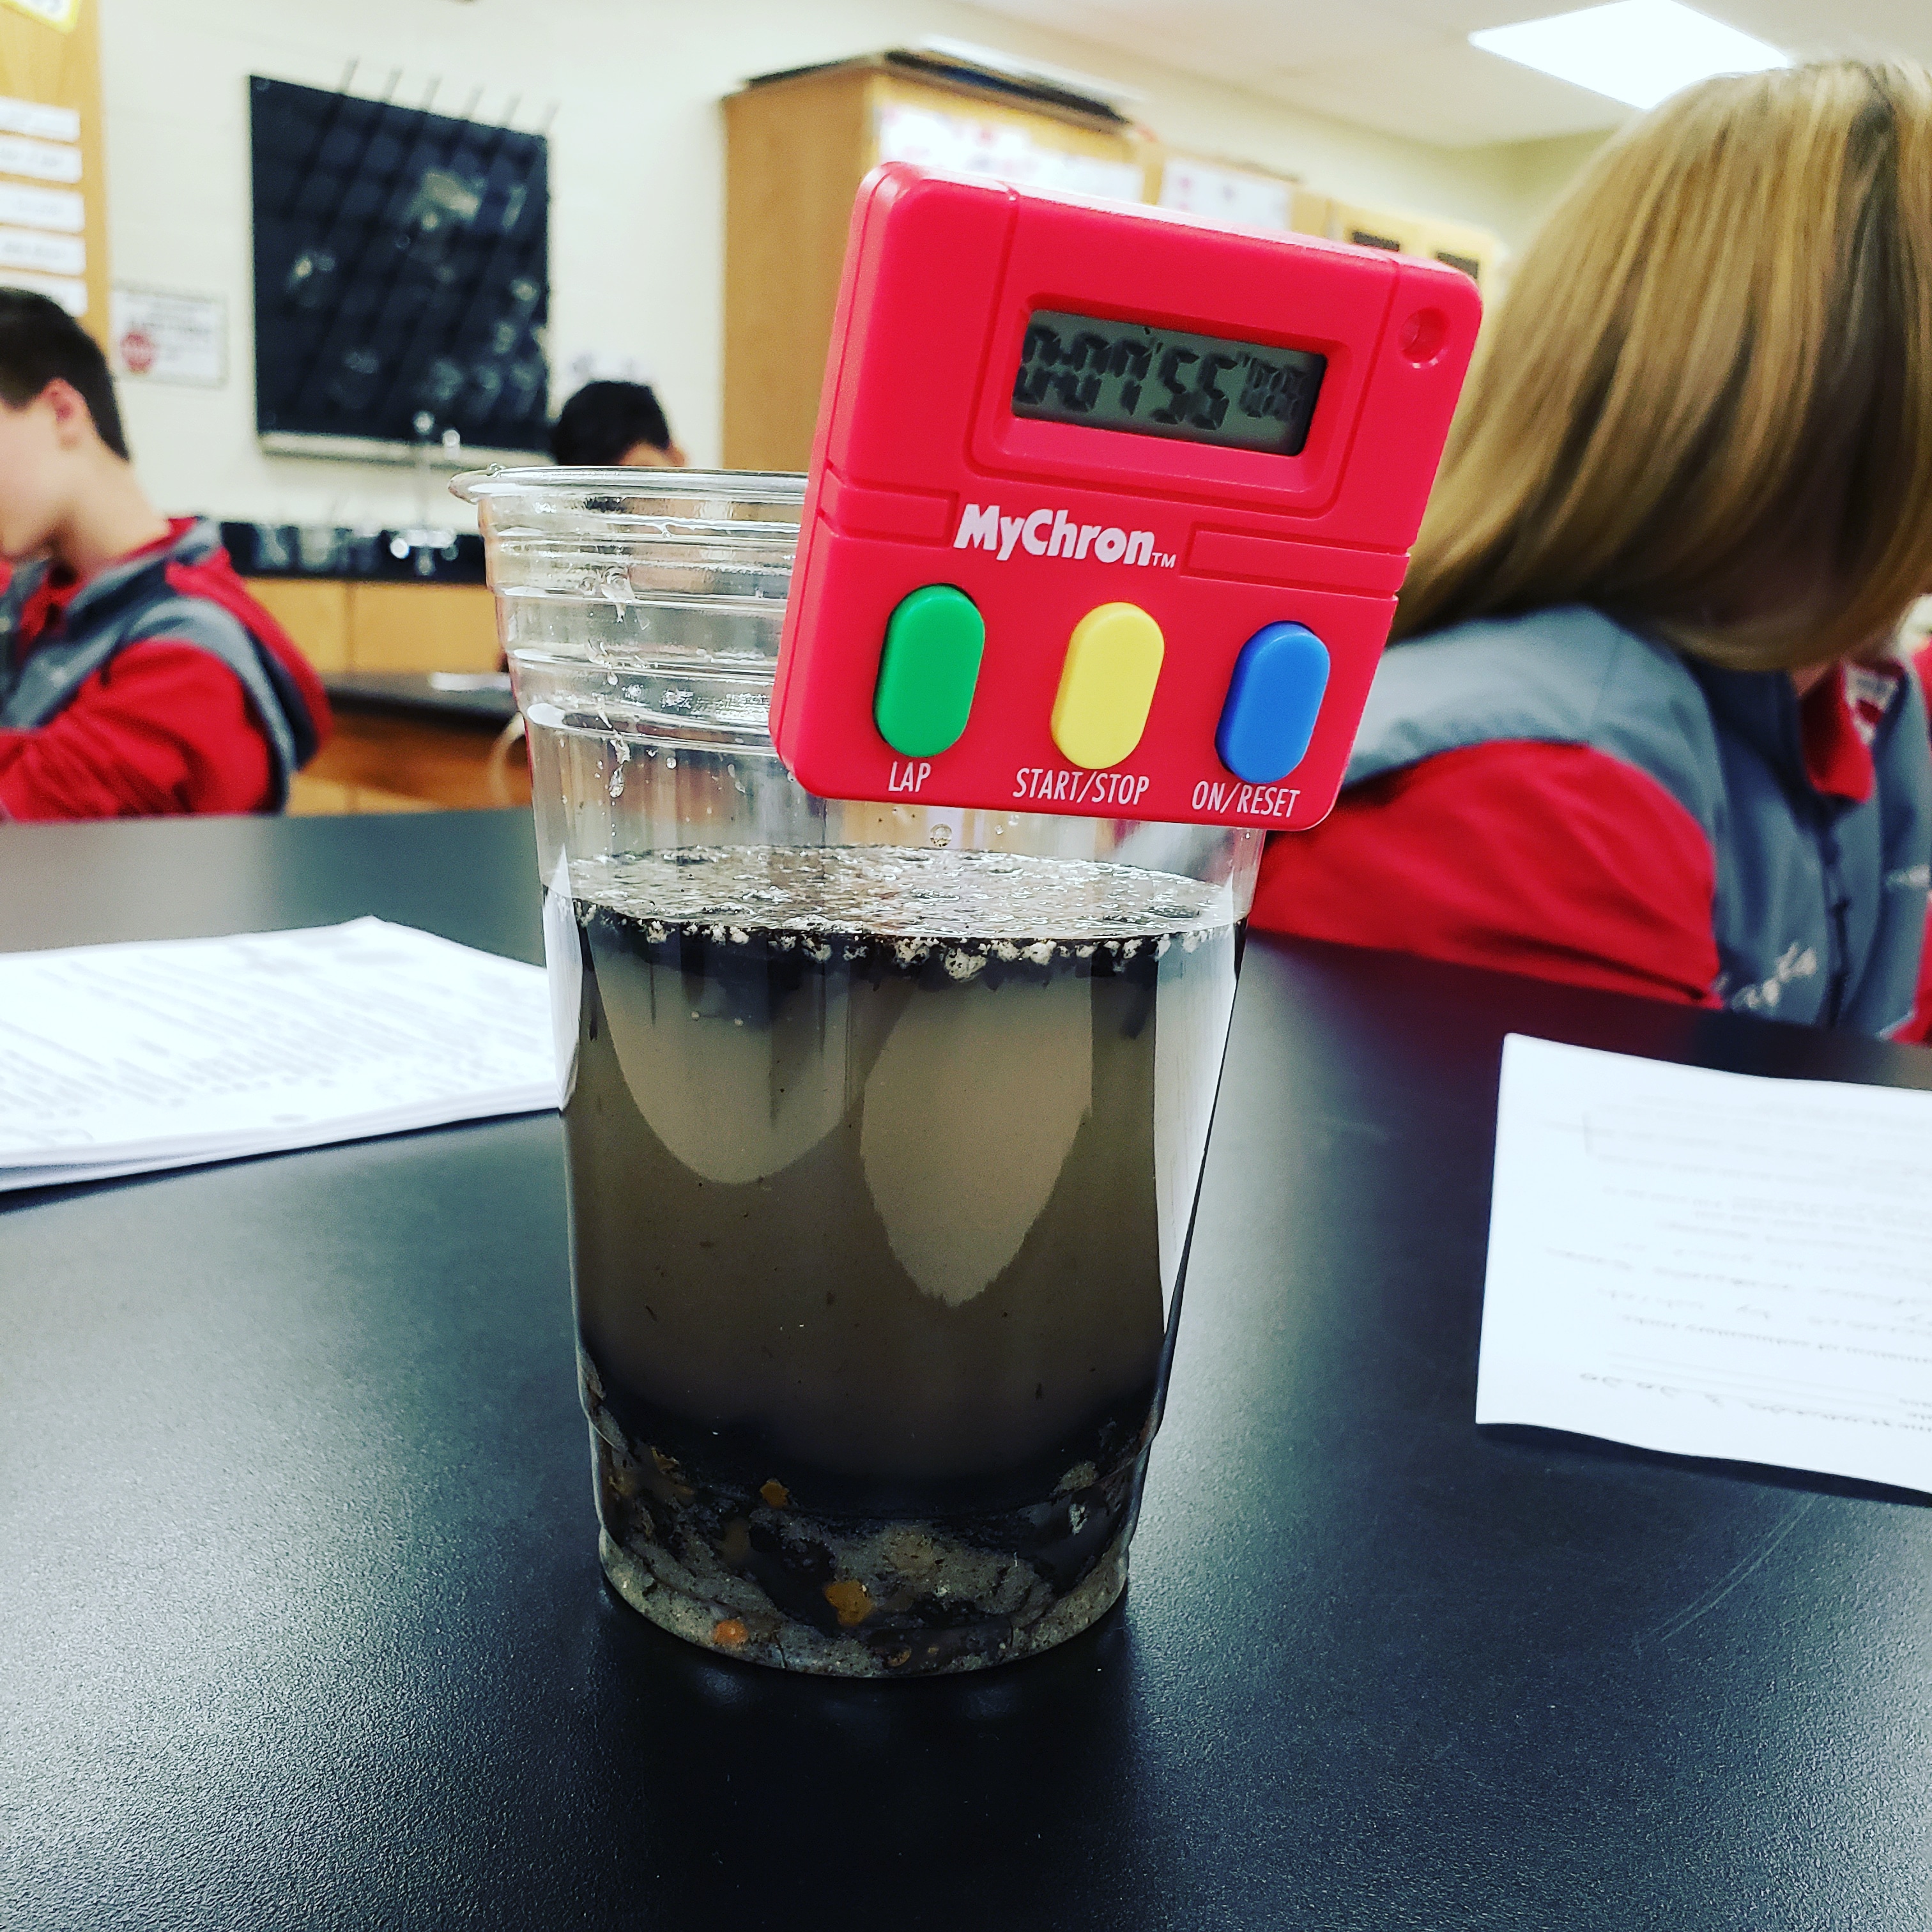
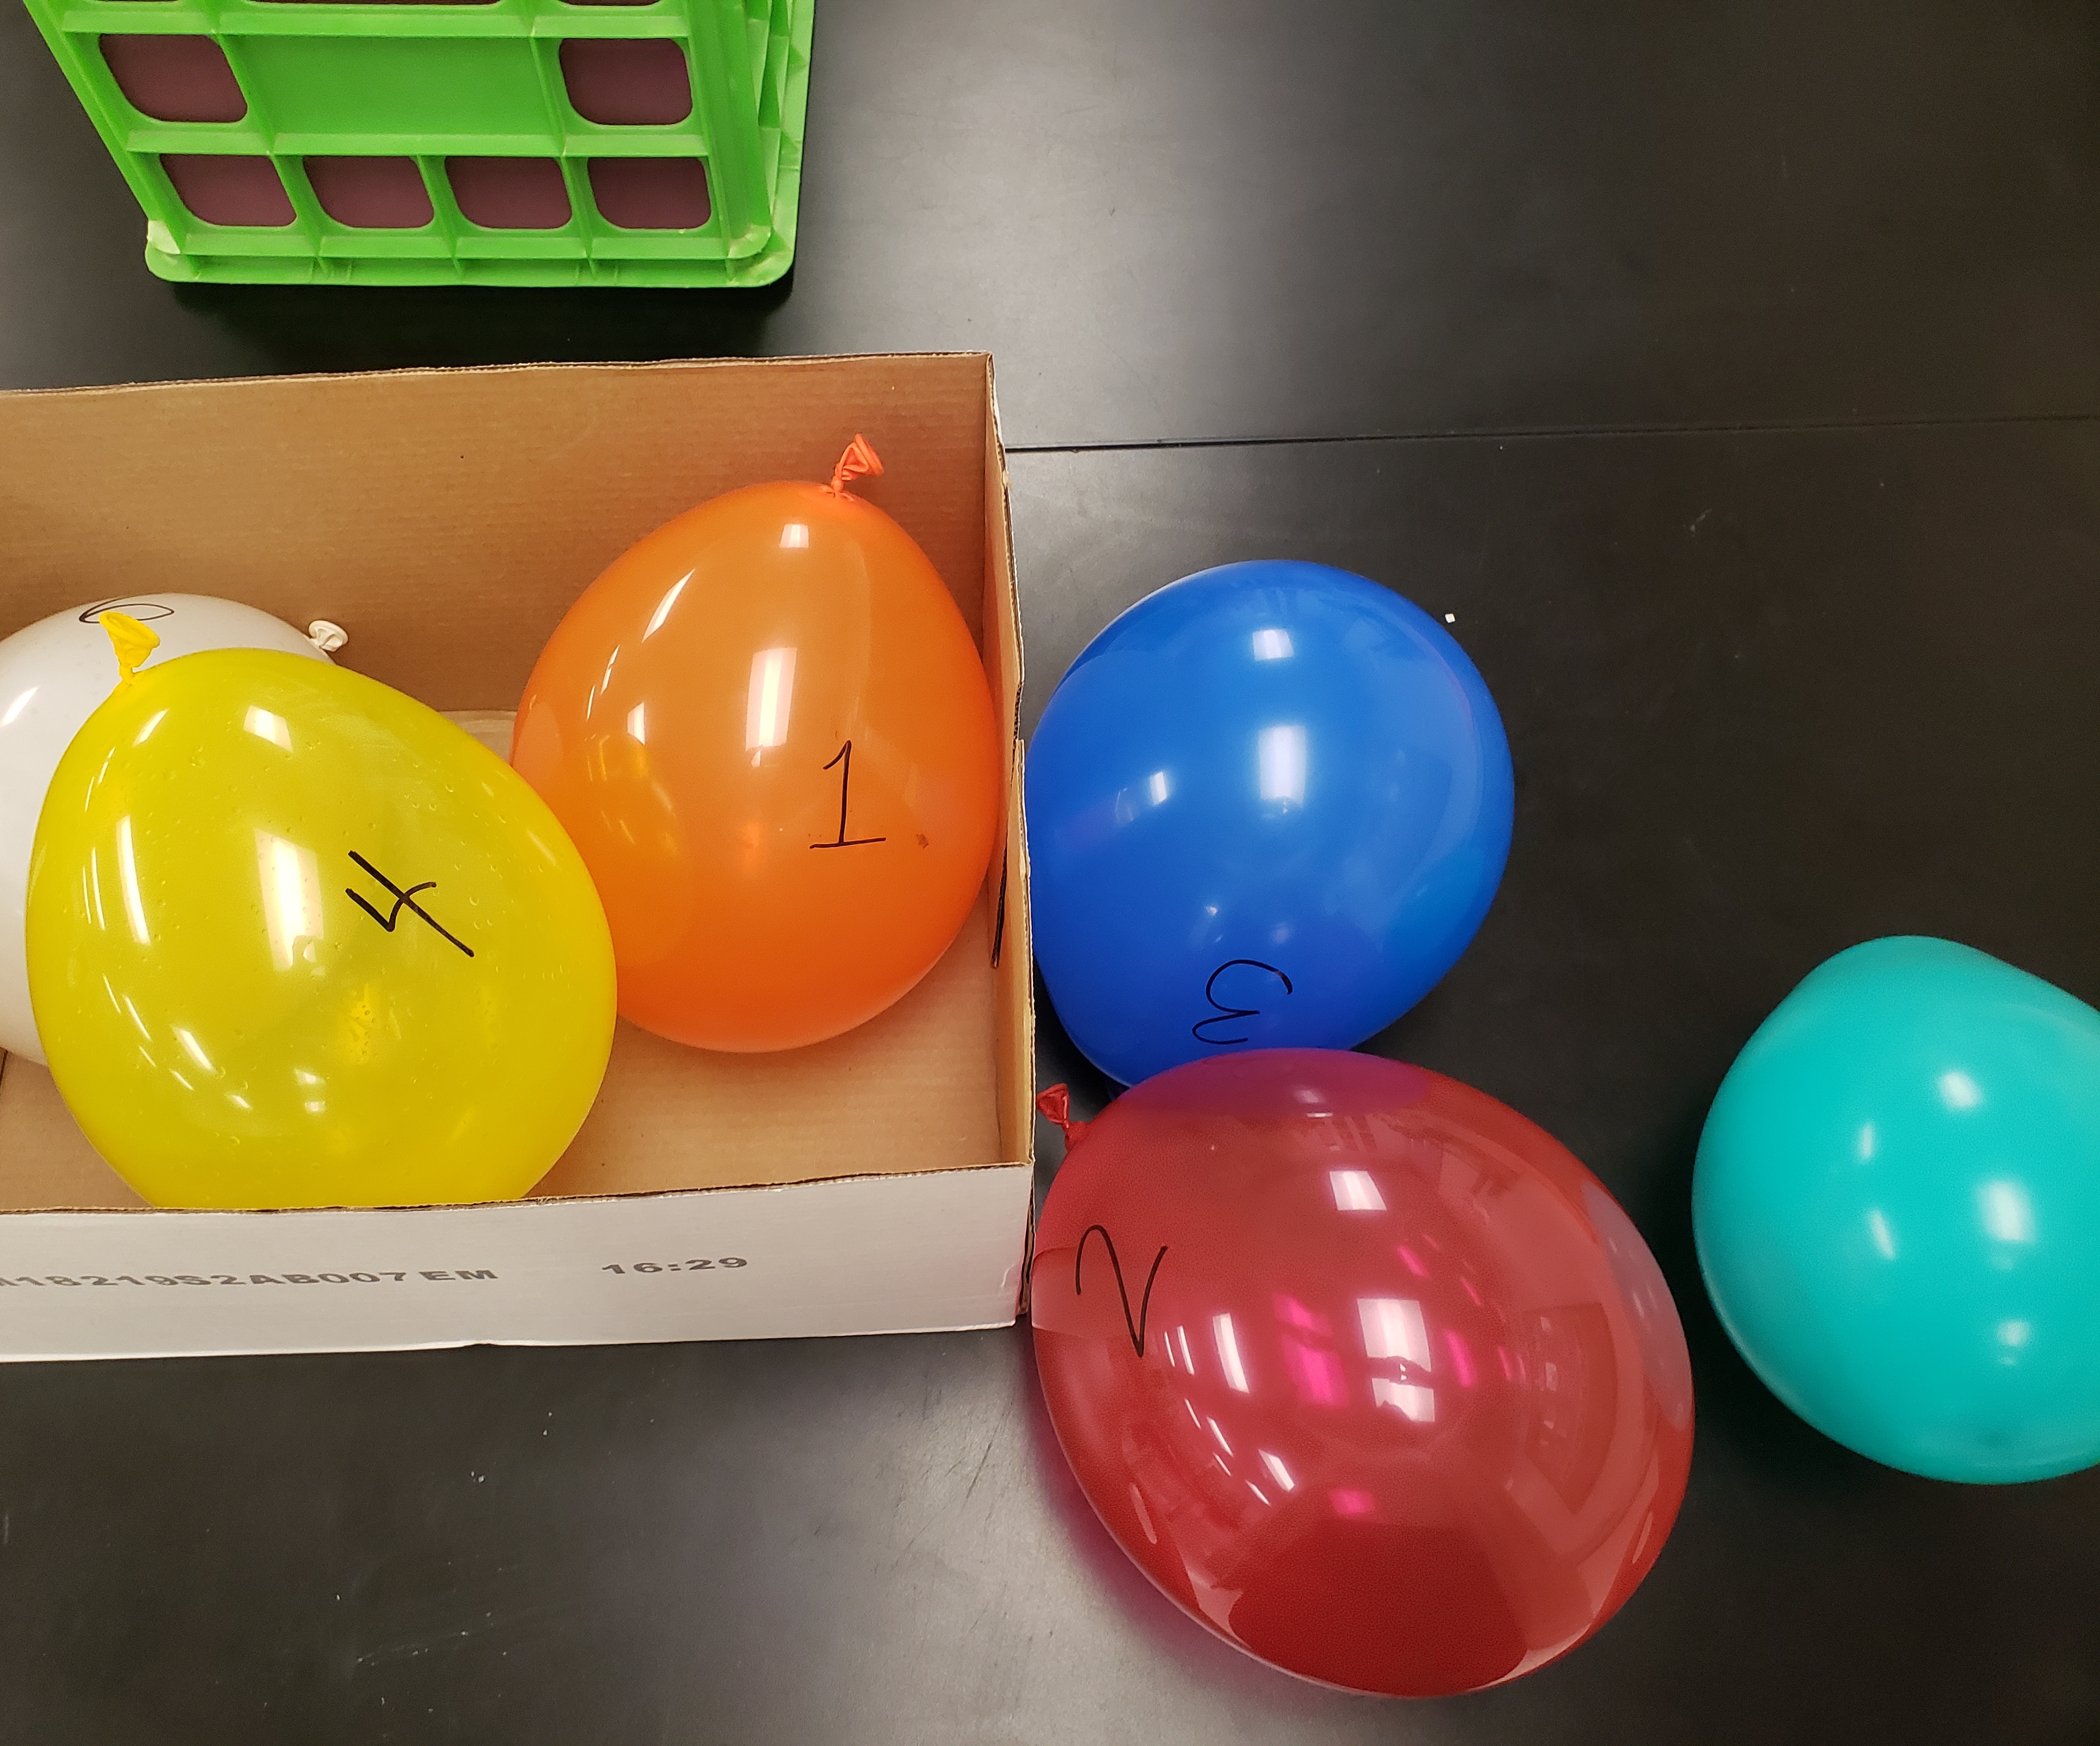
rt), I do a lab where students put starch and water in a little piece of dialysis tubing, tying it off, put it in a glass of water, and drop iodine into the glass. The students then watch the iodine diffuse into the dialysis tube turning the tube blackish/blue. I really love this lab, BUT my biology class had some issues with appropriate lab behavior this year so did a balloon diffusion lab instead. I adapted this pdf from Flinn scientific (https://www.flinnsci.com/api/library/Download/d38c19c446cc40d9b52270ae3187e268) to fit my needs and worked pretty great. Essentially, you put different extracts into the balloons, the smells from the extracts diffuse out, and students try to get what smell each balloon contains. This particular class probably learned more about diffusion from a simple demonstration like this than from the dialysis tubing lab, and it was a great reminder for me that more complex labs don’t necessarily mean better learning.
  3. Earth Science: Erosion Lab– In a similar vein to the balloon lab, I did this lab in attempt to make my life easier. (I had 4 different lab classes to prep for last year and sometimes you just need to make your life more MANAGEABLE amiright???) In my earth science classes I have tried so many different landslide labs when we learn about erosion. They have all been rather messy and time consuming and I am sick of hauling very heavy bags of sand from Home Depot into my classroom! This FREE lab from Ari at The Science Penguin (https://thesciencepenguin.com/2012/11/soil-the-capacity-to-retain-water.html) worked well and met my needs! This lab focuses on the water retention of different soils and not on erosion specifically, but I added some additional analysis questions and my high school students were able to draw connections between the two concepts. IMG_20190109_170437_757
  4. Earth Science: Sedimentary Rock Lab– I’ve tried several times and without much

    IMG_20181114_164853_623
    Sedimentary “rocks” made of graham crackers and sugar water

    success to make sedimentary rocks in plastic bottles or paper cups with different materials found outside. It takes too long for the materials to dry and turn into “rocks” and my students never really get a clear picture of sedimentary rock formation. This year I used a lab I found TPT from Mrs. Ruff (https://www.teacherspayteachers.com/Product/Sedimentary-Rock-Lab-Edible-Rock-Cycle-2085993) We were able to clearly see graded bedding in the first part of the lab and using graham crackers and sugar water to make sedimentary rocks in the second part of the lab gave my students a much better understanding of weathering, erosion, compaction, and cementation.

    IMG_20181113_165855_759
    I put a mixture of different soils and sand in a bucket of water and then poured a little bit in a clear cup for each lab group. Students then timed how long it took for the different materials to settle out and showed them how graded bedding works.
  5. Anatomy: Banana Autopsy– At the beginning of the year in anatomy, it is very 20180913_120940
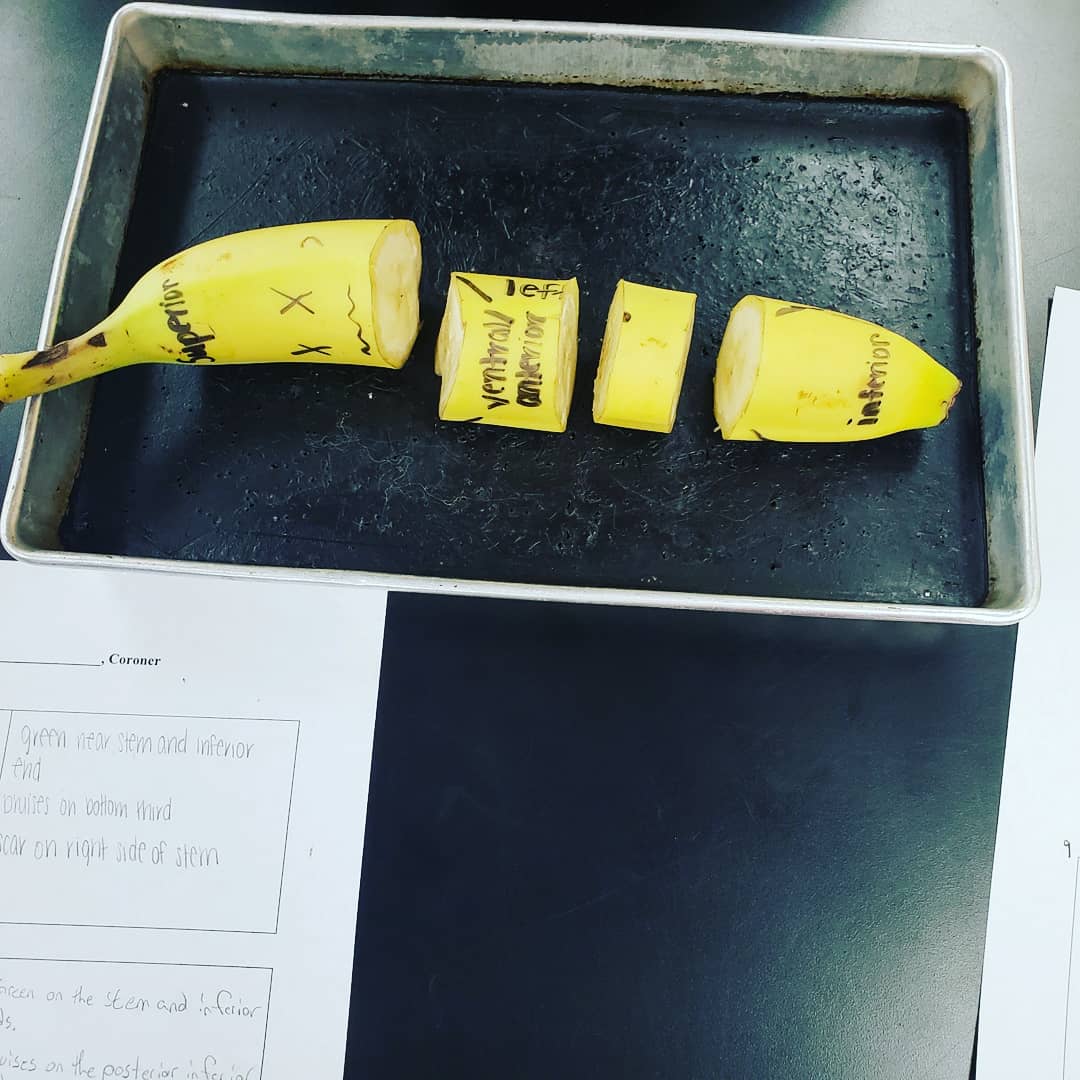
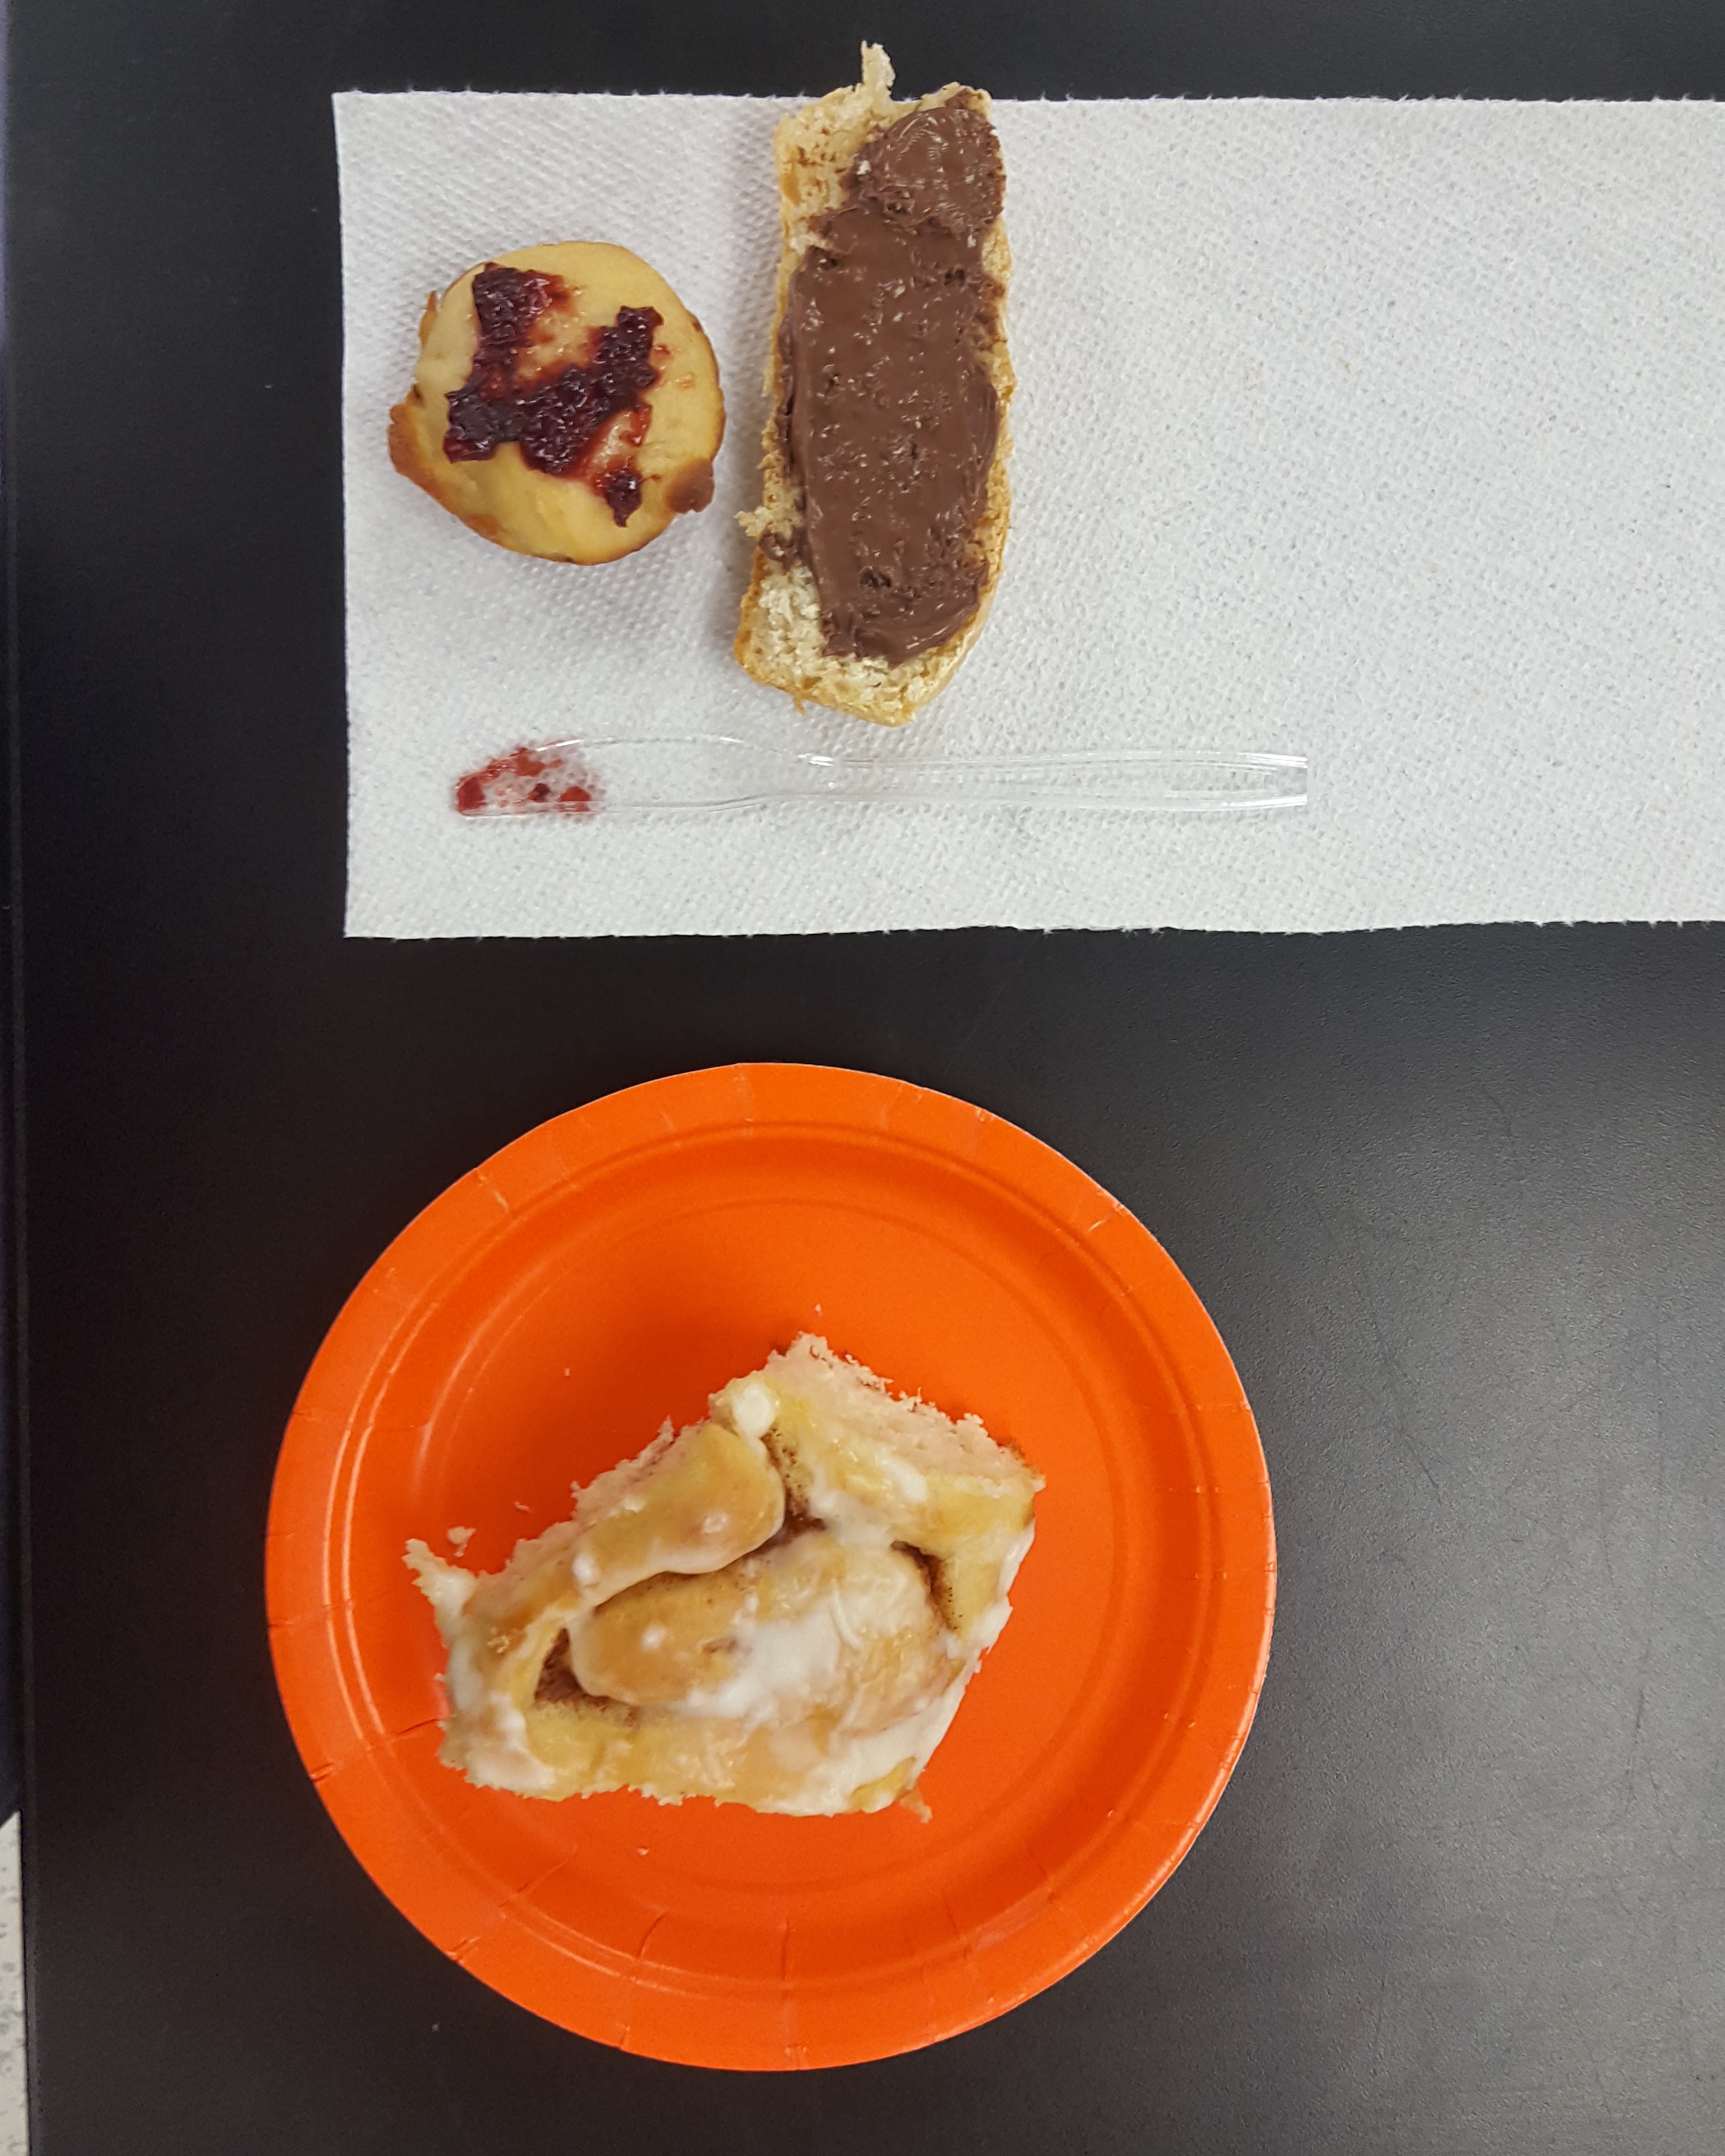
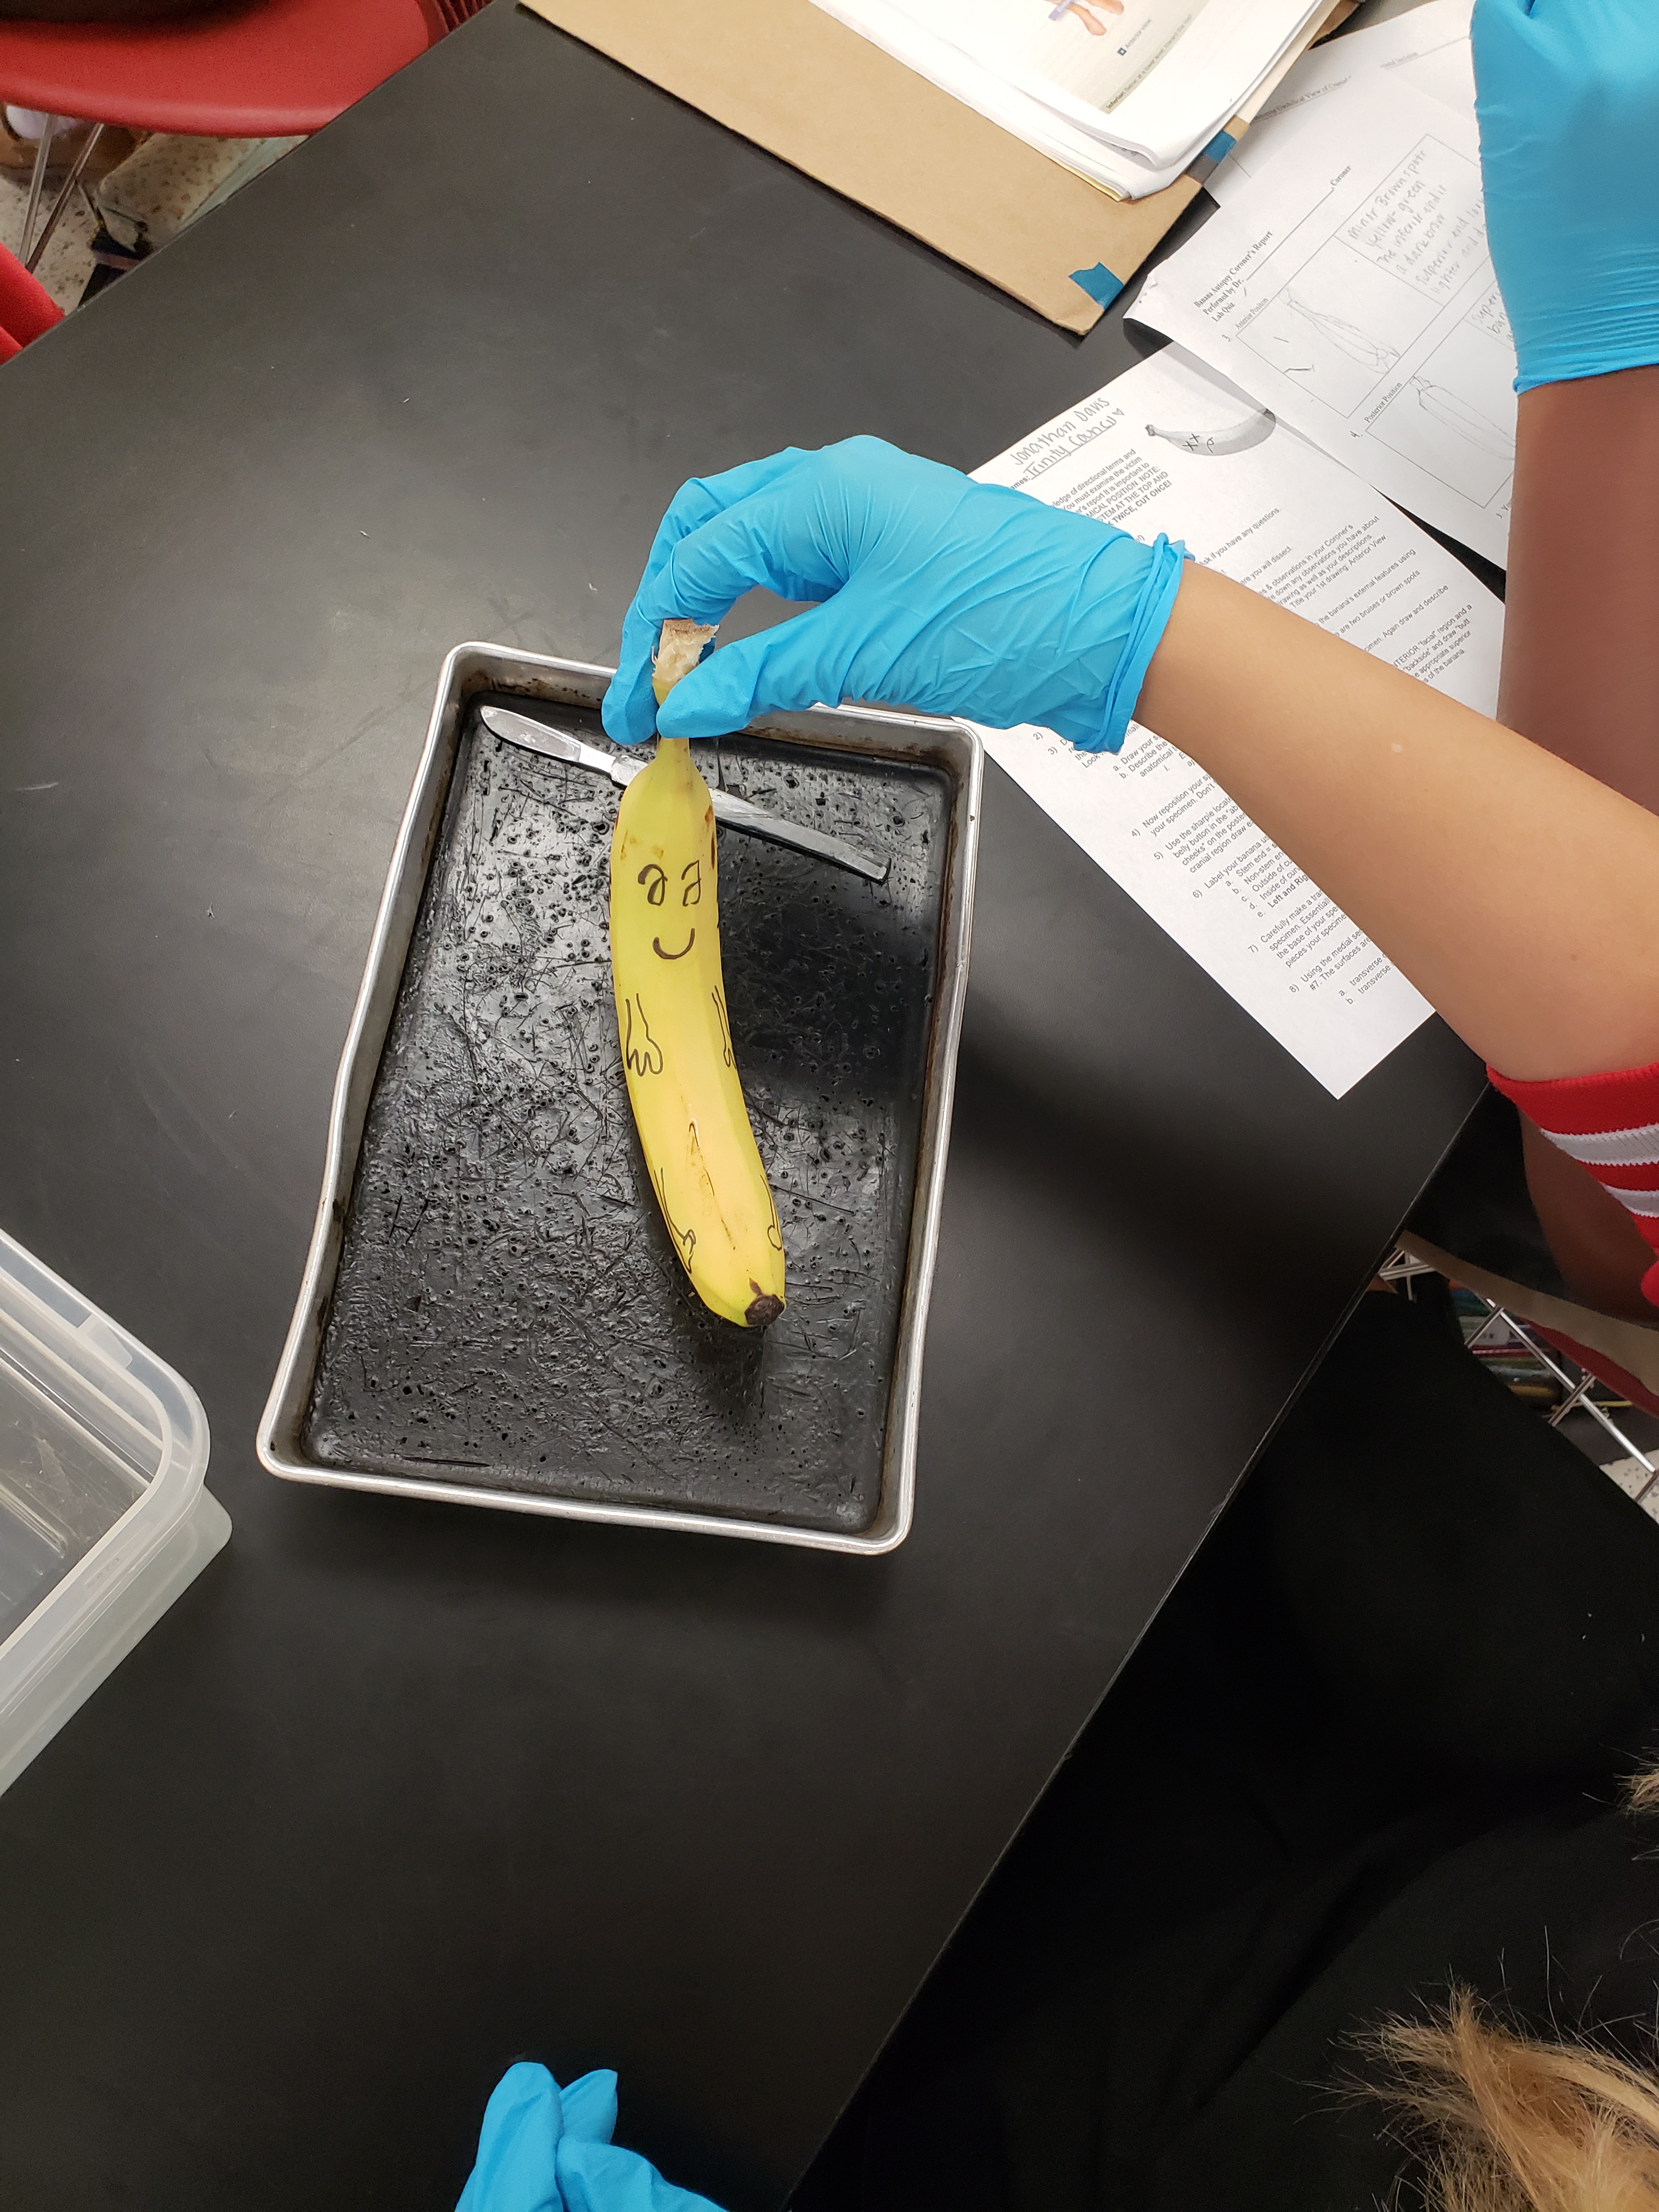
important for students to learn and retain anatomical terms. Throughout the year those words are used over and over again to describe the location of everything in the body, so this year I wanted to do more activities for students to practice using anatomical terms like lateral, medial, anterior, and posterior. This banana dissection lab was the MOST FUN! It’s cheap, not at all messy, and your students will love it. There are plenty of free resources you can find for this activity. I Googled “banana autopsy” and adapted one of the first resources I found to fit my needs.IMG_20180913_155031_615
  6. Anatomy: Blood Vessel Lab– There were a lot of new things I tried i

    20190623_133915
    You can use a piece of paper with a small hole in it to see the capillaries in your eyeball!

    n my anatomy class this year but I am including this lab simply because this was something I had never done and I loved it! When teaching blood vessels, I usually have them learn how to take their blood pressure with a blood pressure cuff and then we just spend time looking at different pics of arteries, veins, and capillaries and talking about their differences and functions. However, this lab gives students a hands-on and visual way of studying capillaries and veins in a way I had never done before. The lab involves seeing your capillaries by looking through a tiny hole in a piece of paper and using a rudimentary way to measure venous blood pressure so students can see the difference compared to arterial pressure. You can find this lab on TPT here: https://www.teacherspayteachers.com/Product/Arteries-Veins-and-Capillaries-Lab-585345. Here is the YouTube video I used to show my students how to see their own capillaries! https://www.youtube.com/watch?v=L_W-IXqoxHA&feature=youtu.be.

If you have any questions about these activities, please feel free to comment below or send me a message. Hope you’re all having a super summer!

signature

Reminders of October

Orange and Green Forest Fall Facebook Cover

Oh October. This is often a hard month for teachers. The honeymoon phase of September is over. The true colors of your students are starting to show (for better or for worse). Kids start testing the systems you’ve put in place to keep your classroom running smoothly. The grading is starting to pile up and it starts to feel overwhelming. The days get shorter and darker and colder and more frustrating. Where I teach, we also have parent/teacher conferences, homecoming, and the first quarter ends in October, which adds a lot of pressure and stress. Every year I get to this month and I start feeling overwhelmed by the work load, managing student behavior, and balancing all the other activities and obligations that I have in October. I also have a very strong inner critic that gets me down when I fall behind in grading or lessons don’t go as planned or my students act out. All the positive mental energy I had in August and September to tell my self that I’m doing my best, seems to gone in October and I severely criticize myself for making mistakes.

So, if you’re like me, you need a reminder this month that the job you’re doing is incredibly important and all you can do is to do the best you can. Maybe, also like me, you need a reminder of how to keep yourself mentally focused in the midst of the busyness. The following are a couple of things I need to remind myself as I look back and reflect on this month.

Focus on what you can control. I really needed this reminder this month and I think it’s is huge for teachers no matter where you teach. There’s so much we don’t have control over: the students we have, the parents of our students, class sizes, standardized testing, the obligations and requirements of our districts and our administration.  Sometimes we allow these things to frustrate us so much that we lose sight of what we CAN do for our students. It’s not worth your mental energy to agonize over things you can’t change. Focus on your relationships with your students and how you engage and teach your students better each day. Focus on the things you do have control over.

When you make mistakes, silence your inner critic. In September I feel like I have laser focus on what needs to be done in my classroom and I’m very productive and energized when I’m at school. I’m so on top of everything that needs to get to done and remember to do all the things to keep myself organized. When October hits, I start to get more and more tired and I make more mistakes in the classroom and then I criticize myself. I tell myself that a good teacher wouldn’t forget to copy the quizzes for that day or make that grading mistake or forget to buy the supplies needed for the lab or get behind on grading. Of course, everyone forgets things and makes mistakes and I need to remember this. Once I realized that I was criticizing myself so much, I am learning how to stop myself from thinking these critical thoughts trying to use more positivity self talk. I need to remind myself that I don’t have to hold myself to an impossible standard.

Have a plan for bad days. As teachers we usually do a good job of planning and being proactive to avoid problematic situations, but we should also make plans for what we do when we have bad days as school. I’m not talking about how we handle discipline, I’m talking about how we handle ourselves on days when a kid has a melt down or you have a melt down or you have an unpleasant interaction with a colleague or on days when EVERYTHING SEEMS TO GO WRONG. How can we handle these days in a healthy way rather than criticizing ourselves for making a mistake or angrily venting to another colleague or going home and eating junk food? Maybe it’s sitting between classes and taking a few deep breaths or going to a quiet place and counting to ten or going for a walk after school. Do what works for you. I’m in my 5thyear of teaching and still learning how to do this. I think that anticipating and planning for bad days before they happen makes them less awful and coping with them in a healthy way keep can keep up from getting burnt out.

giphy
Source: giphy

Give yourself and your students and your colleagues a fresh start each day. Try your hardest to forget about what happened yesterday and start each day a new. No matter how frustrated you get with the people or situations around you at work, don’t hold onto them. Start each day like it everyone gets a fresh start including yourself. Put on a smile (even if it’s just a fake smile) and focus on your students and being the best teacher you can be for them.

If you’re feeling anything like I have this month, I hope you know that you are doing a great job. Teaching can seem impossible sometimes, but you can do it. Don’t give up.

signature